Okta SCIM
Learn about syncing your user list with Okta SCIM.
This guide outlines how to synchronize your application’s Okta directories using SCIM.
To synchronize an organization’s users and groups provisioned for your application, you’ll need to provide the organization with two pieces of information:
- An Endpoint that Okta will make requests to.
- A Bearer Token for Okta to authenticate its endpoint requests.
After completing step 1 below, both of these are available in your Endpoint’s Settings in the WorkOS Dashboard.
Login to your WorkOS Dashboard and select “Organizations” from the left hand navigation bar.
Select the organization you’ll be configuring a new Directory Sync with.
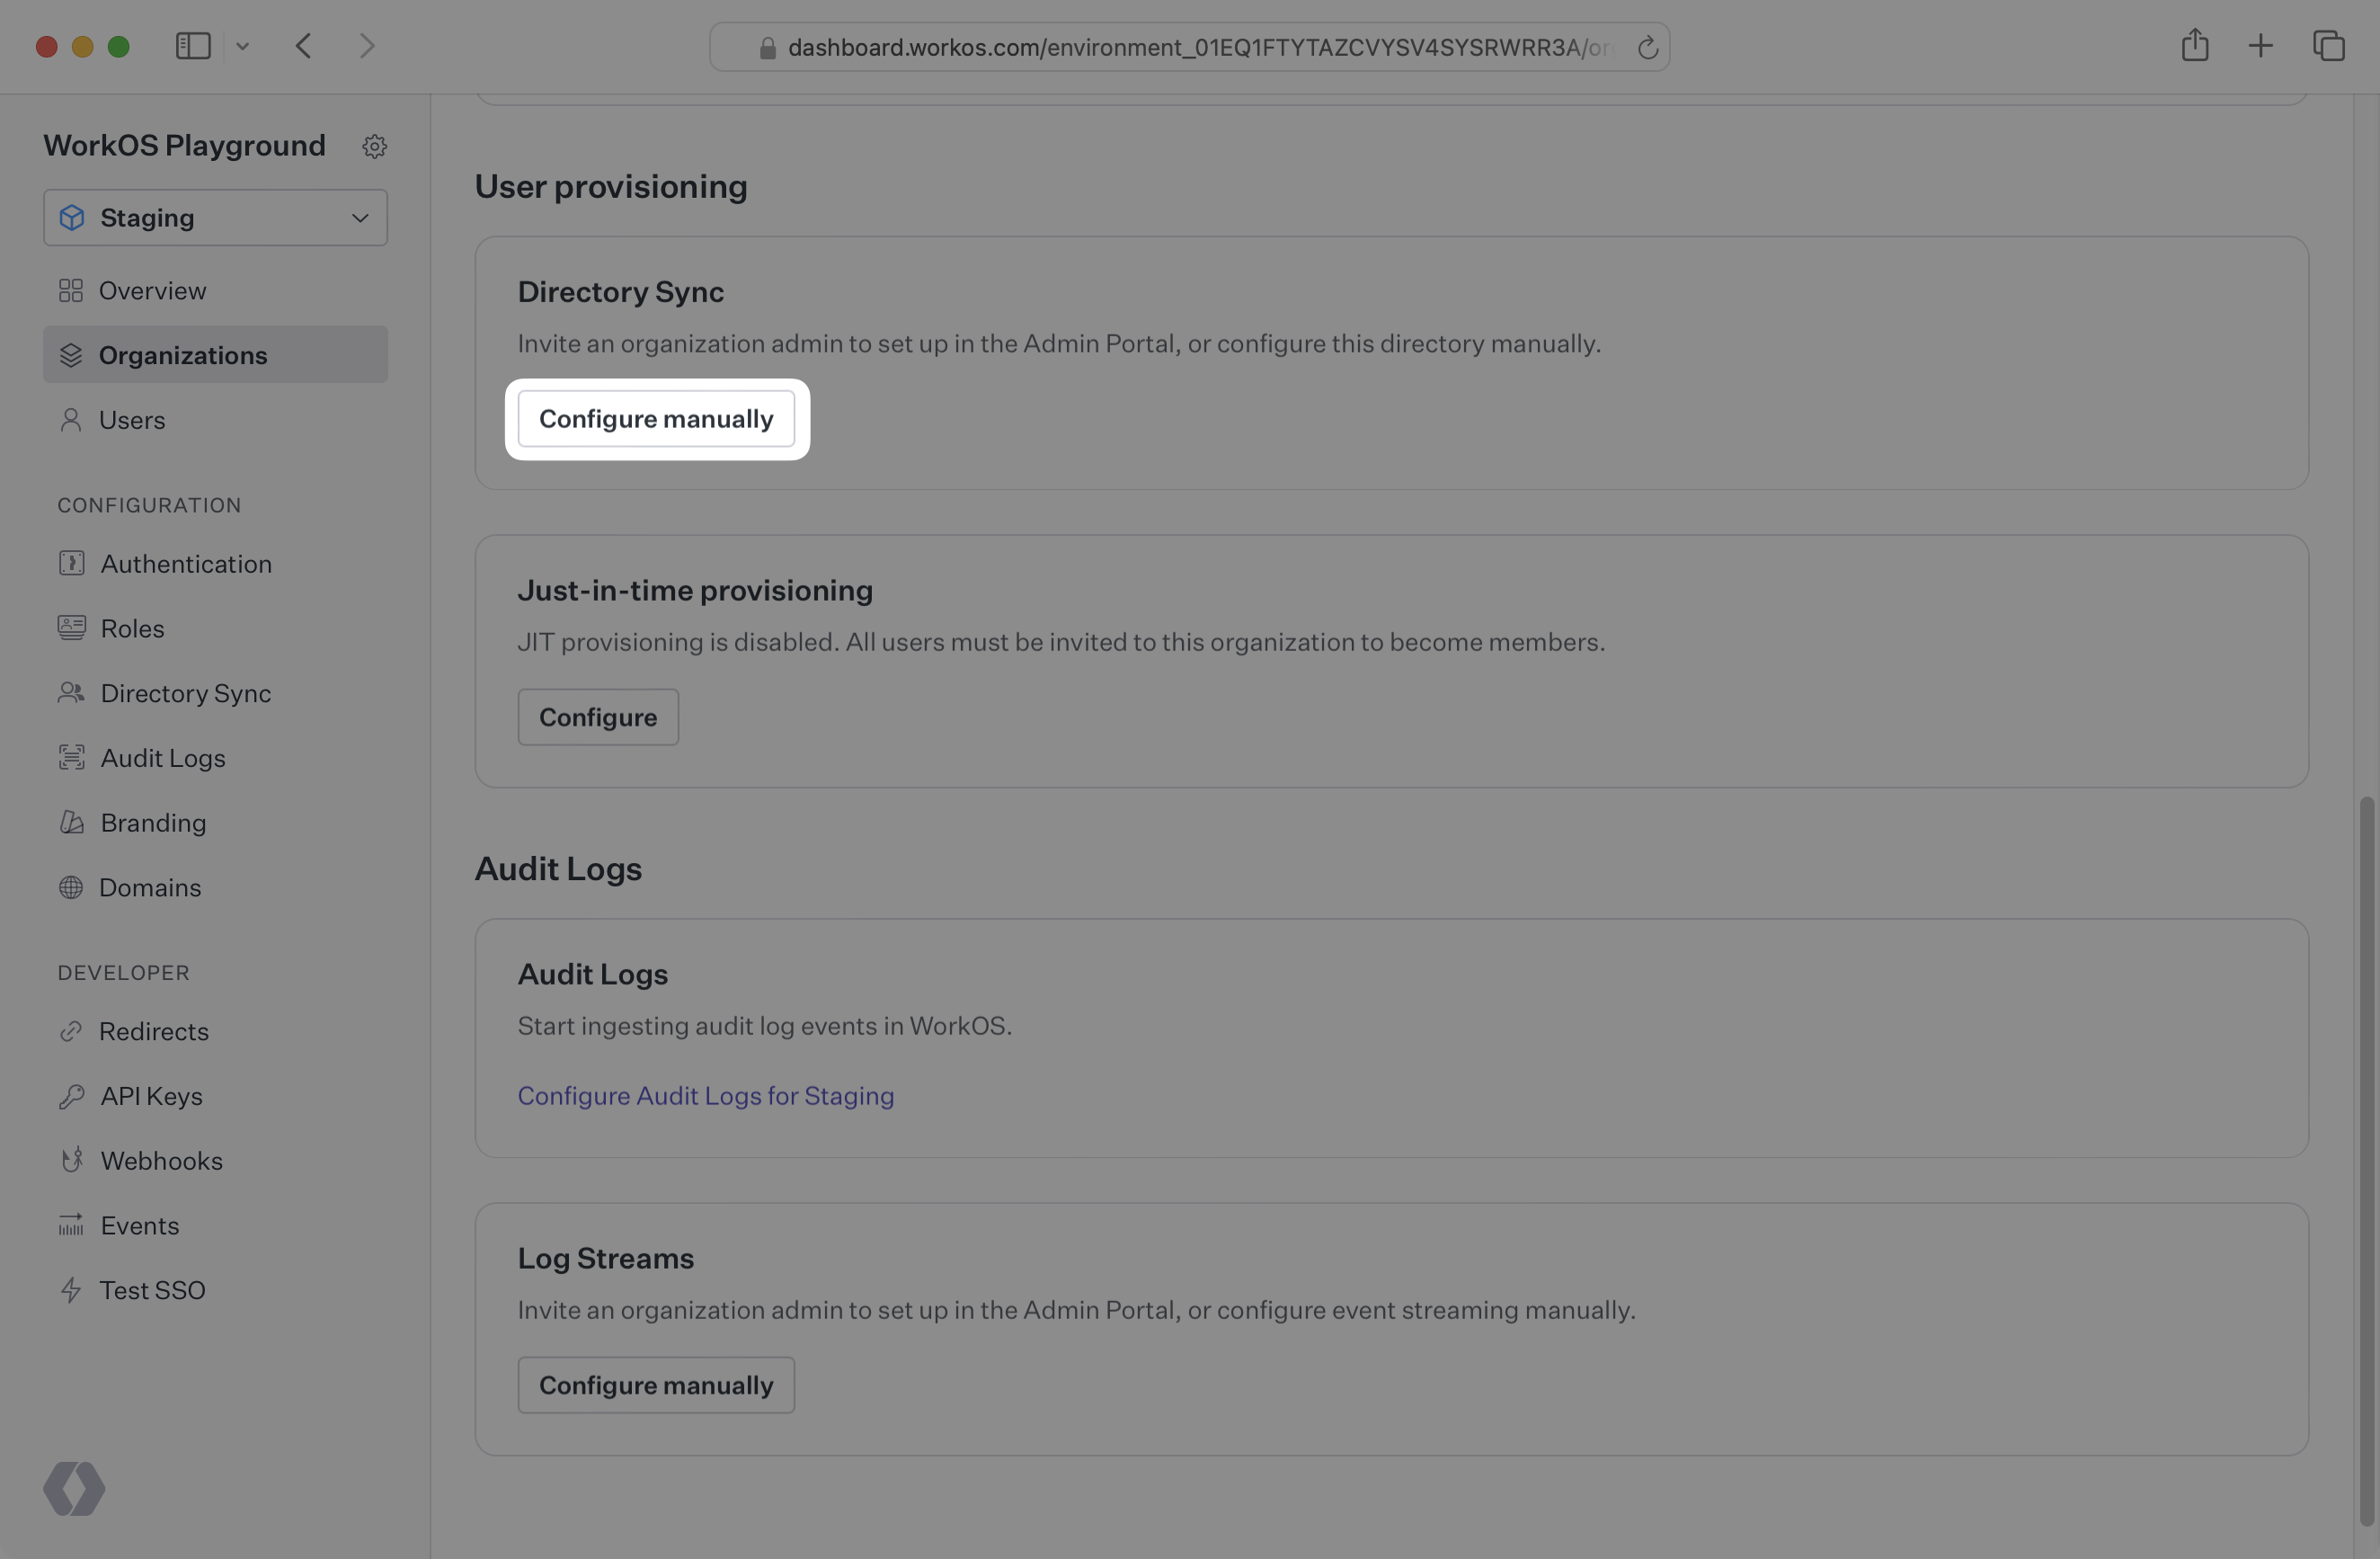
Scroll to the “User provisioning” section. Then, click “Configure manually” within the “Directory Sync” section.
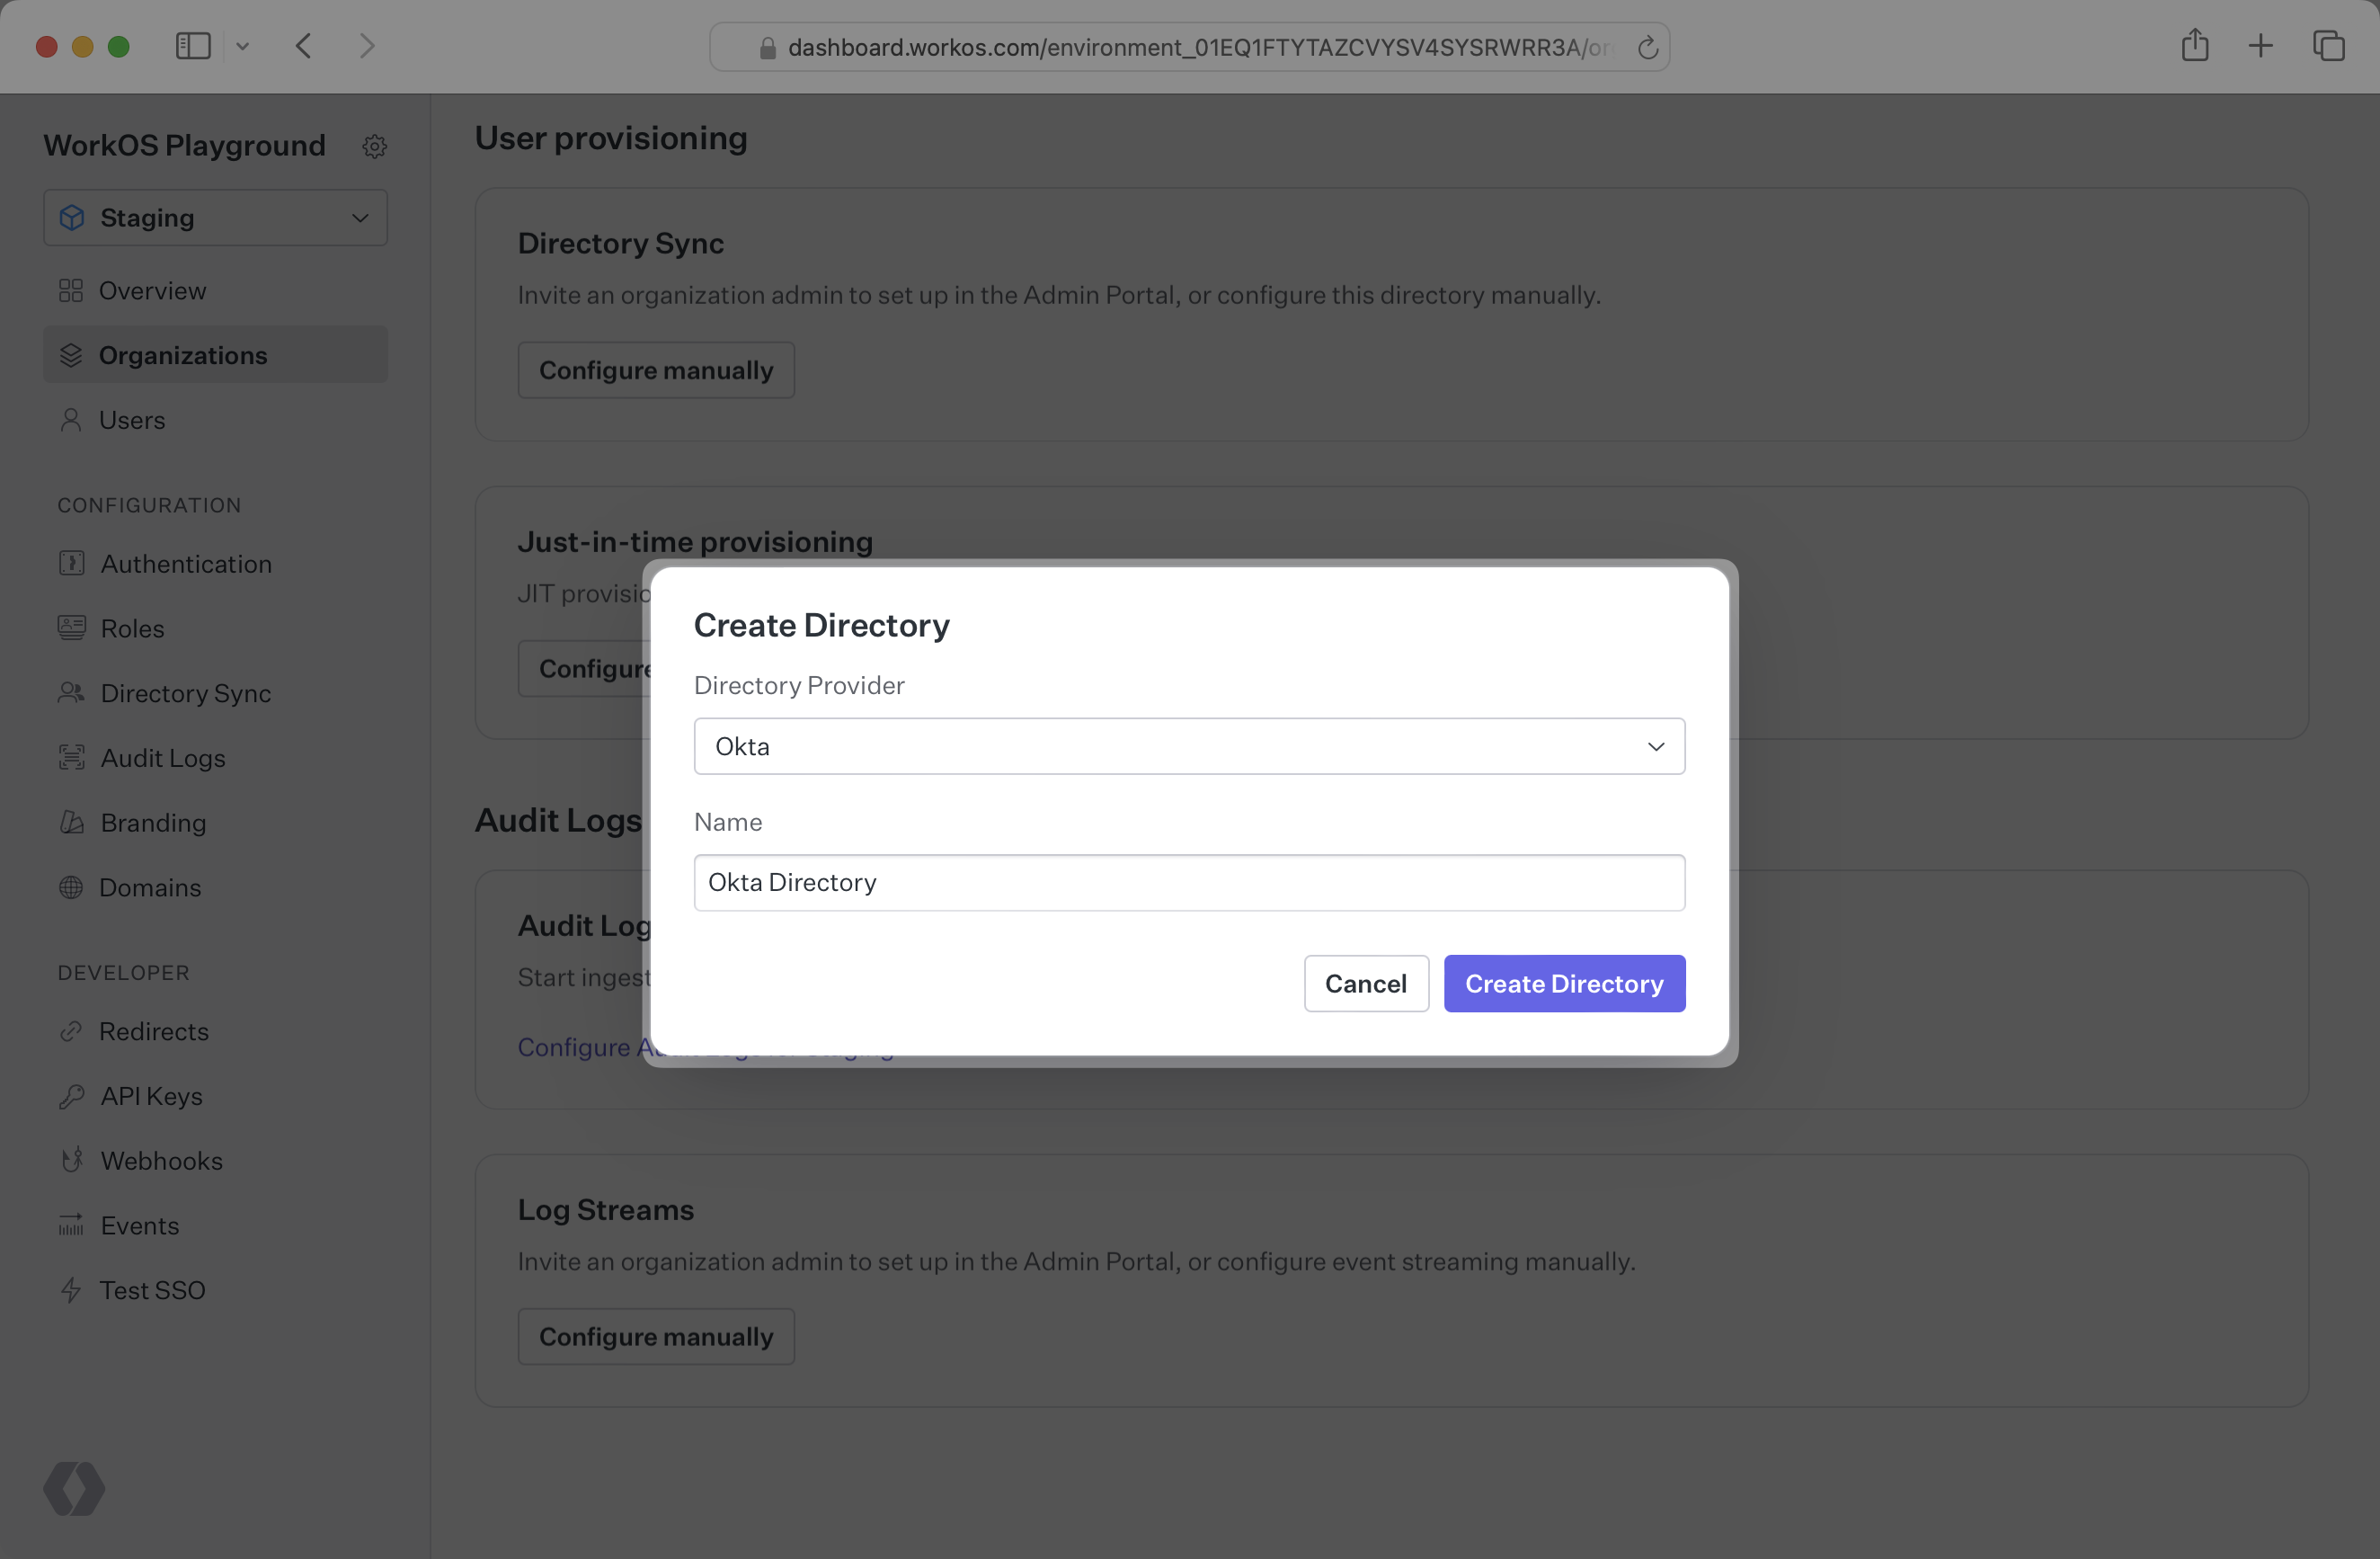
Select “Okta” from the Directory Provider dropdown and provide the Name for the Directory Sync connection. Then, click “Add directory”.
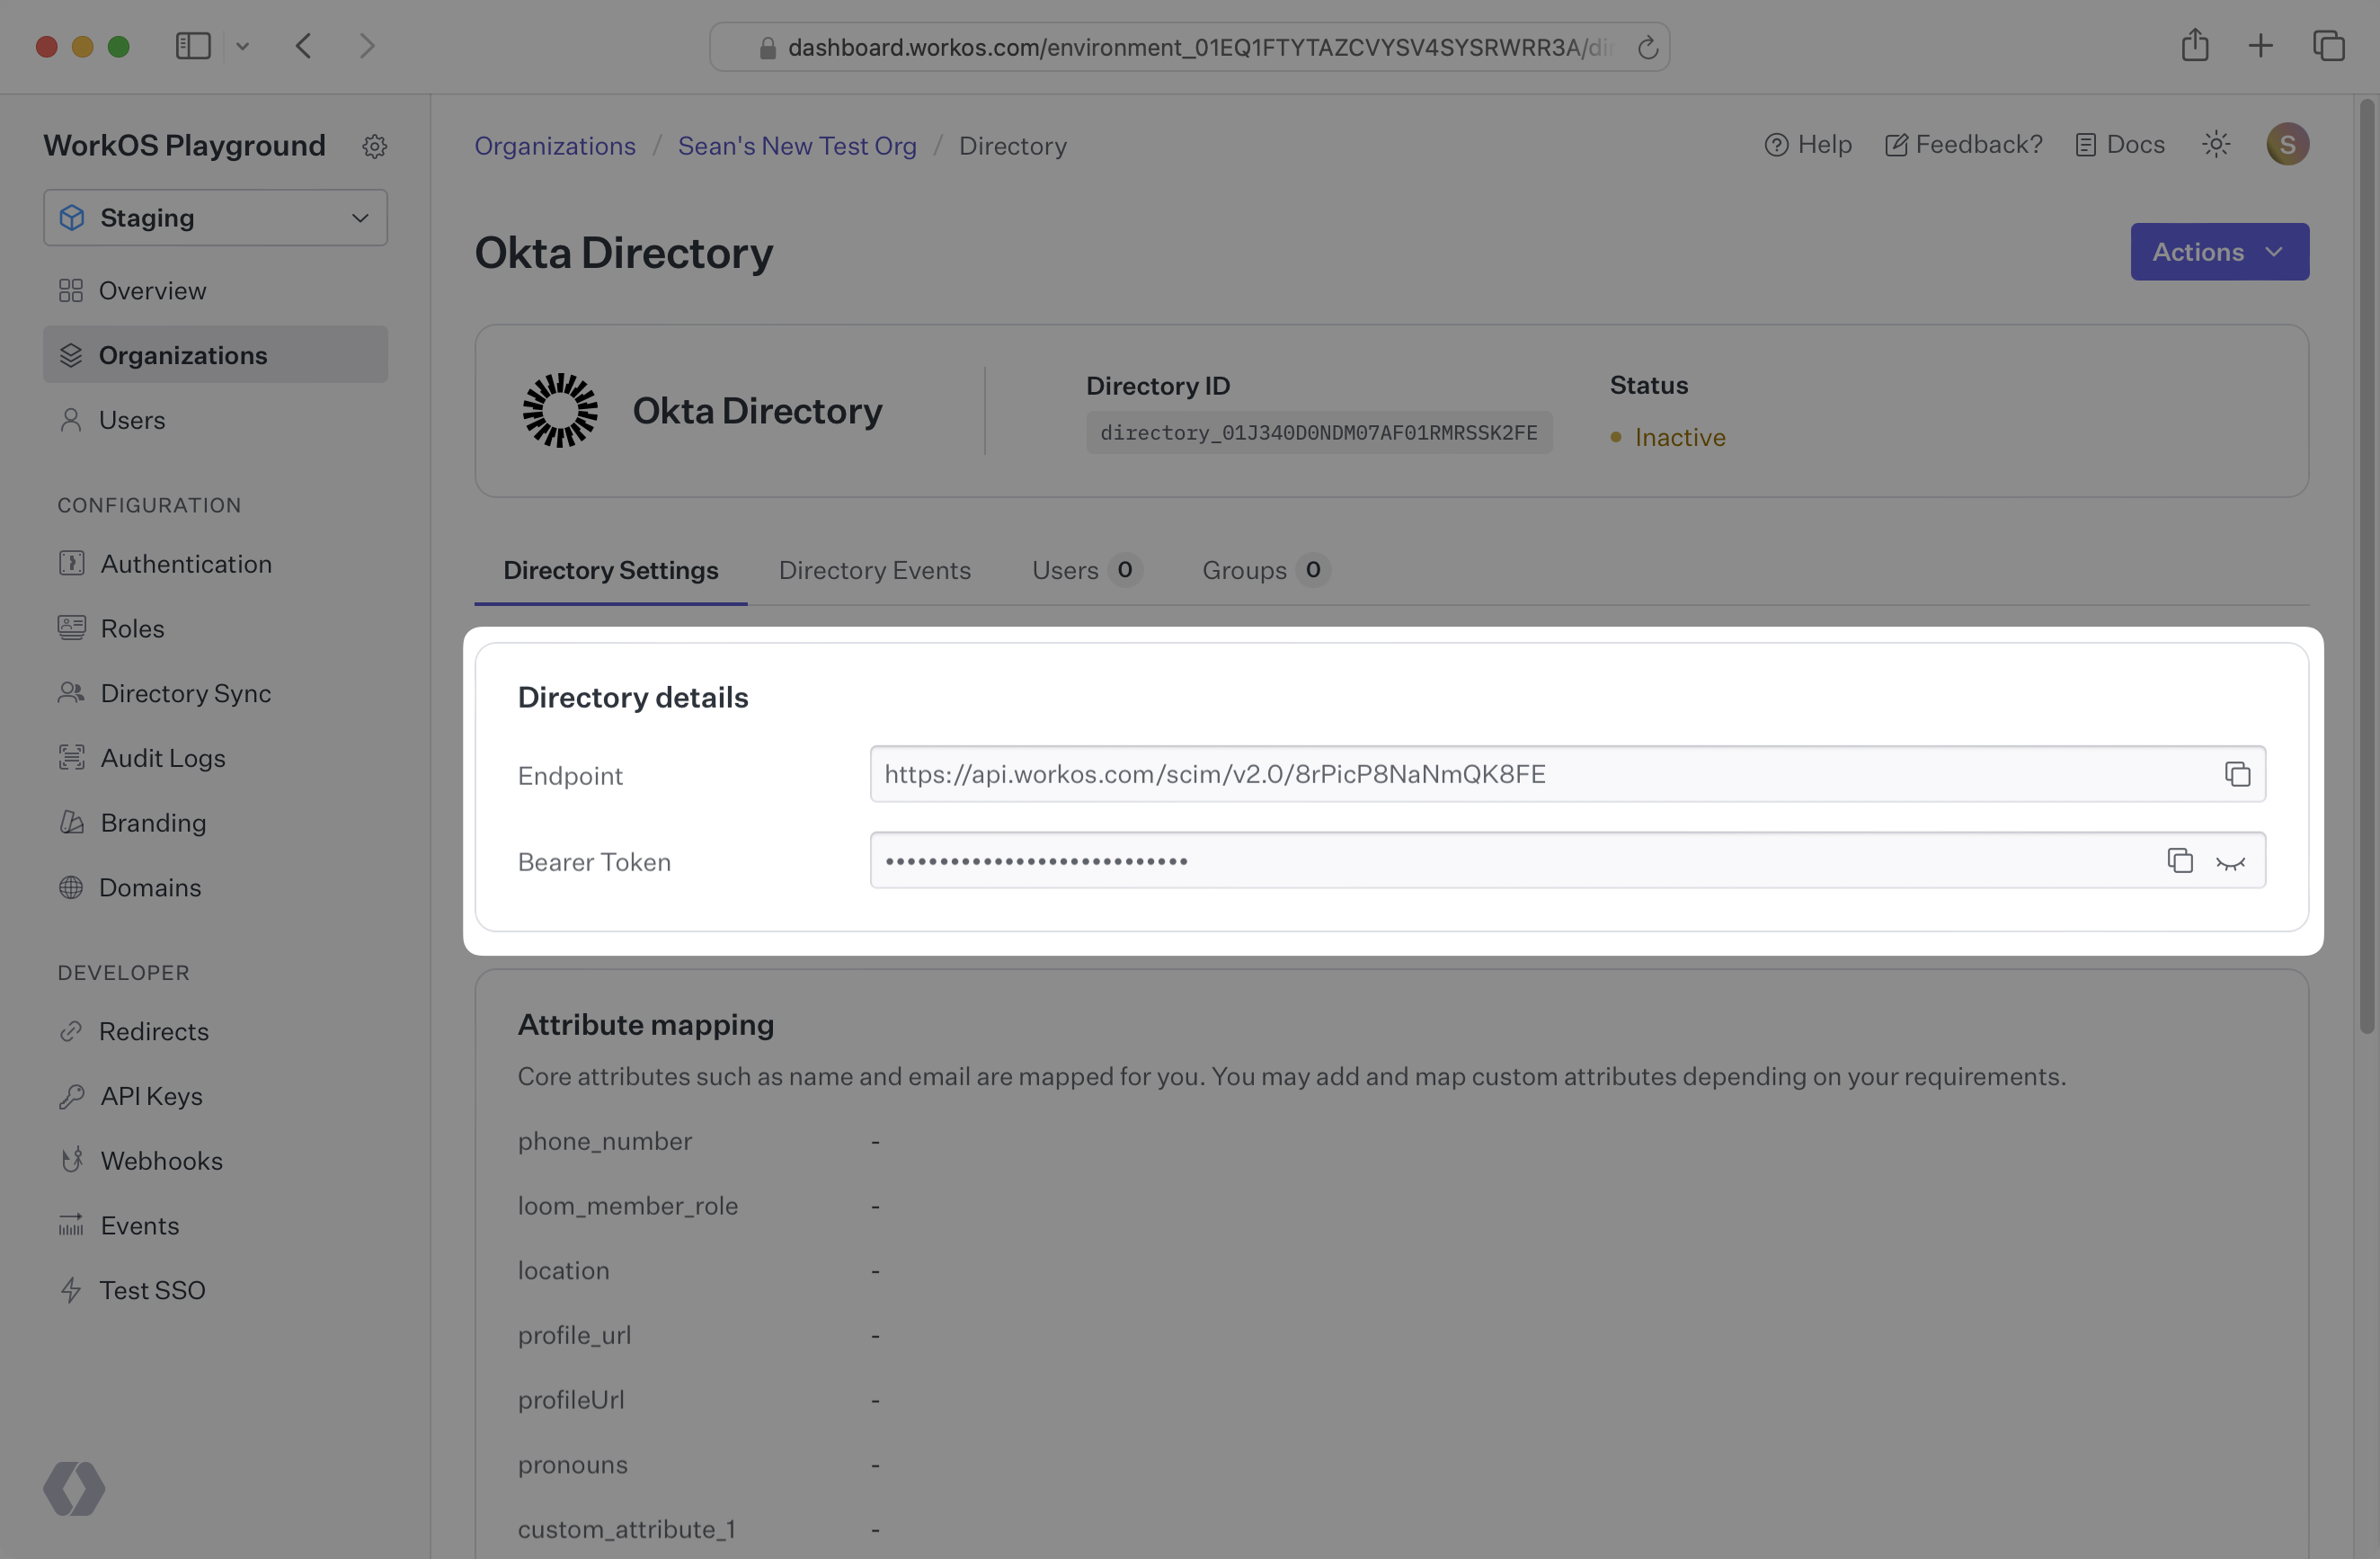
You’ll see WorkOS has created the Endpoint and Bearer Token which you will provide to Okta in the steps below.
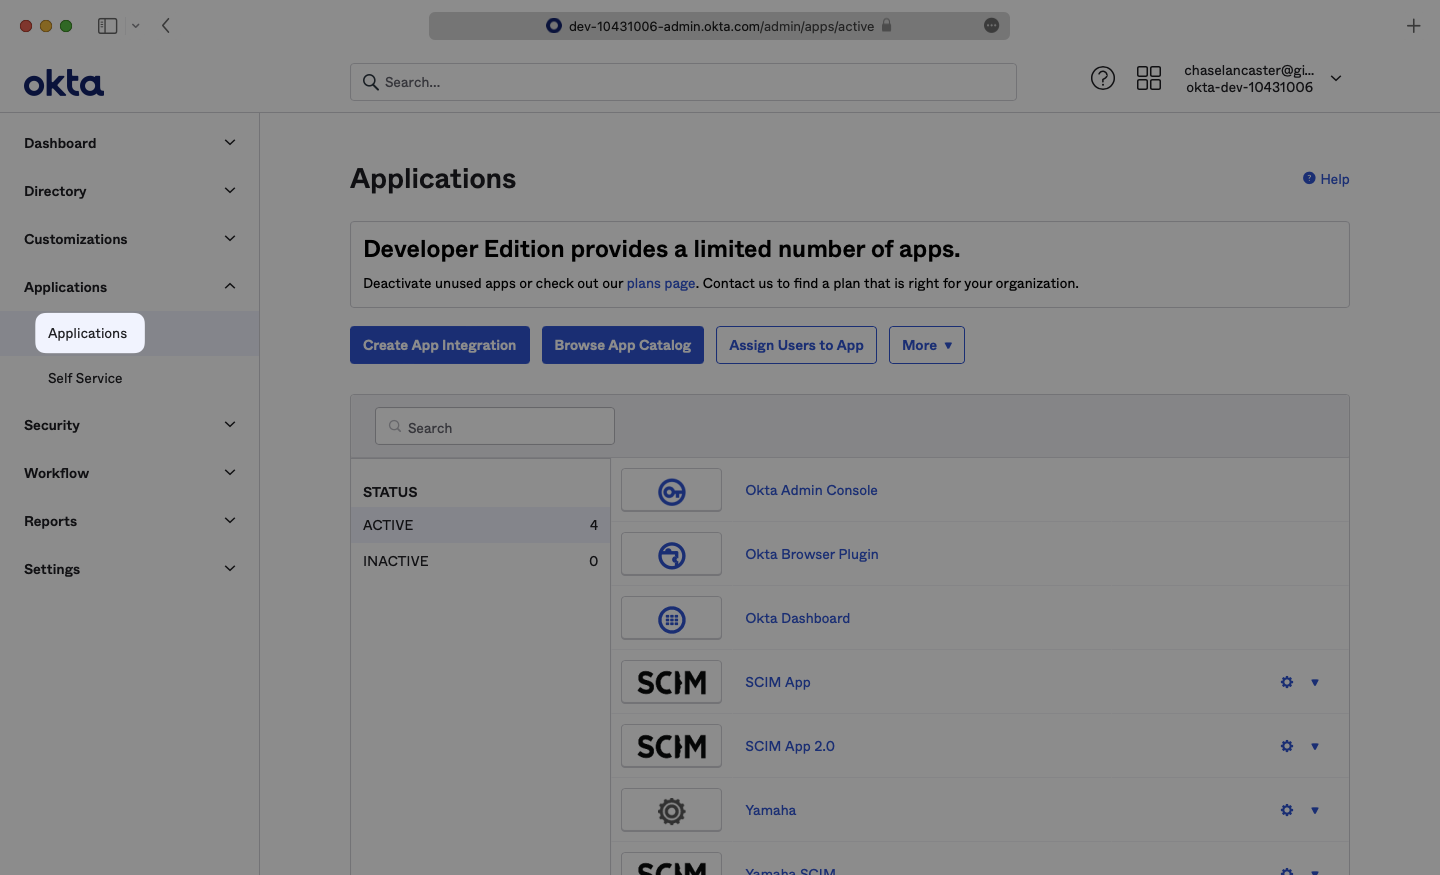
Log in to Okta, go to the Okta admin dashboard and select “Applications” in the navigation bar.
If your application is already created, select it from the list of applications and move to Step 3.
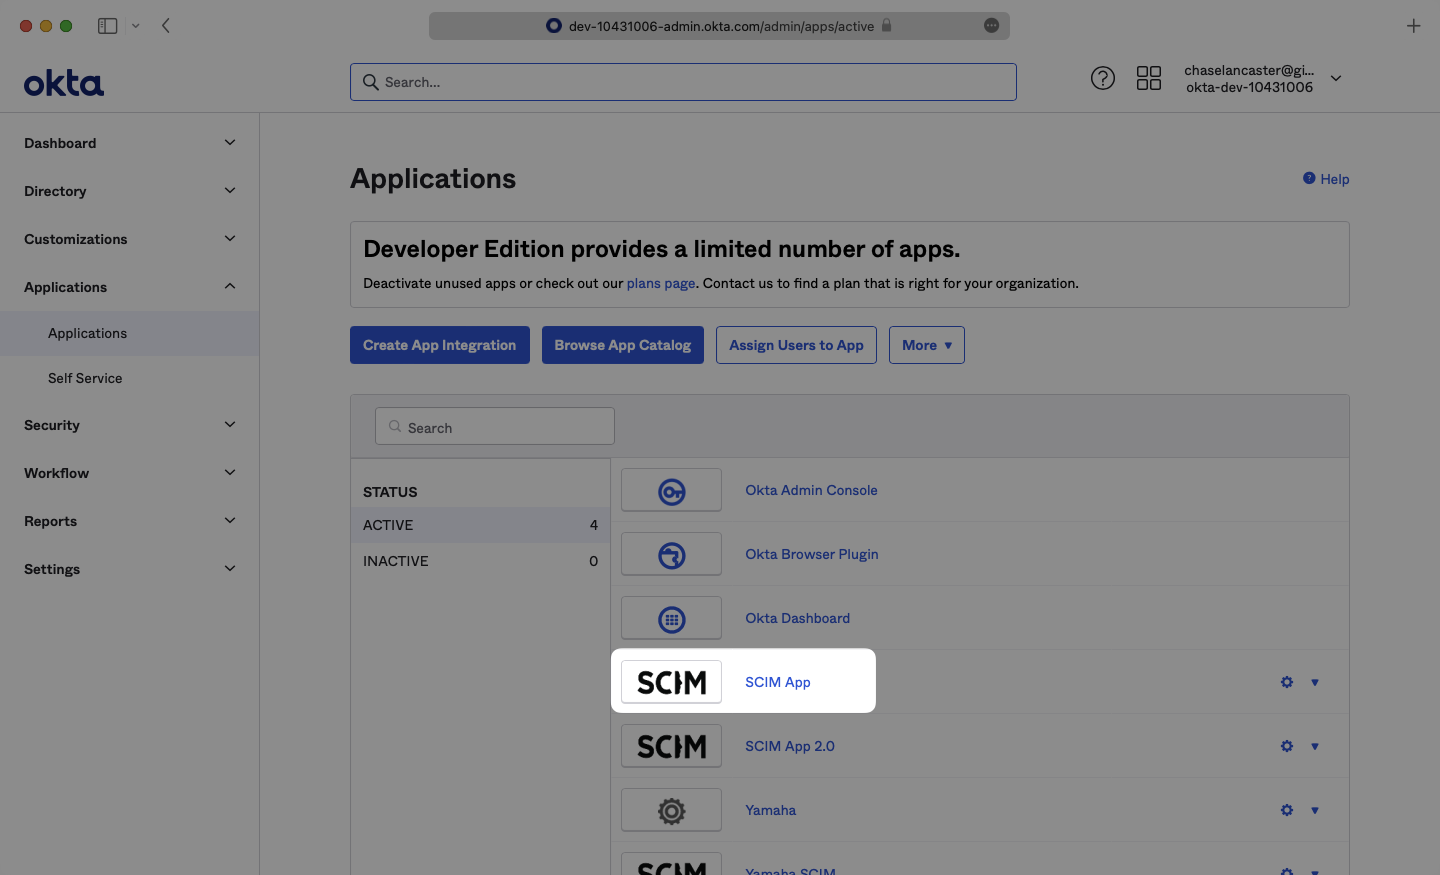
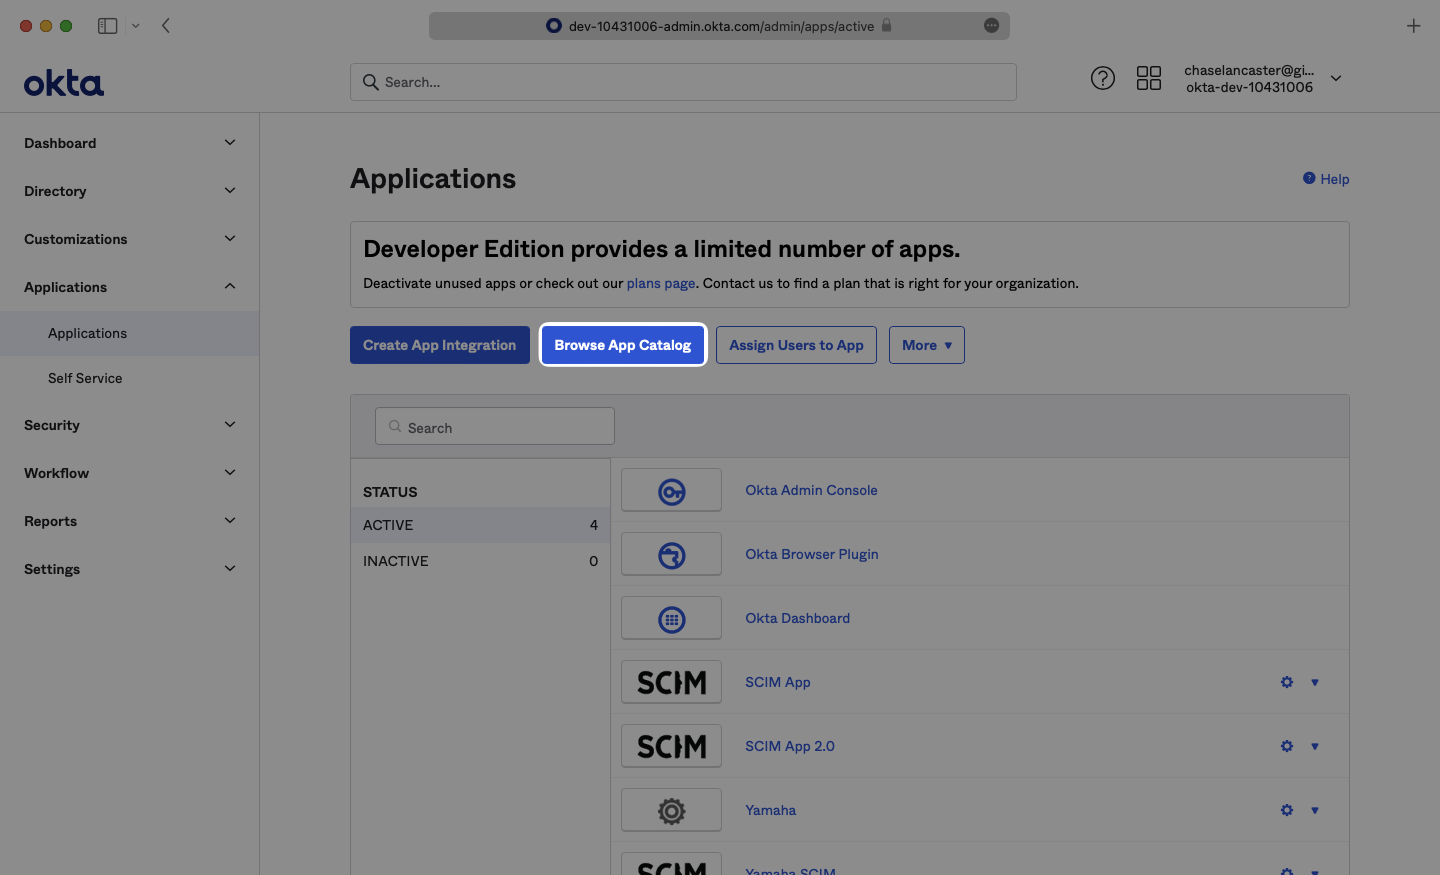
If you haven’t created a SCIM application in Okta, select “Browse App Catalog”.
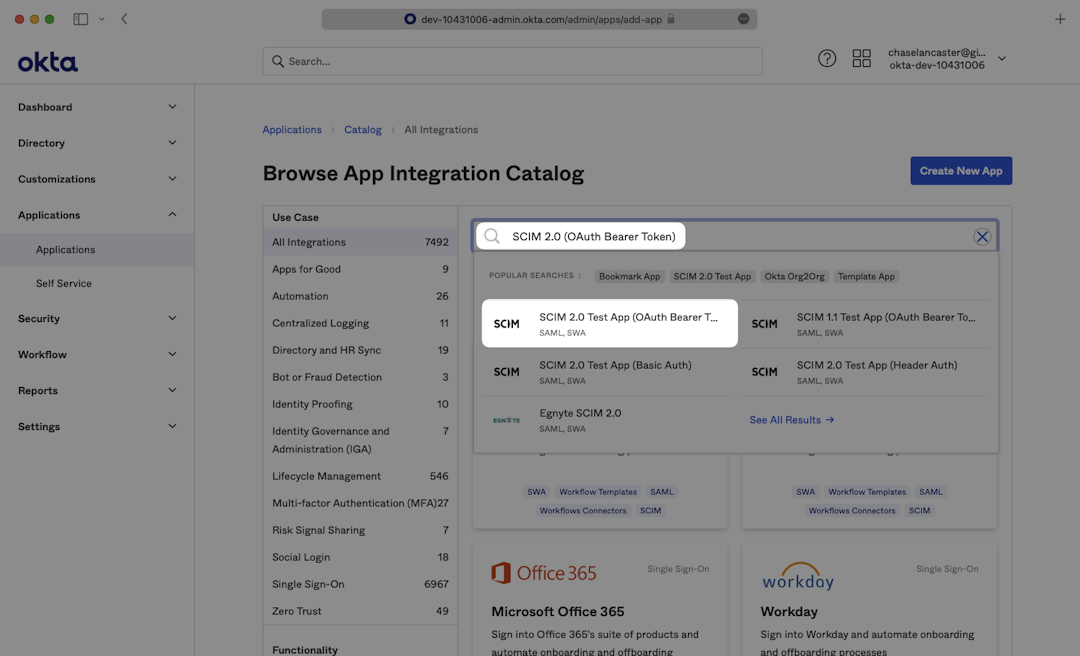
From your Okta Application dashboard, search for “SCIM 2.0 Test App (OAuth Bearer Token)” and select the corresponding result.
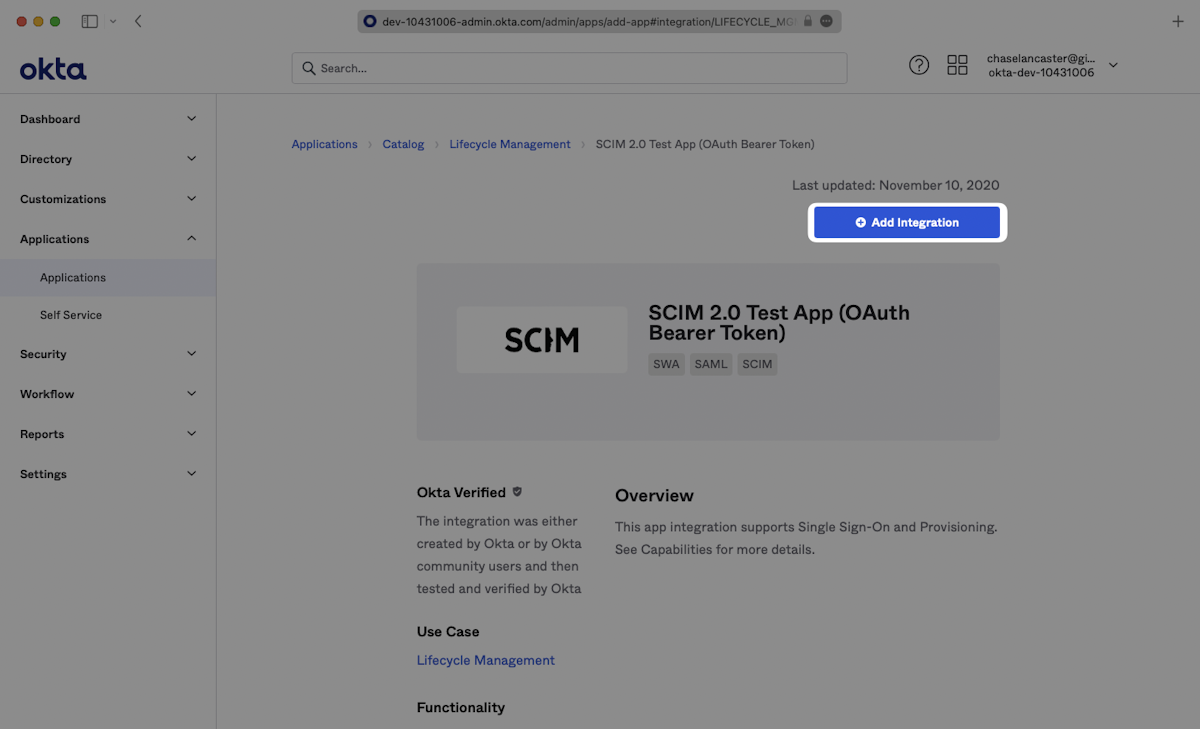
On the following page, click “Add Integration”.
Enter a descriptive App name, then click “Next”.
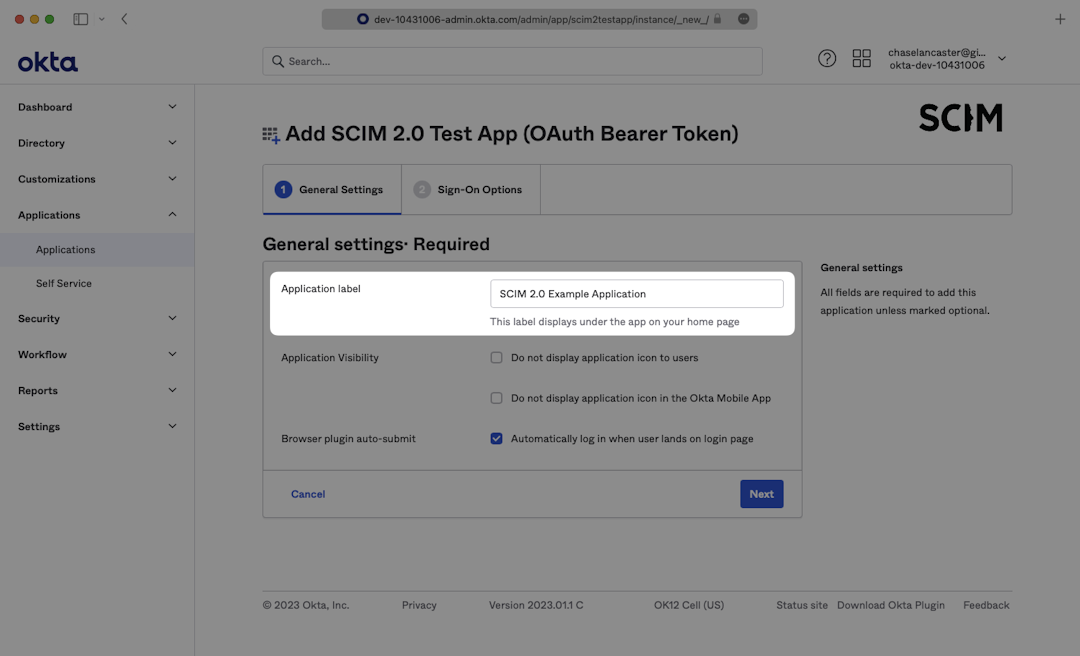
Many applications will work with the default configuration that is set on your new application. If you require any additional configuration for your directory such as configuring Attribute Statements, do so on the Sign-On Options page. Click “Done” to complete creating your application.
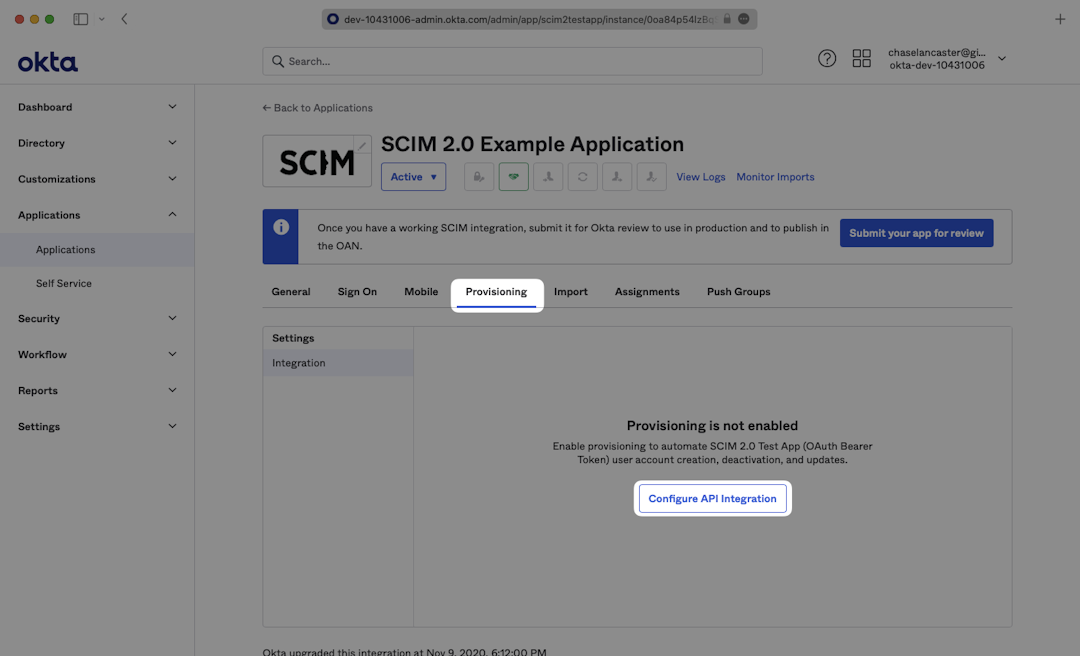
In your application’s Enterprise Okta admin panel, click the “Provisioning” tab. Then, click “Configure API Integration”.
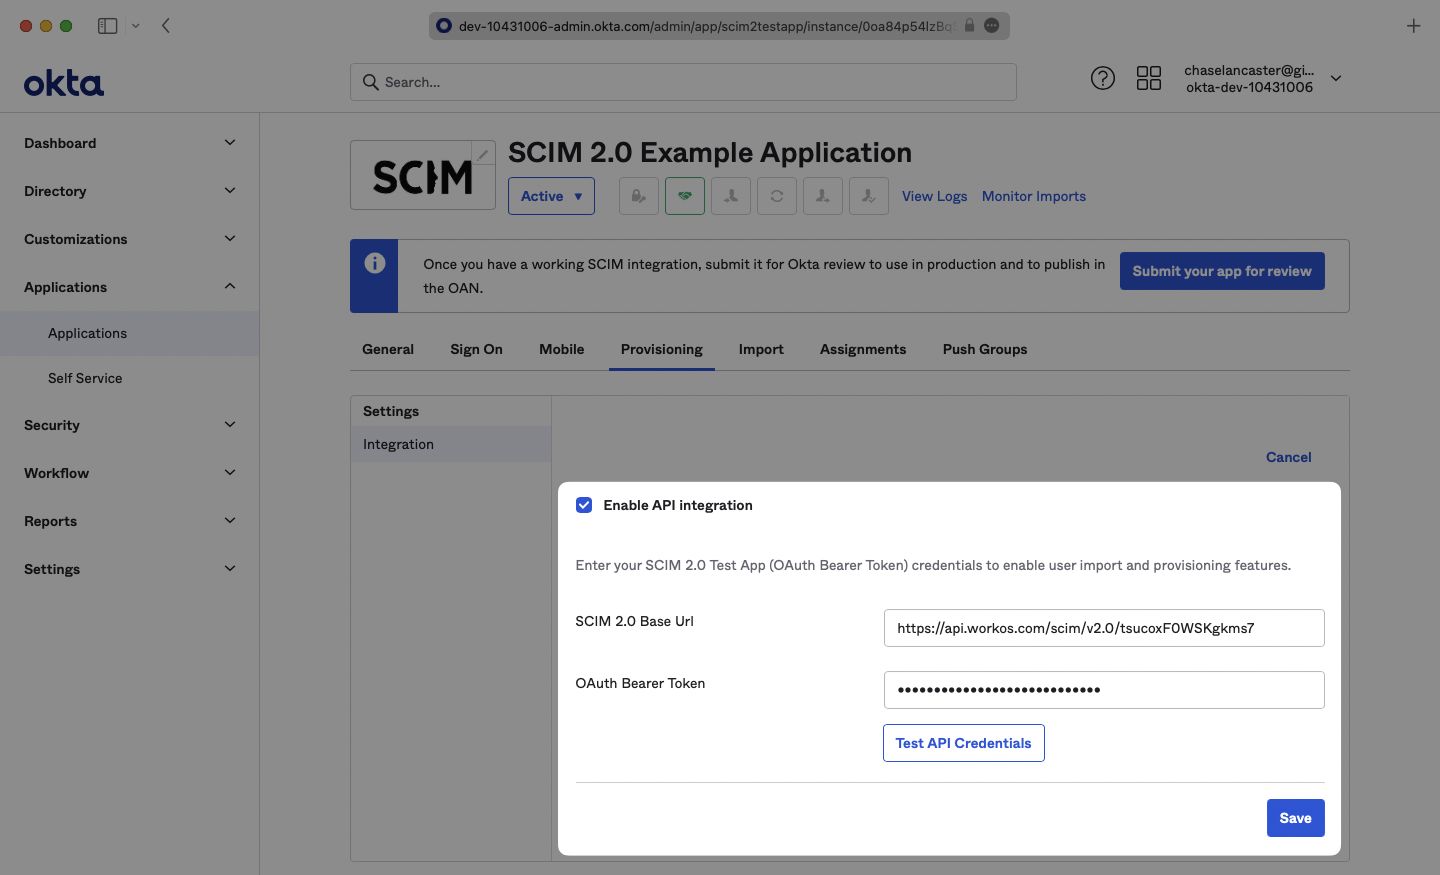
Check “Enable API Integration”. After that, copy and paste the Endpoint from your WorkOS Dashboard in the SCIM 2.0 Base URL field.
Then, copy and paste the Bearer Token from your WorkOS Dashboard into the OAuth Bearer Token field.
Click “Test API Credentials”, and then click “Save”.
The provisioning tab will now show a new suite of options which we’ll utilize in the next Guide Section to continue provisioning your application.
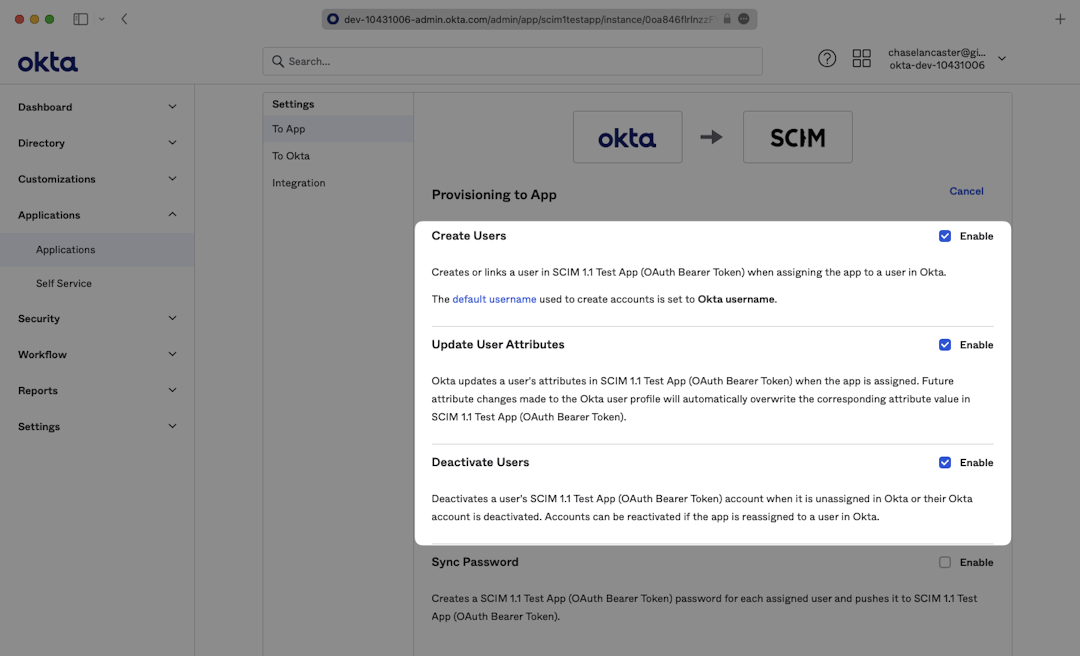
In the “To App” navigation section, check to enable:
- Create Users
- Update User Attributes
- Deactivate Users
Click “Save”.
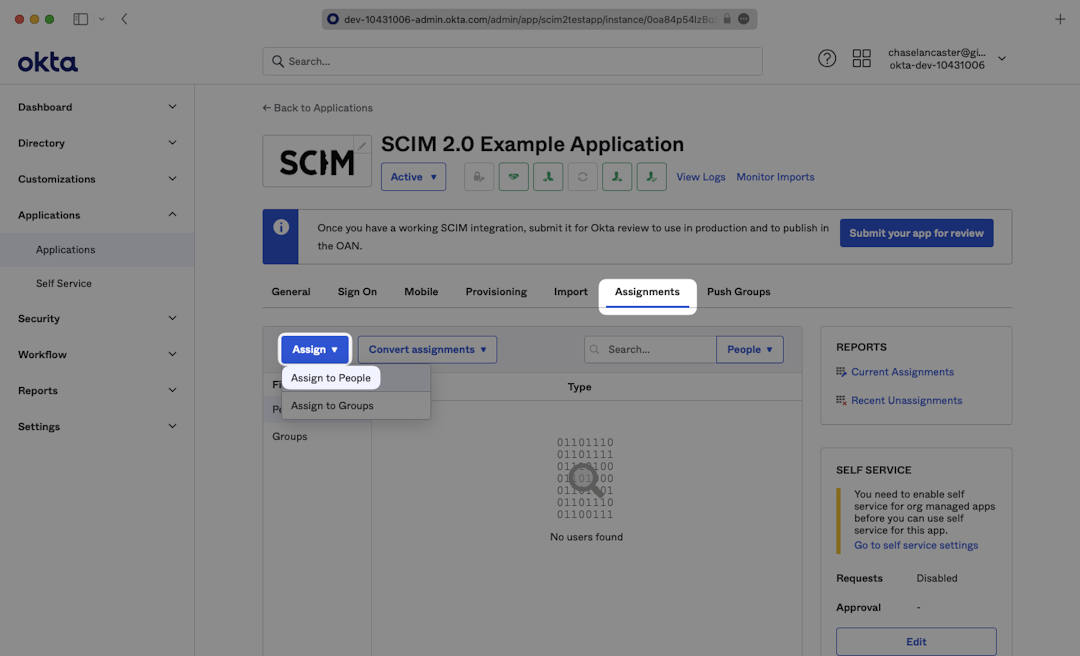
To assign users to the SCIM Application, navigate to the “Assignments” tab, from the “Assign” dropdown, select “Assign to People”.
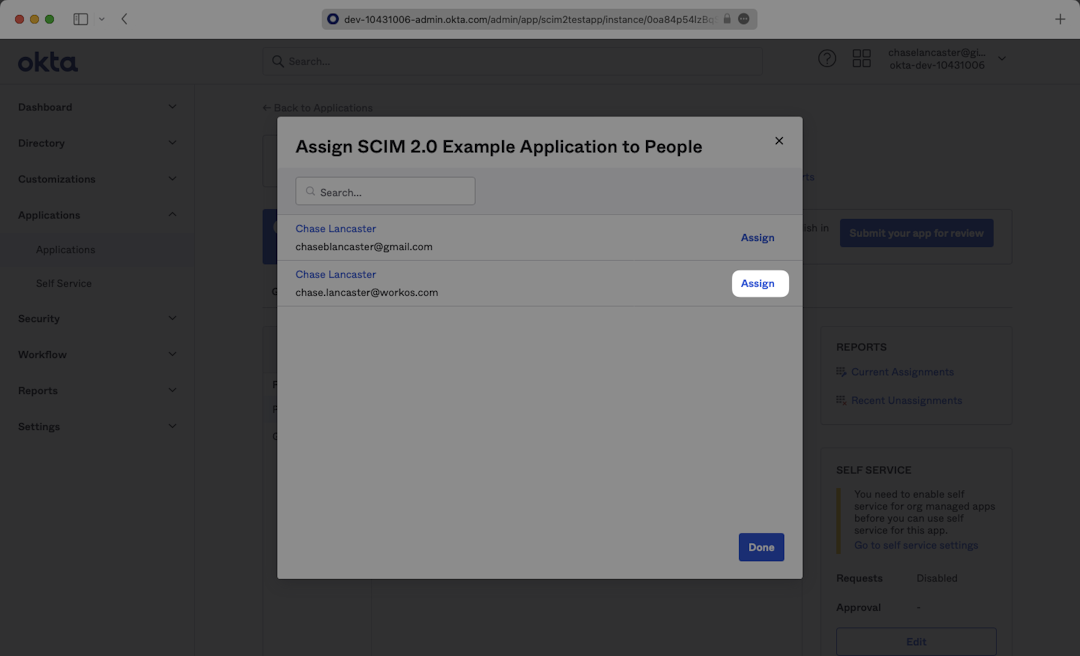
Select users you’d like to provision and select “Assign”.
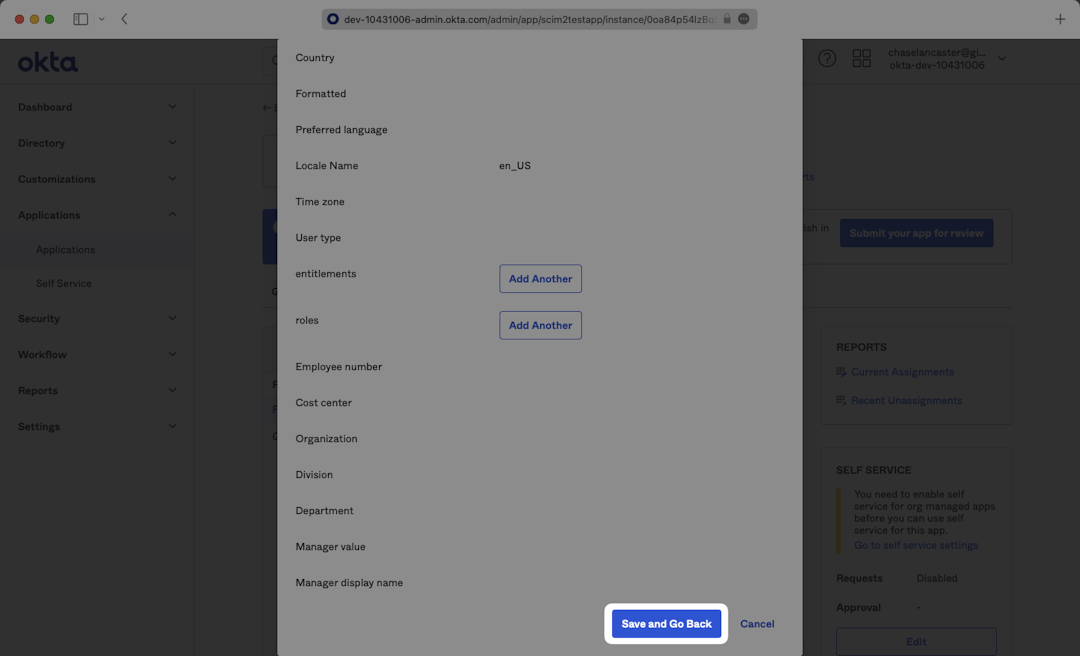
When you click “Assign” a lengthy form will open where you can populate all of the user’s metadata. Confirm the metadata fields, scroll down to the bottom, and press “Save and Go Back”. Repeat this for all users and select “Done”.
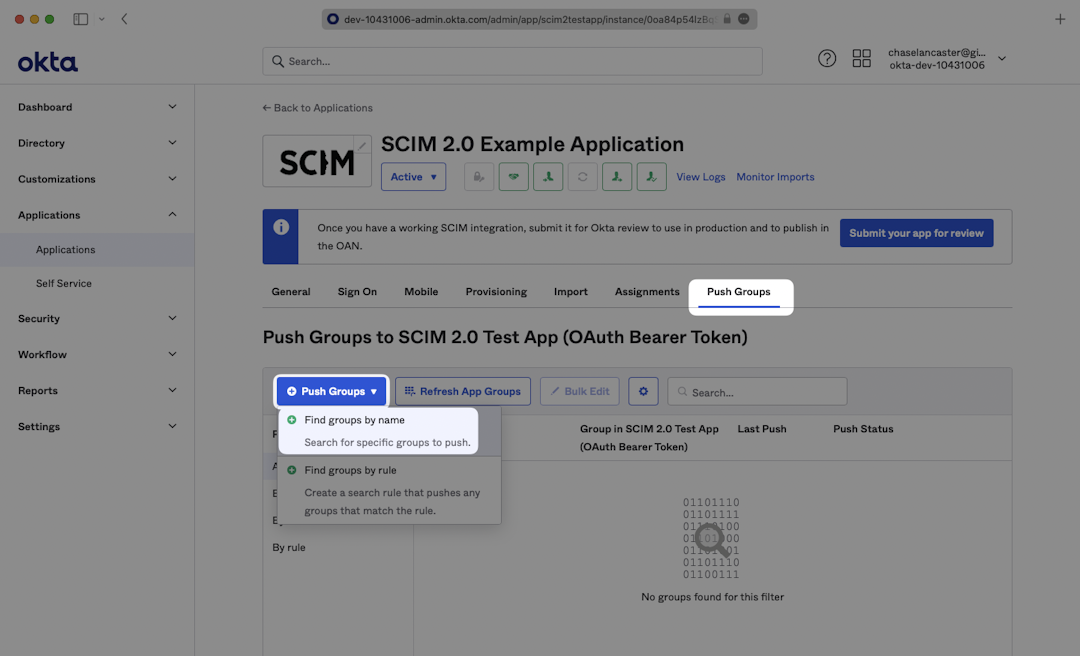
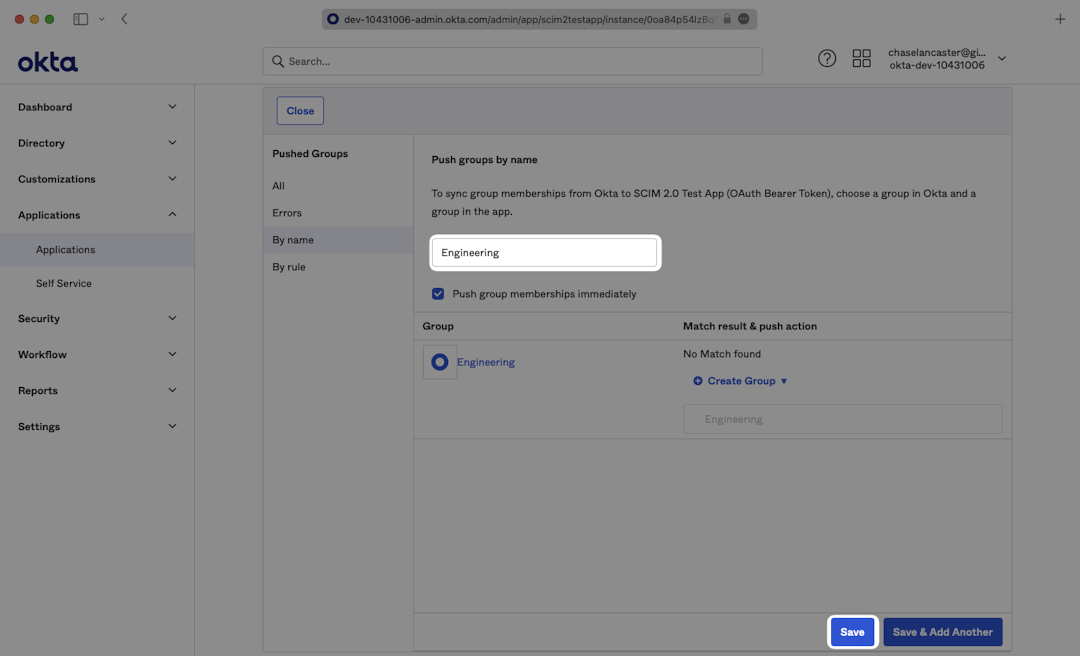
To push groups in order to sync group membership, navigate to the “Push Groups” tab, from the “Push Groups” dropdown, select: “Find groups by name”.
Search for the group you’d like to push and select it. Make sure the box is checked for “Push Immediately” and click “Save”.
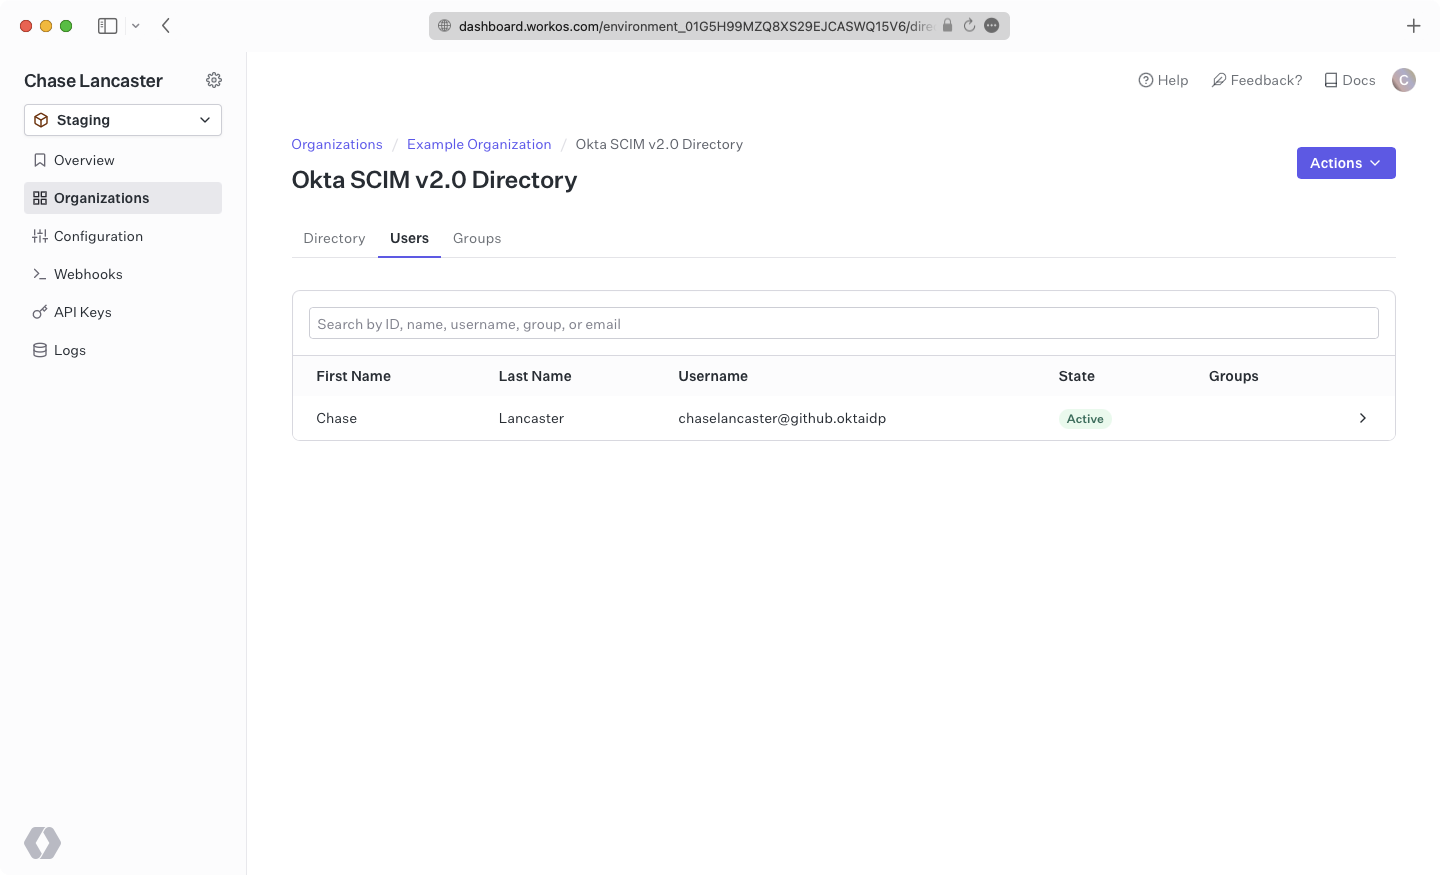
In the WorkOS dashboard, you should now see the users and groups synced over.
A detailed guide to integrate the WorkOS API with your application can be found here
For any non-standard attributes used by the application, some configuration may be required in Okta. Below is a guide on configuring user attribute mappings, so they propagate via SCIM.
From the Okta administrator portal, navigate to Directory → Profile Editor, and find the application for which you’d like to edit mappings.
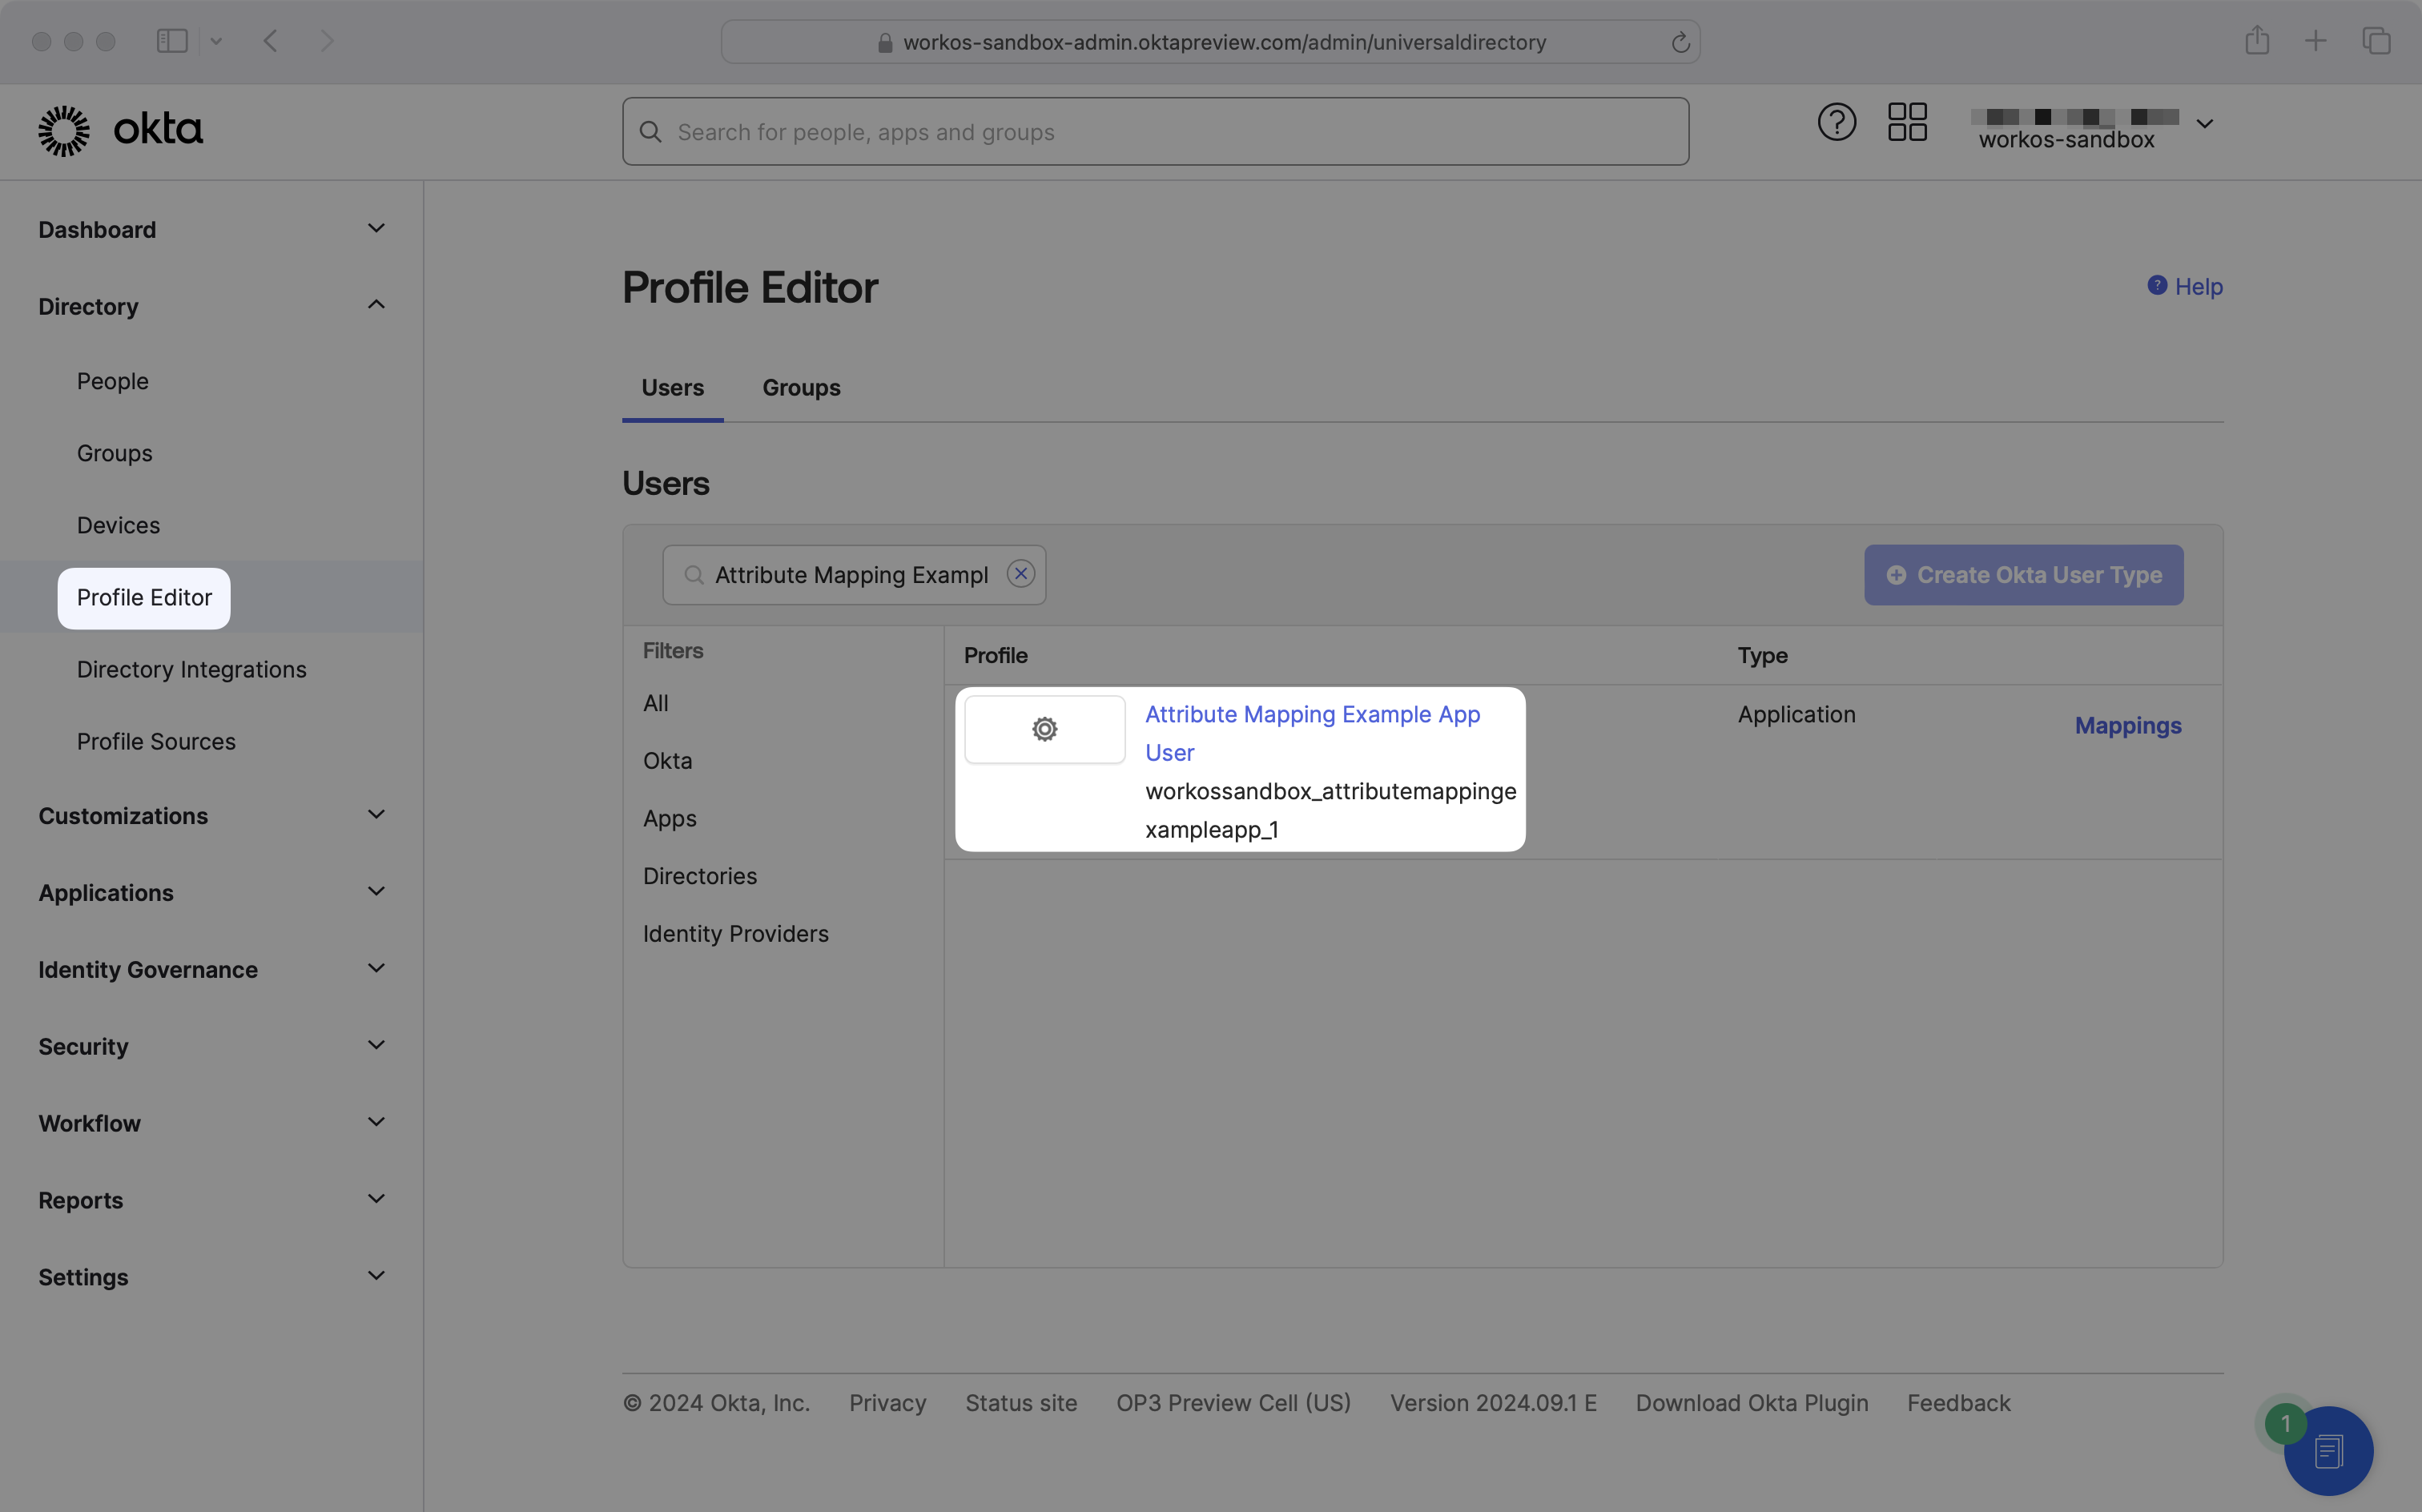
Clicking into the application will bring you to a Profile Editor page:
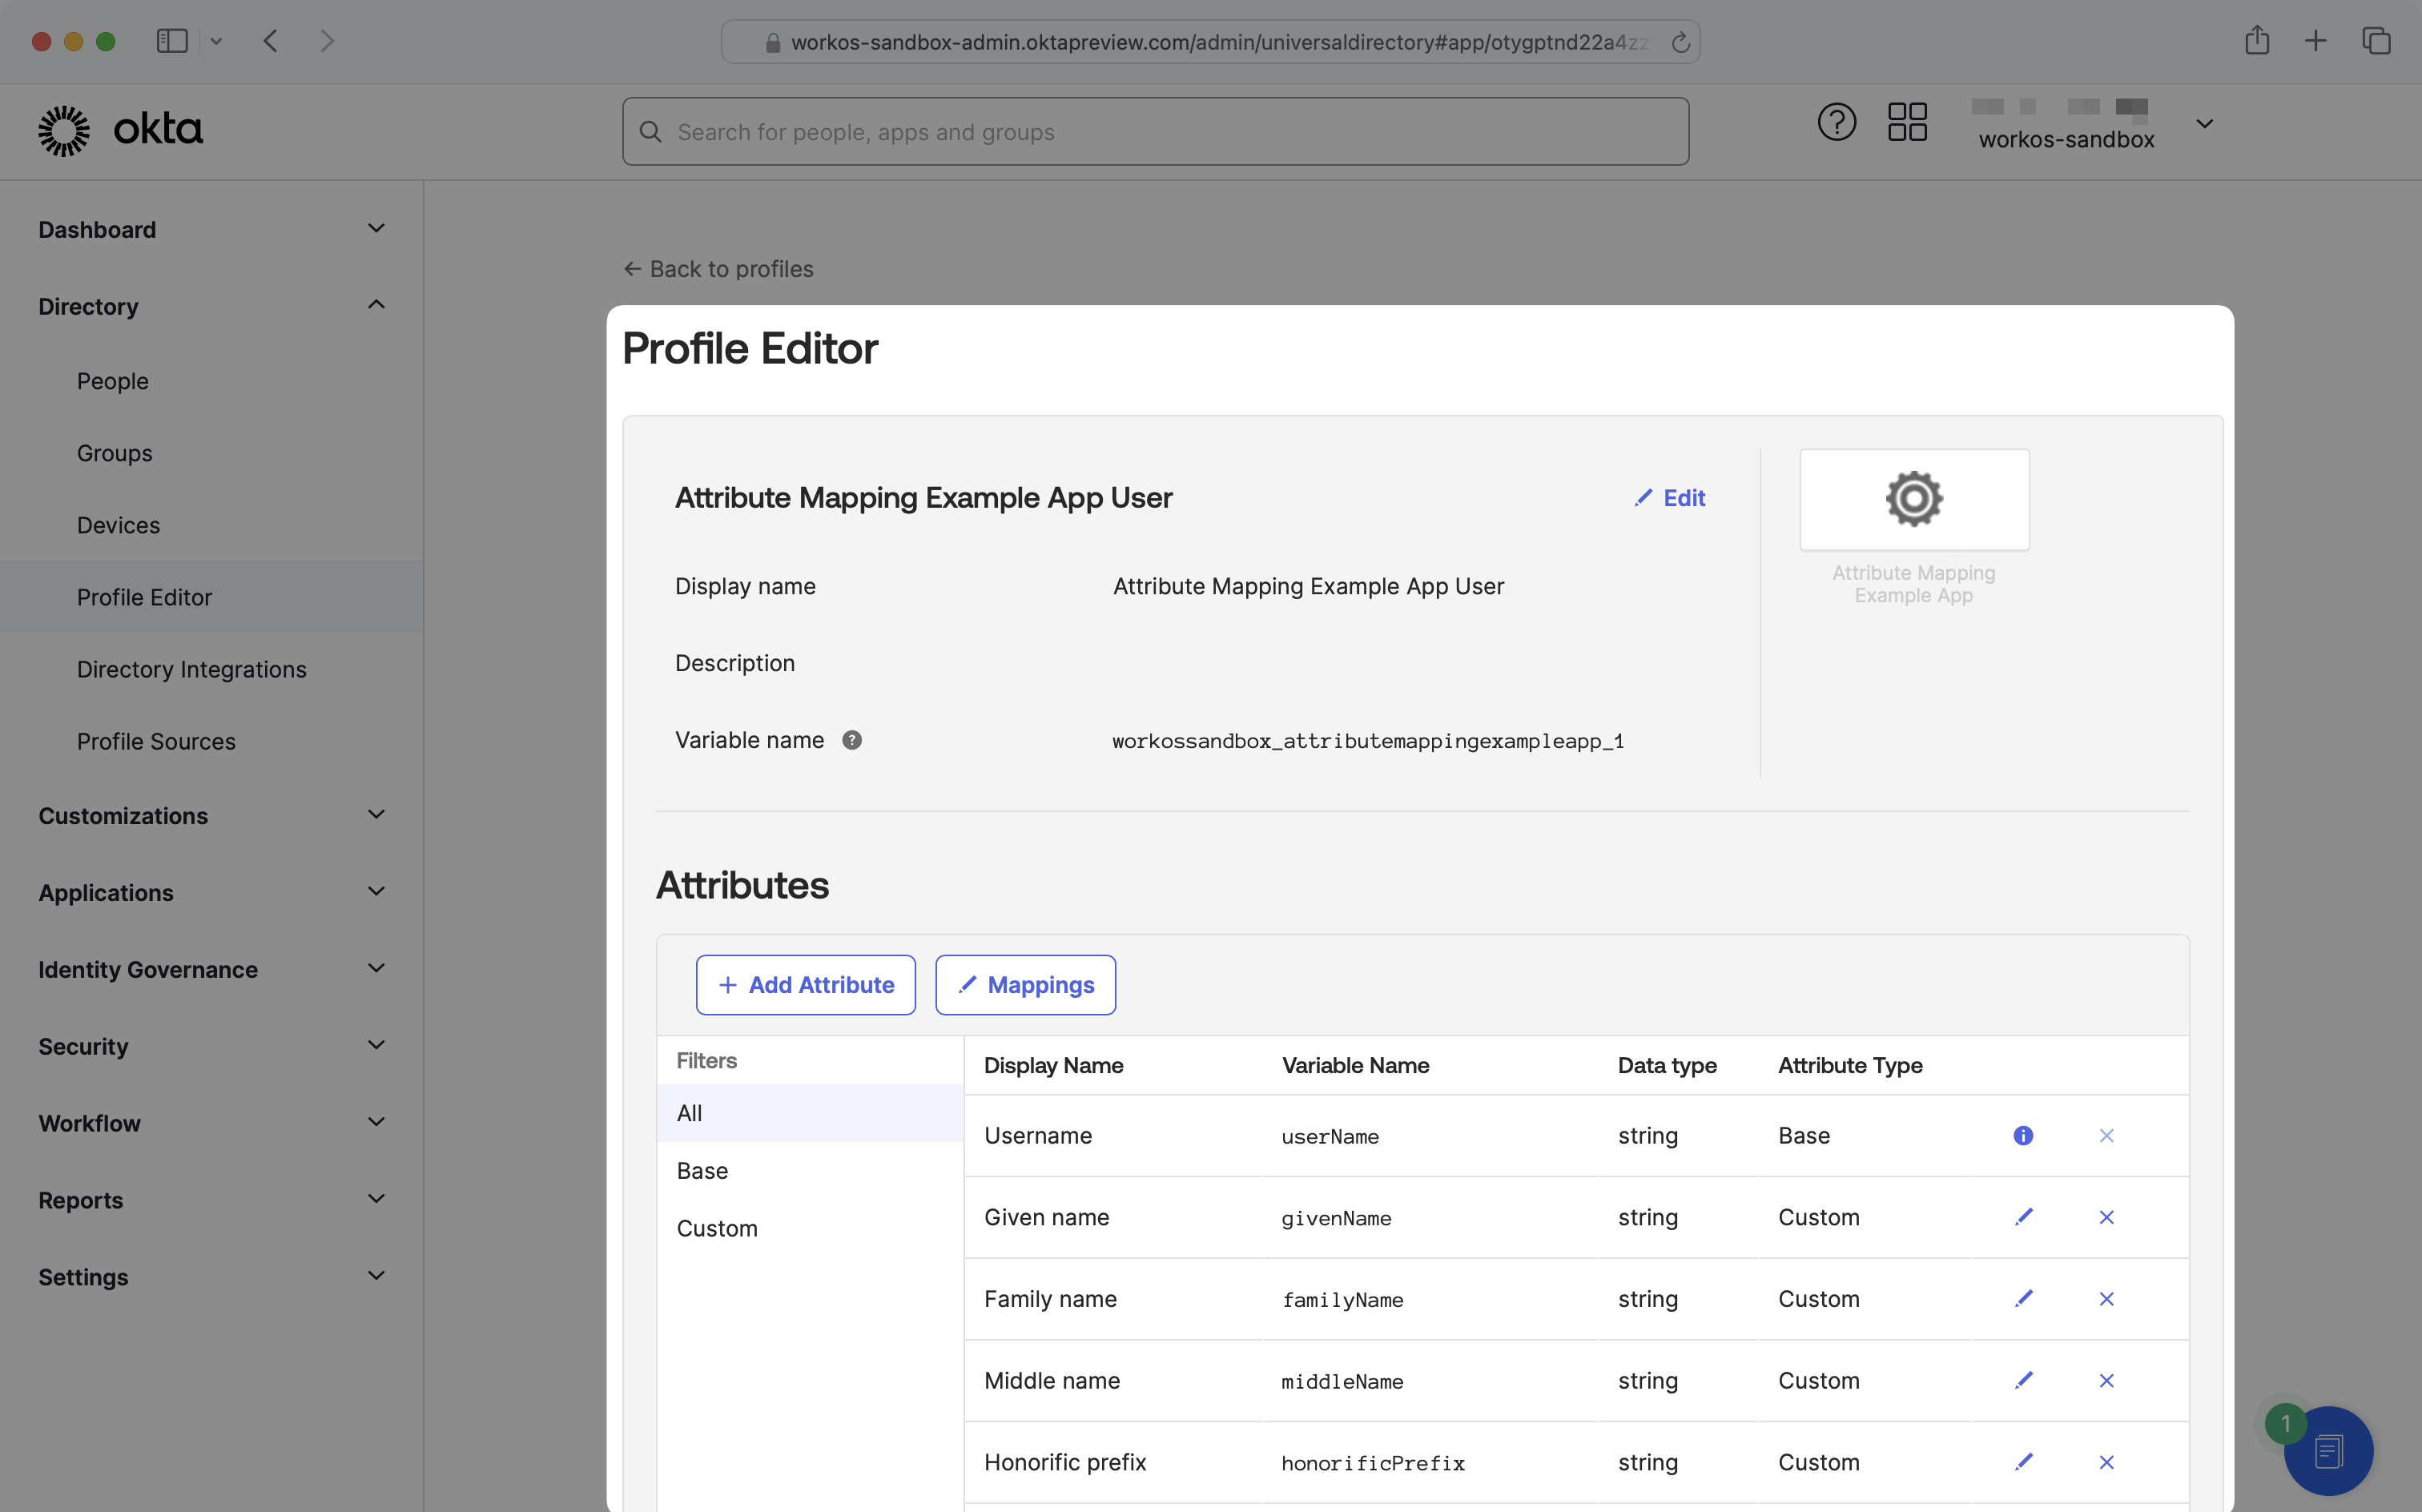
You’ll likely see several attributes listed, which are scoped to the application. If you see an attribute listed you’re looking to map to an application, there’s no need to create a new attribute and you can skip to step 3.
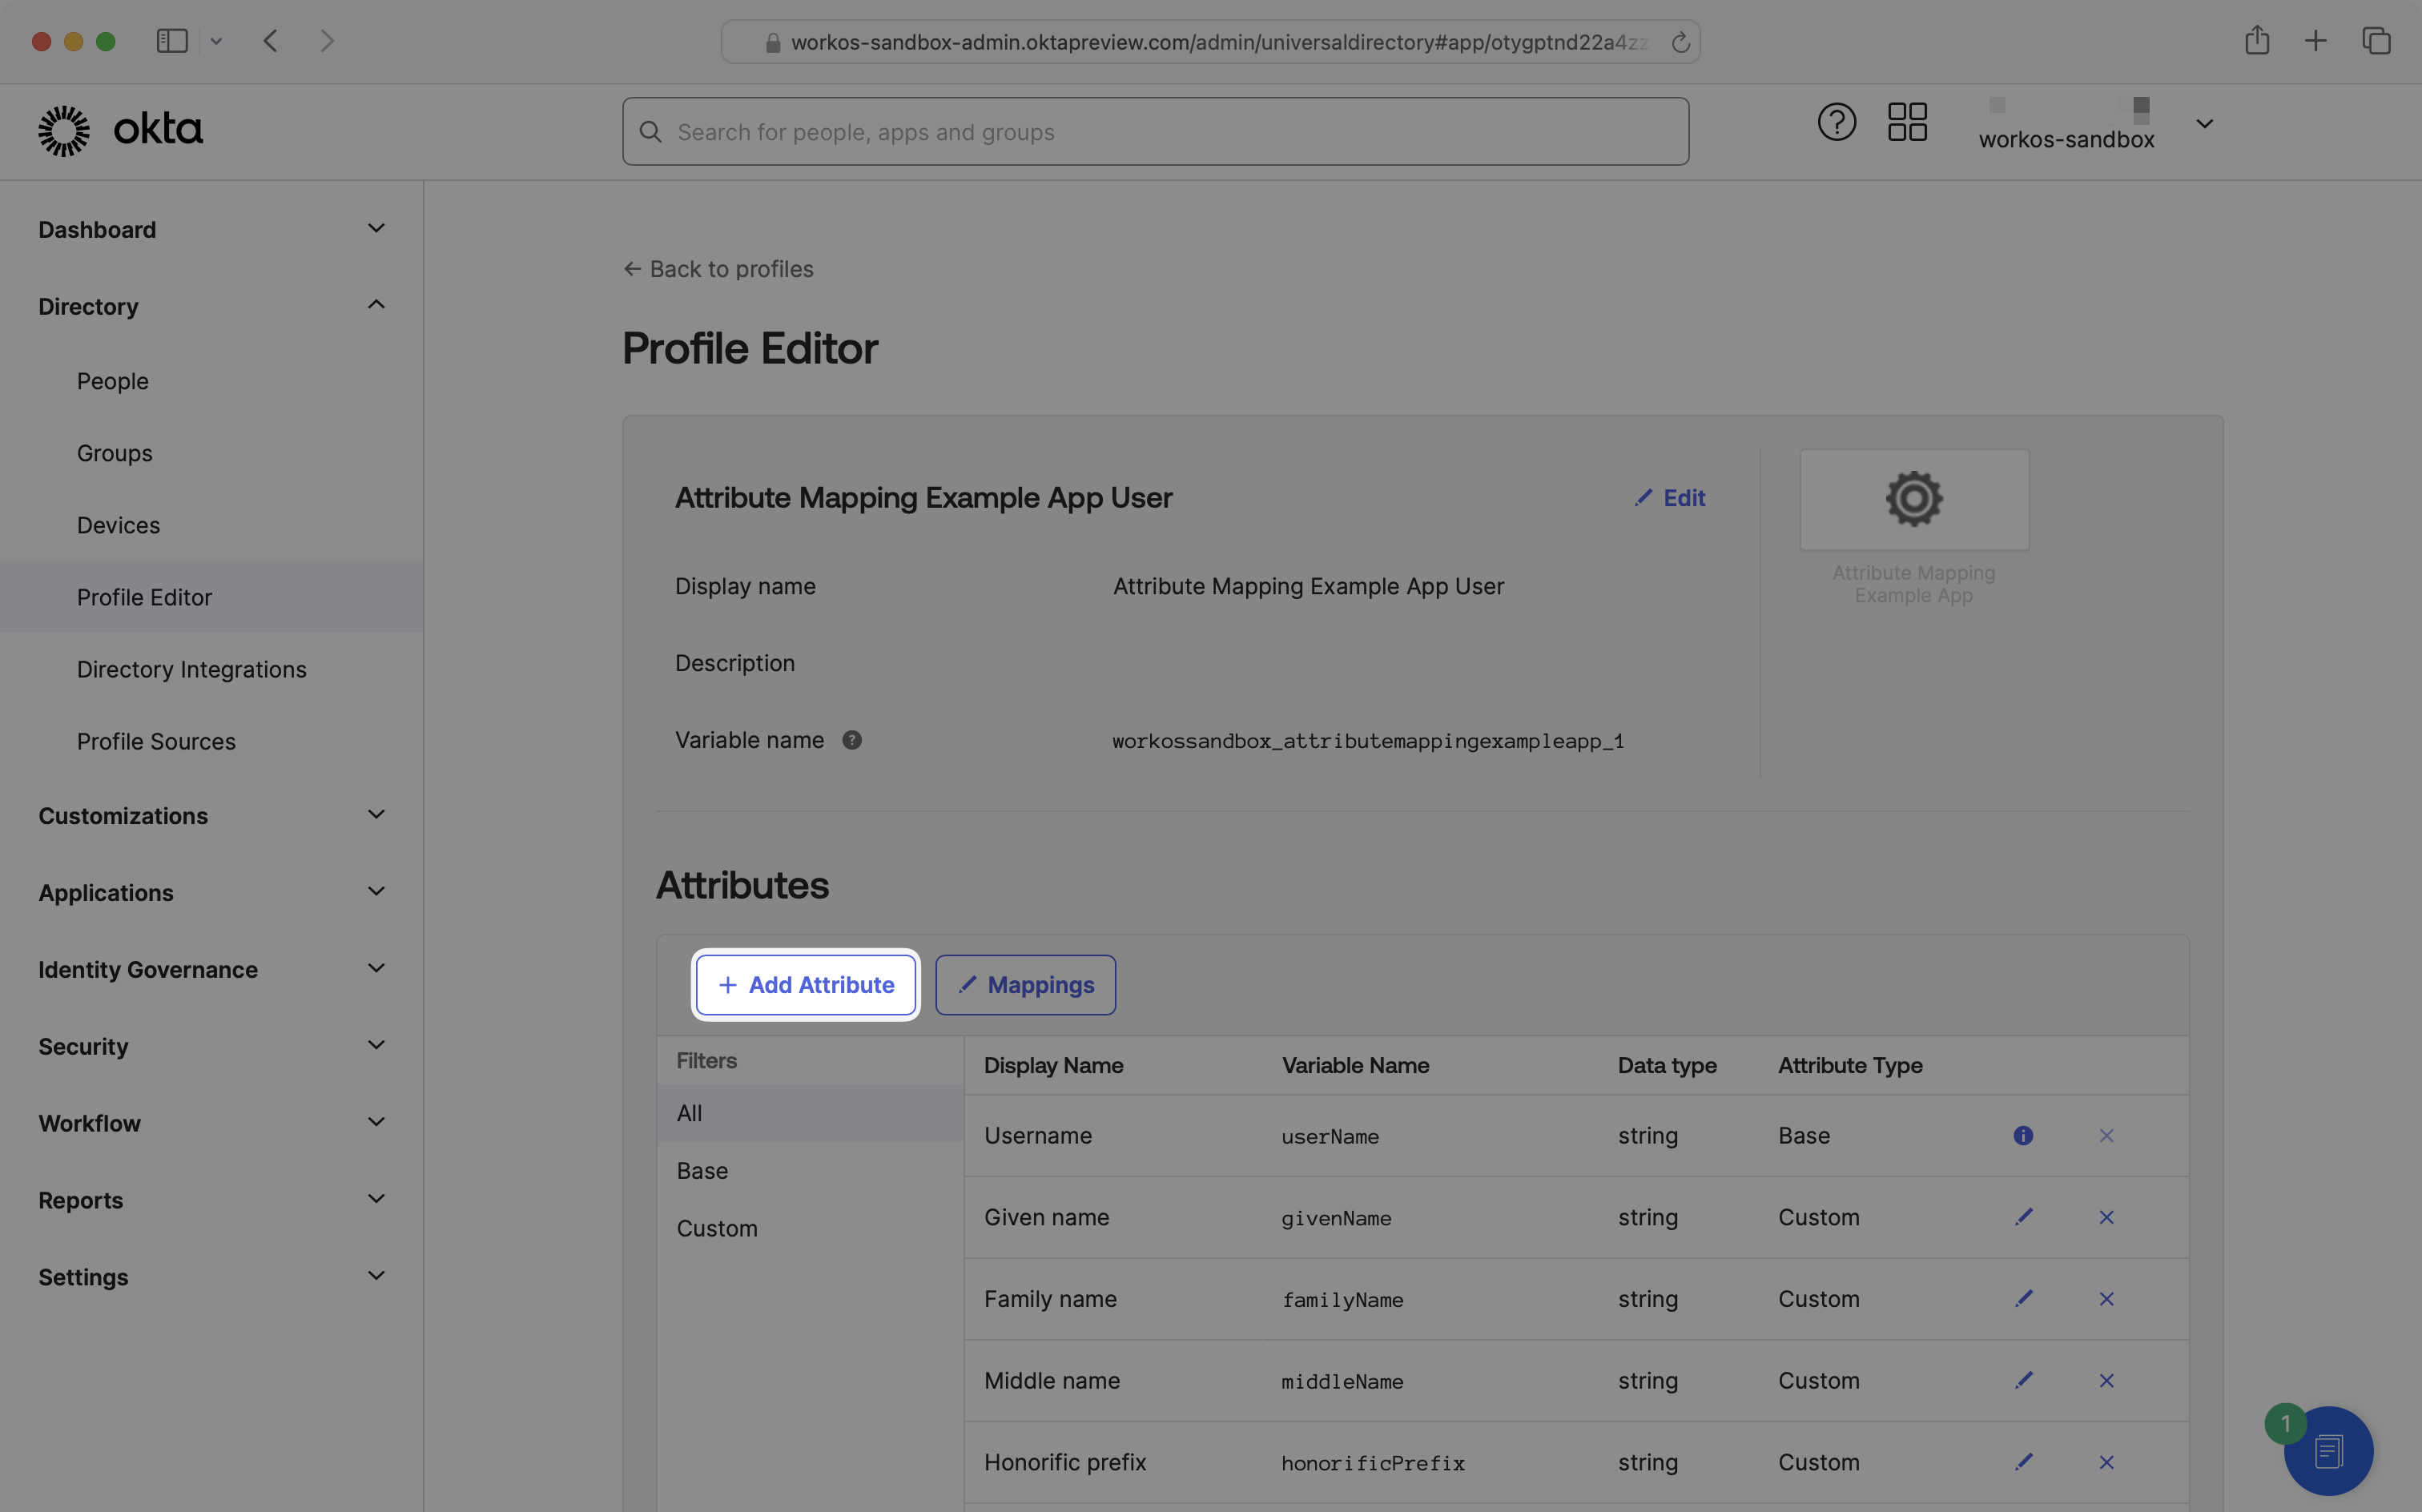
If a desired attribute is missing from your application, click the “Add Attribute” button to create a new attribute.
Enter a display name and variable name of your choosing, and ensure the external name matches the key required by the third-party application. For example, if the third-party application pulls the manager value from manager.value, the external name should be manager.value.
For attributes included as part of the SCIM enterprise extension, enter the external namespace as urn:ietf:params:scim:schemas:extension:enterprise:2.0:User.
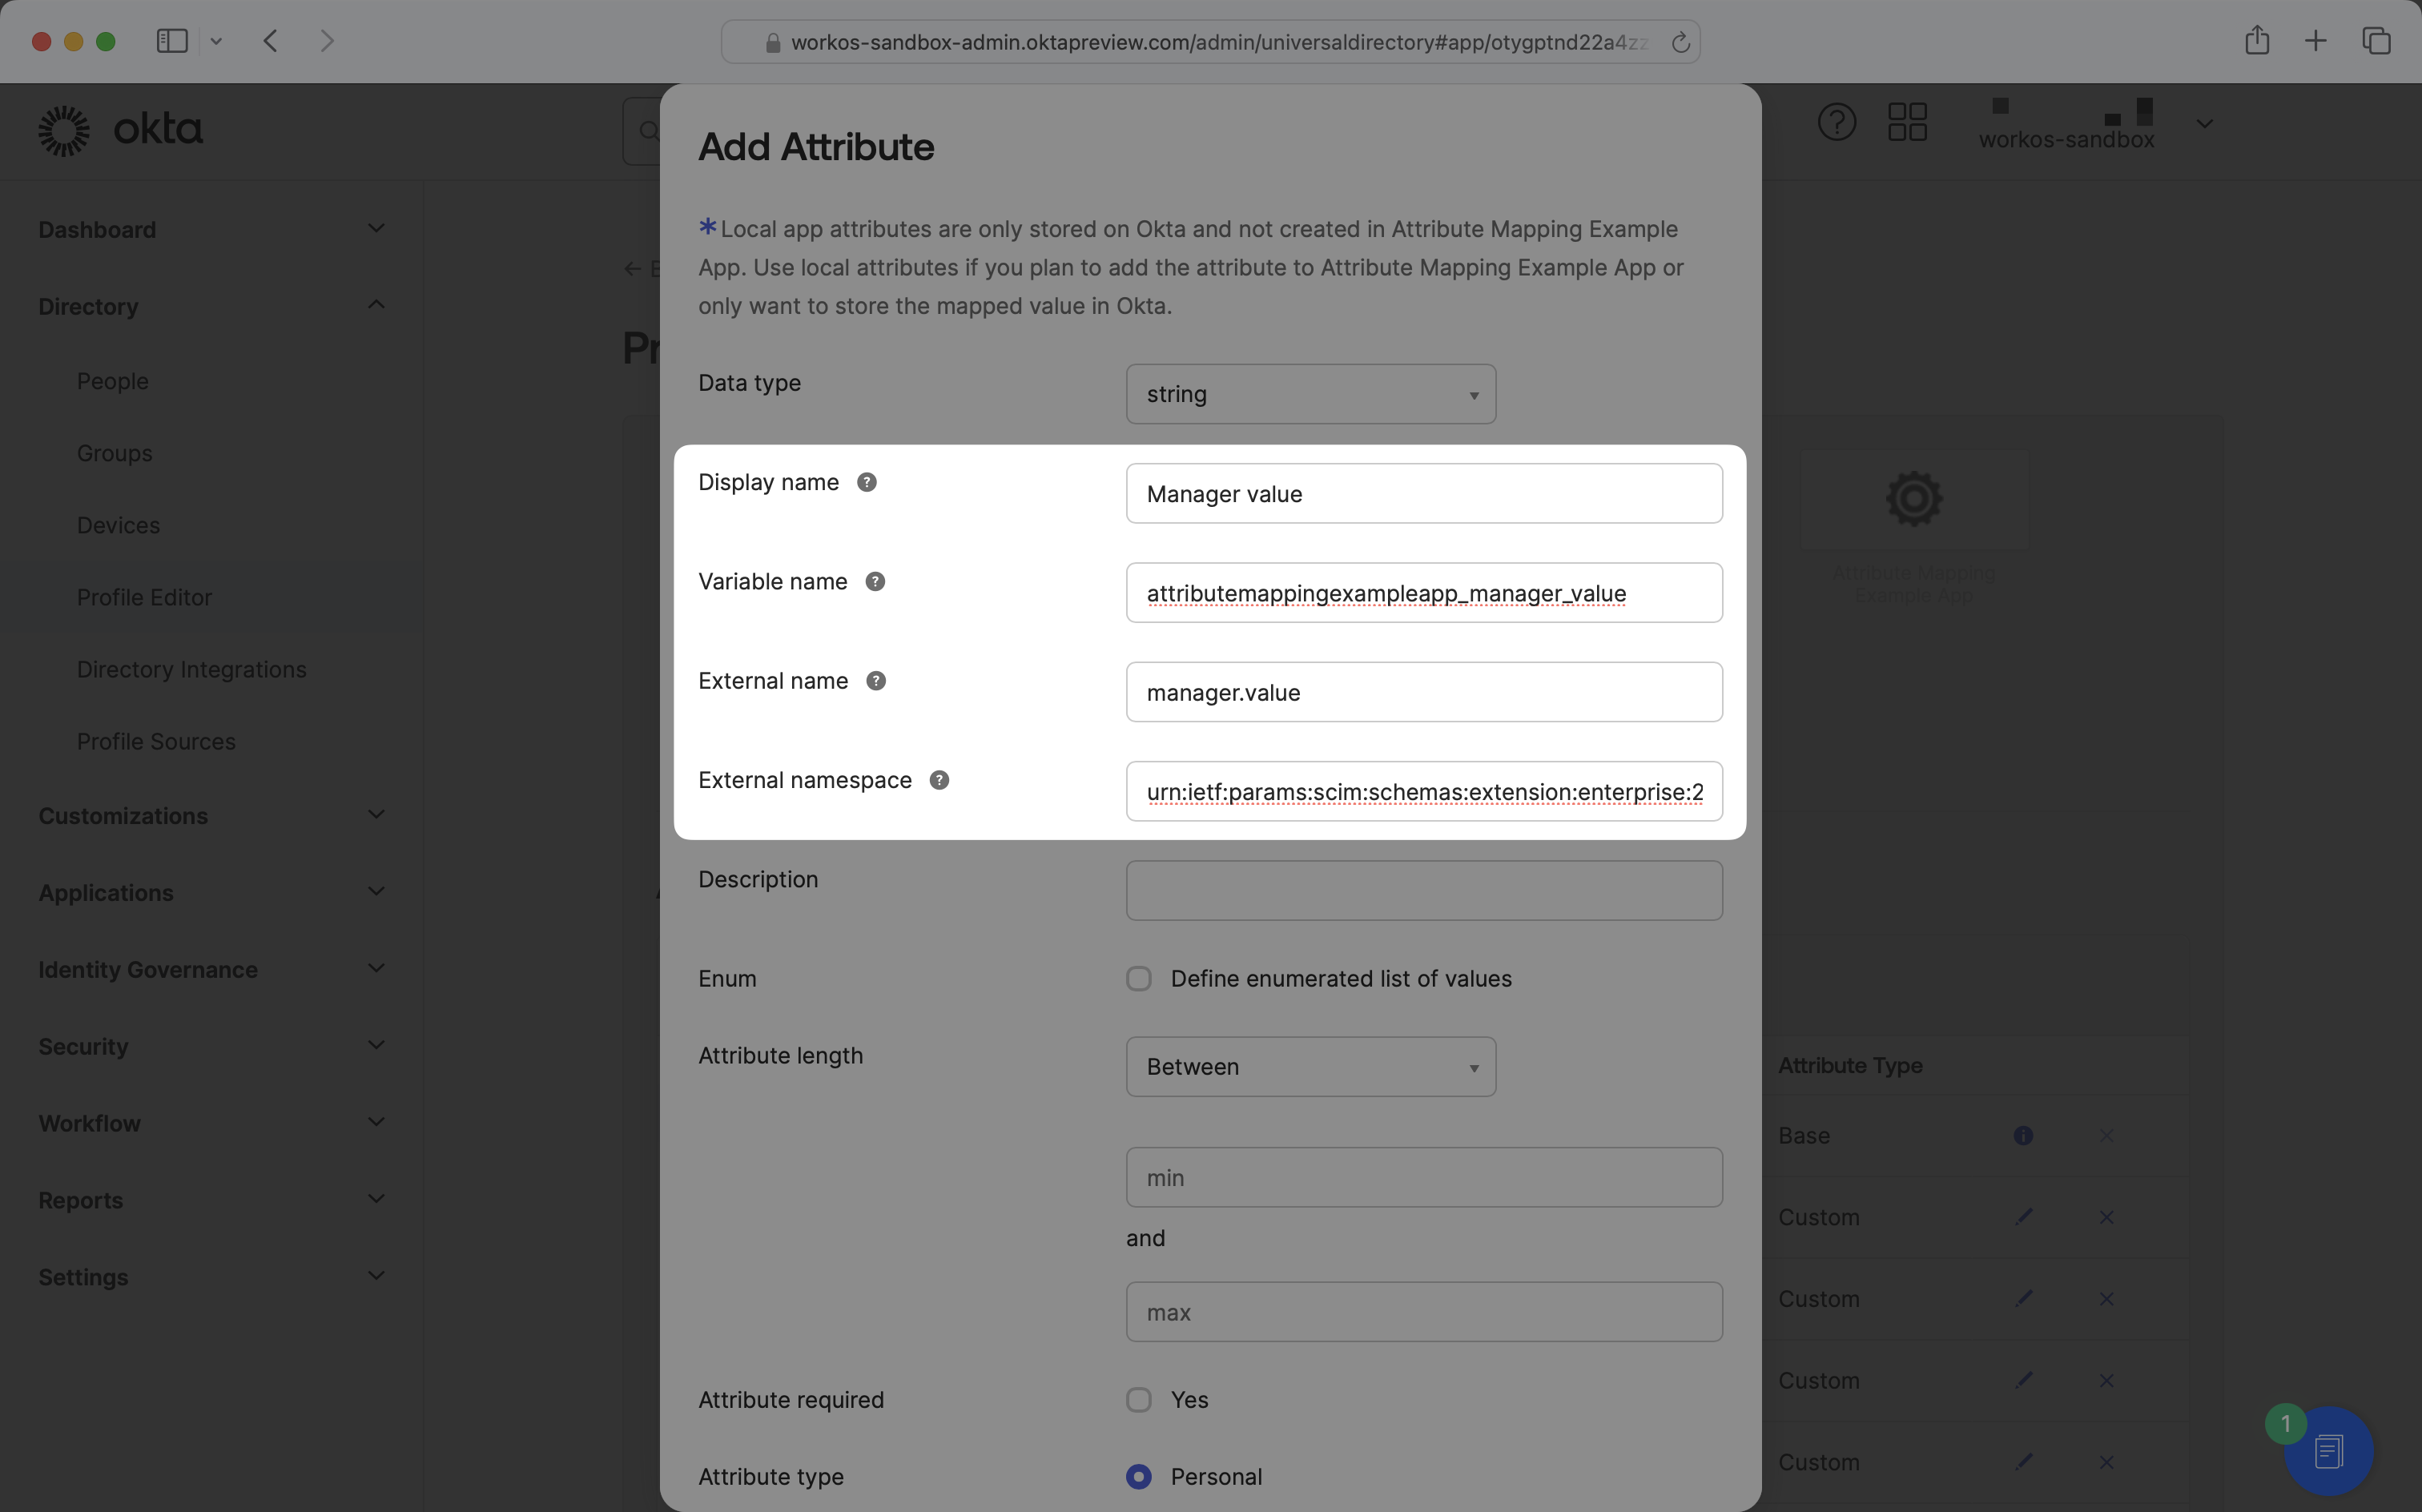
Once you’ve entered the required information, click “Save”.
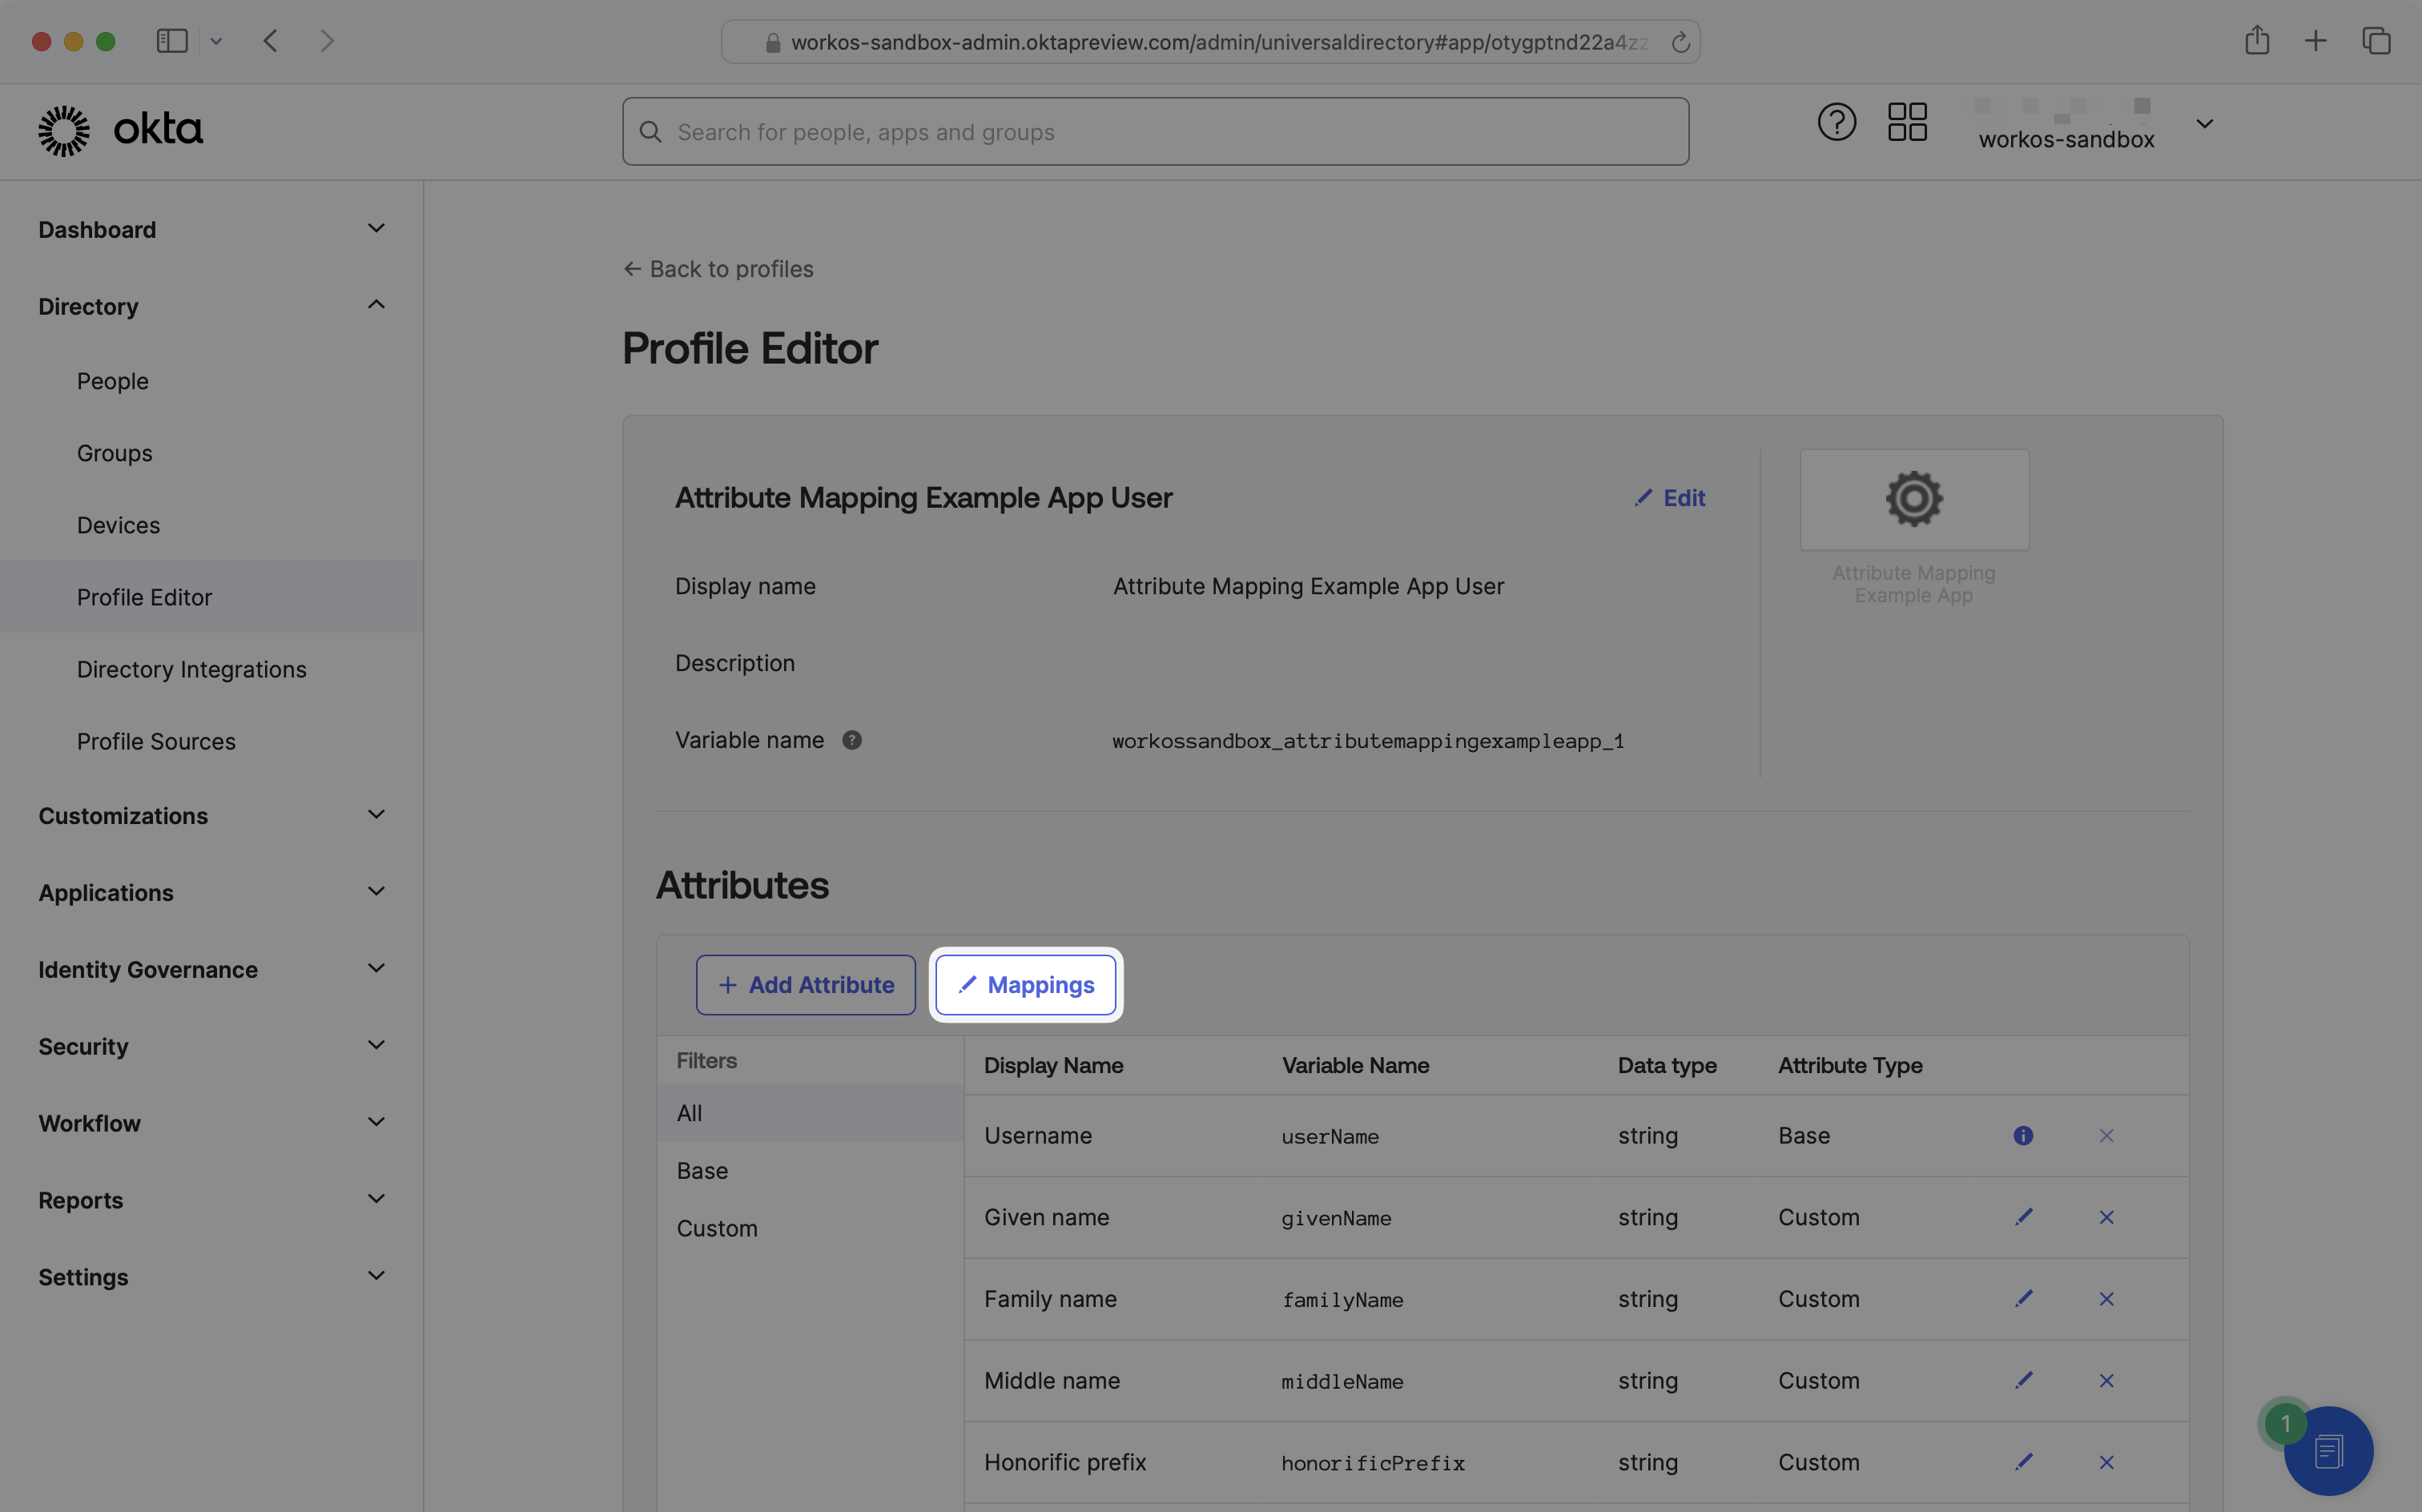
To map Okta user profile attributes to your application users, click on the “Mappings” button.
Mappings can be bidirectional, either from the application to the Okta user or from the Okta user to the application. This guide will focus on mapping from the Okta user to the application. Click the “Okta User to (name of application)” tab.
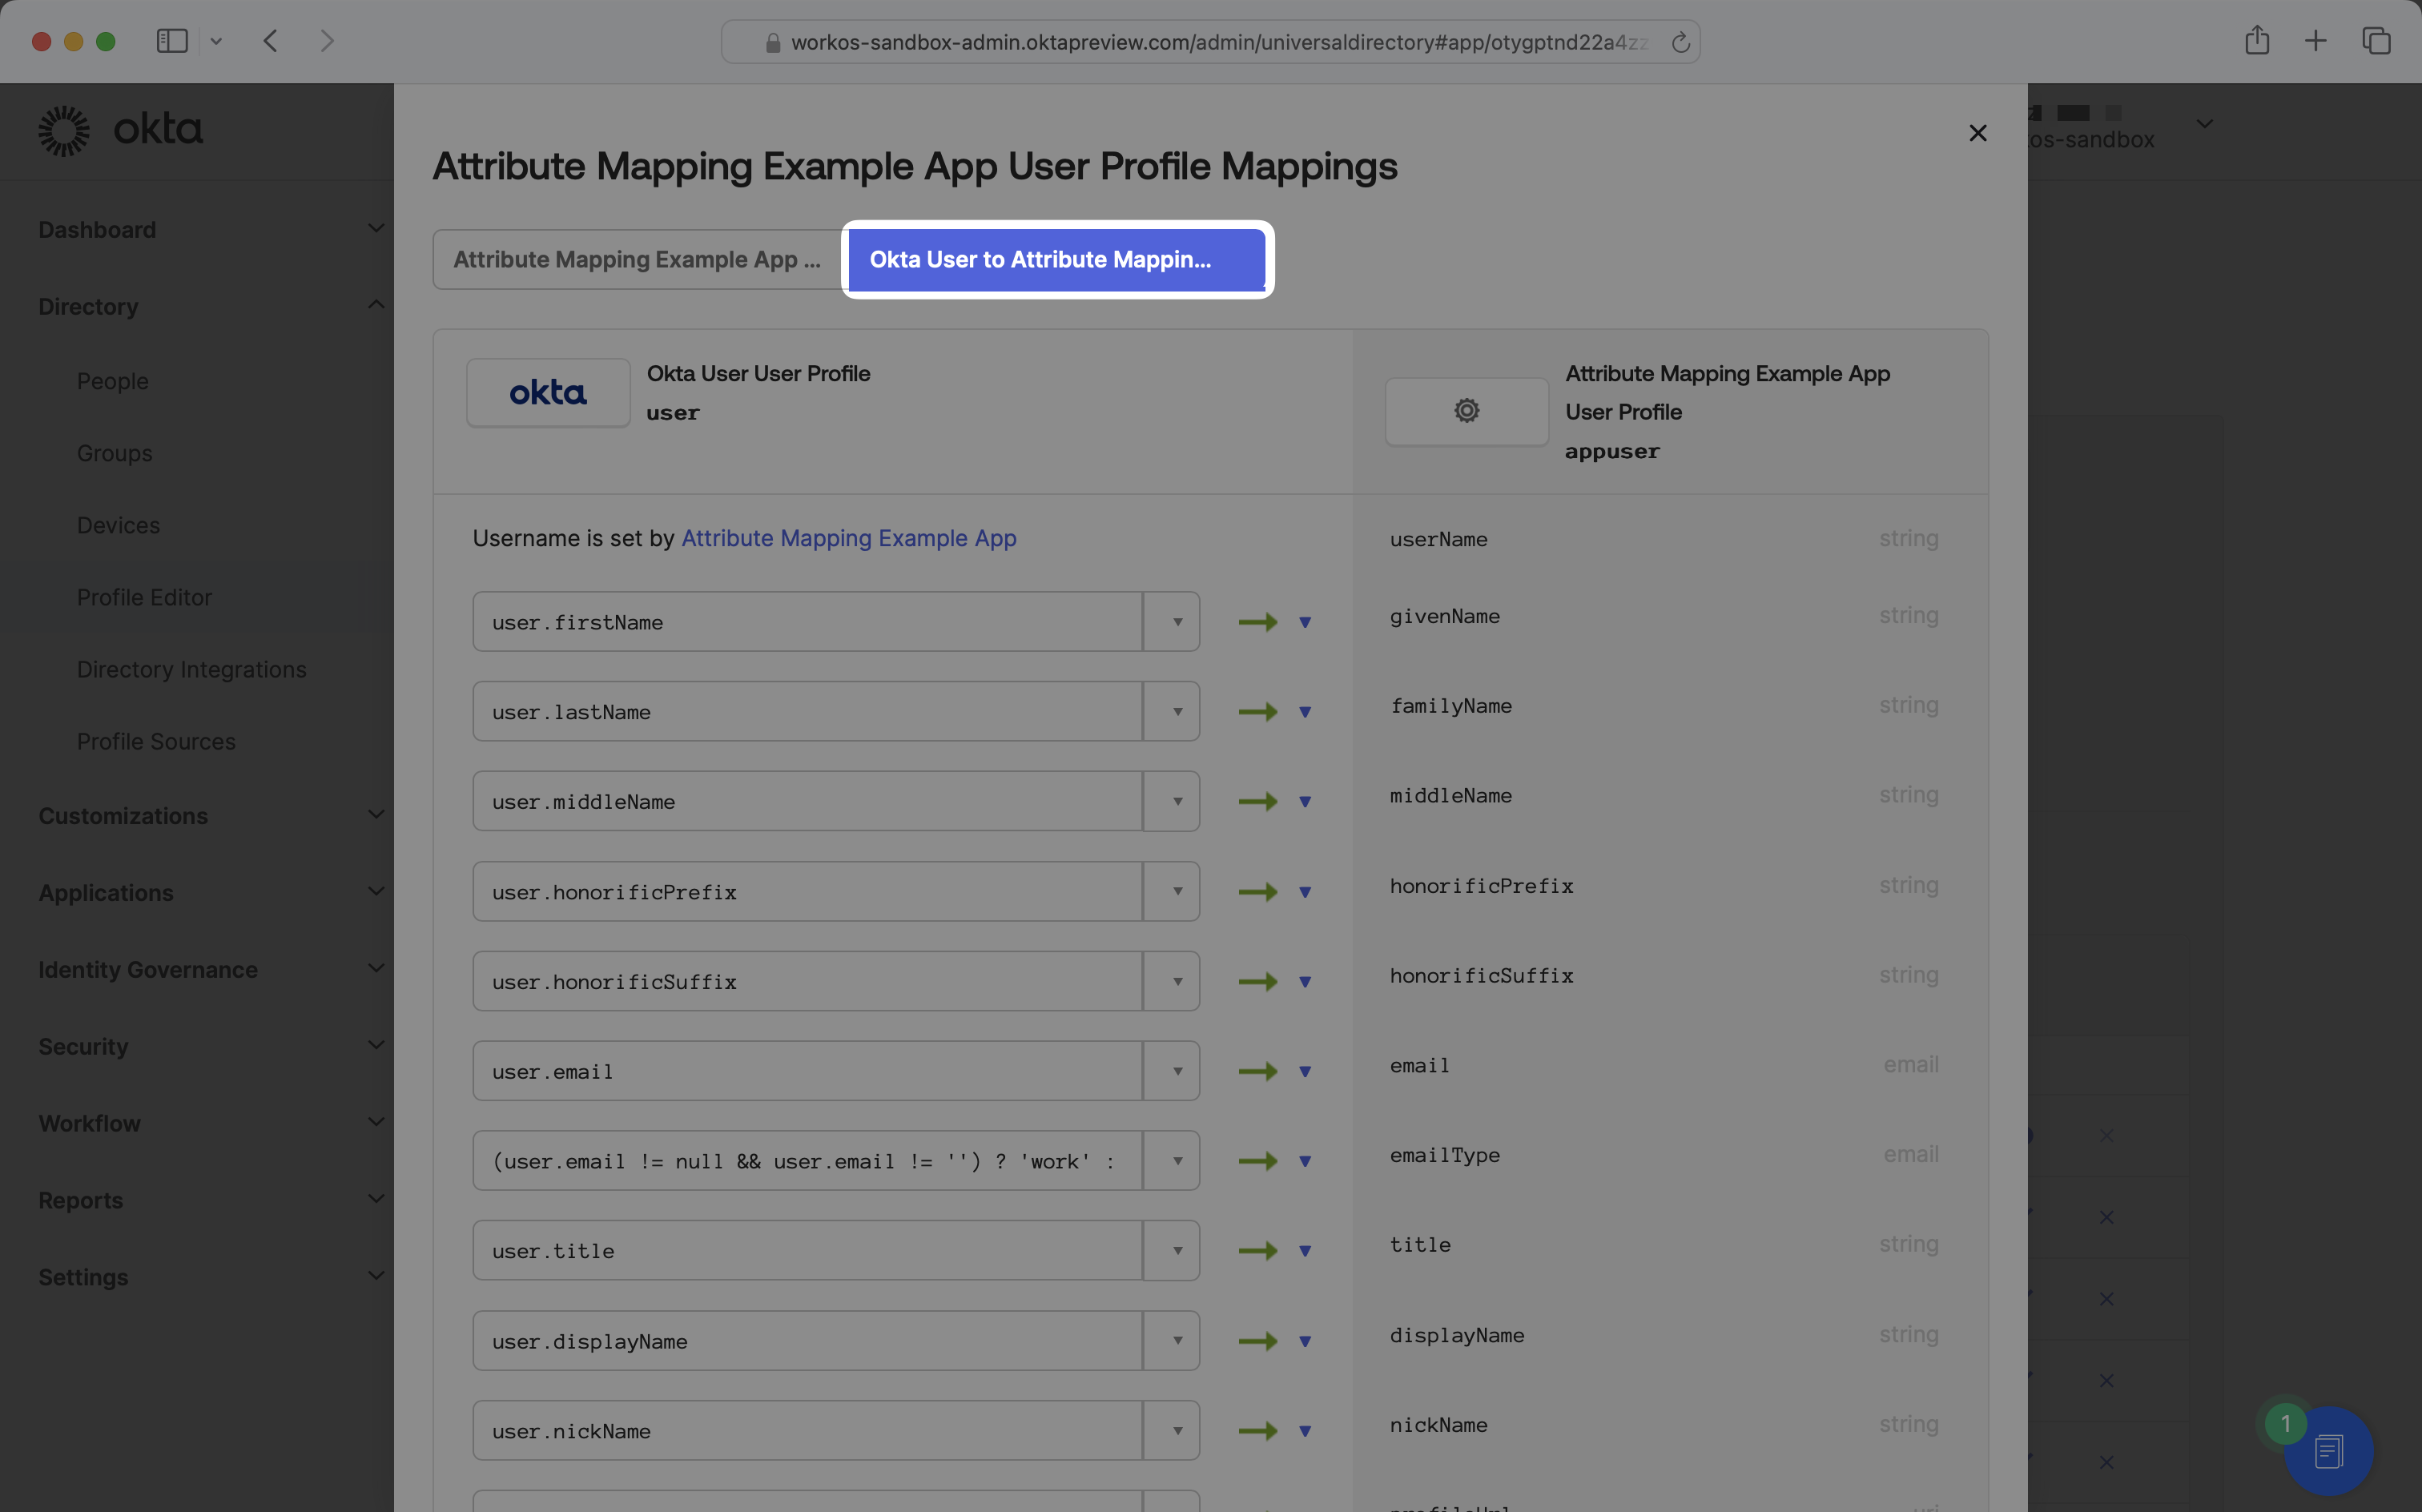
Find the name of the attribute you’d like to map in the right column. In the corresponding row’s left column, enter the name of the Okta user profile attribute you’d like to map over. For example, if you’re looking to map manager email in the application, select managerId in the left column.
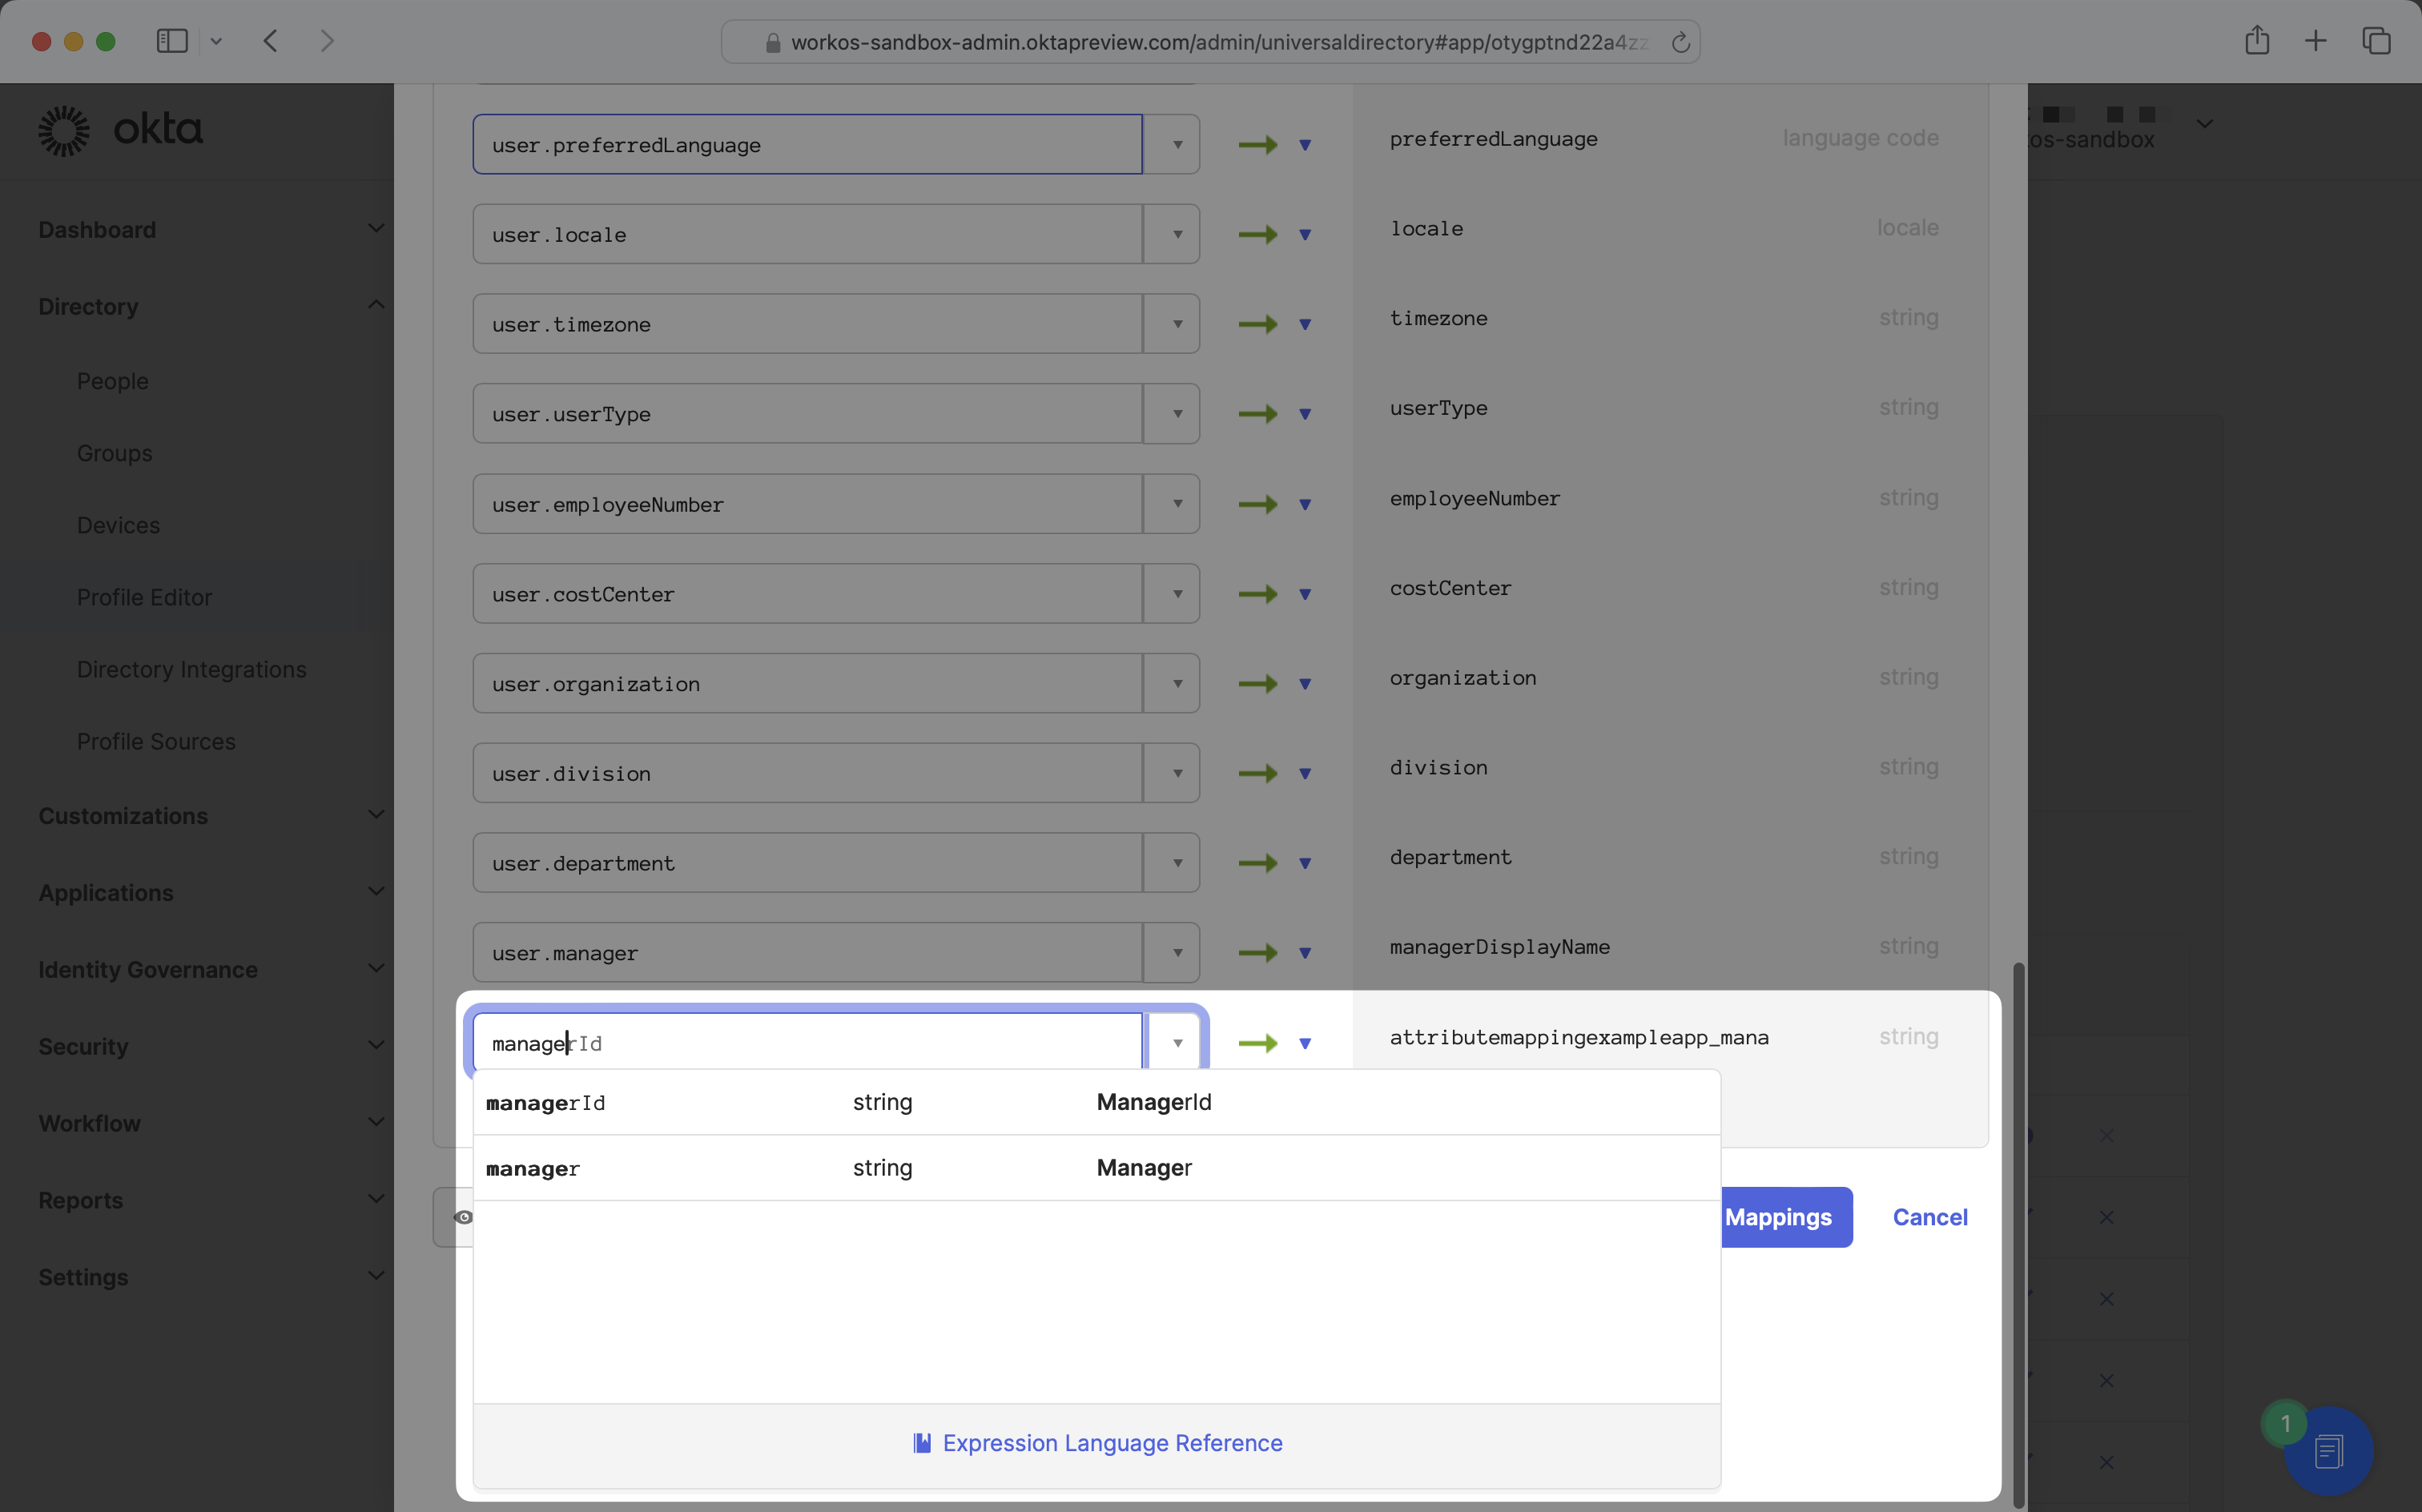
Ensure the apply mappings setting is set to “Apply mapping on user create and update”.
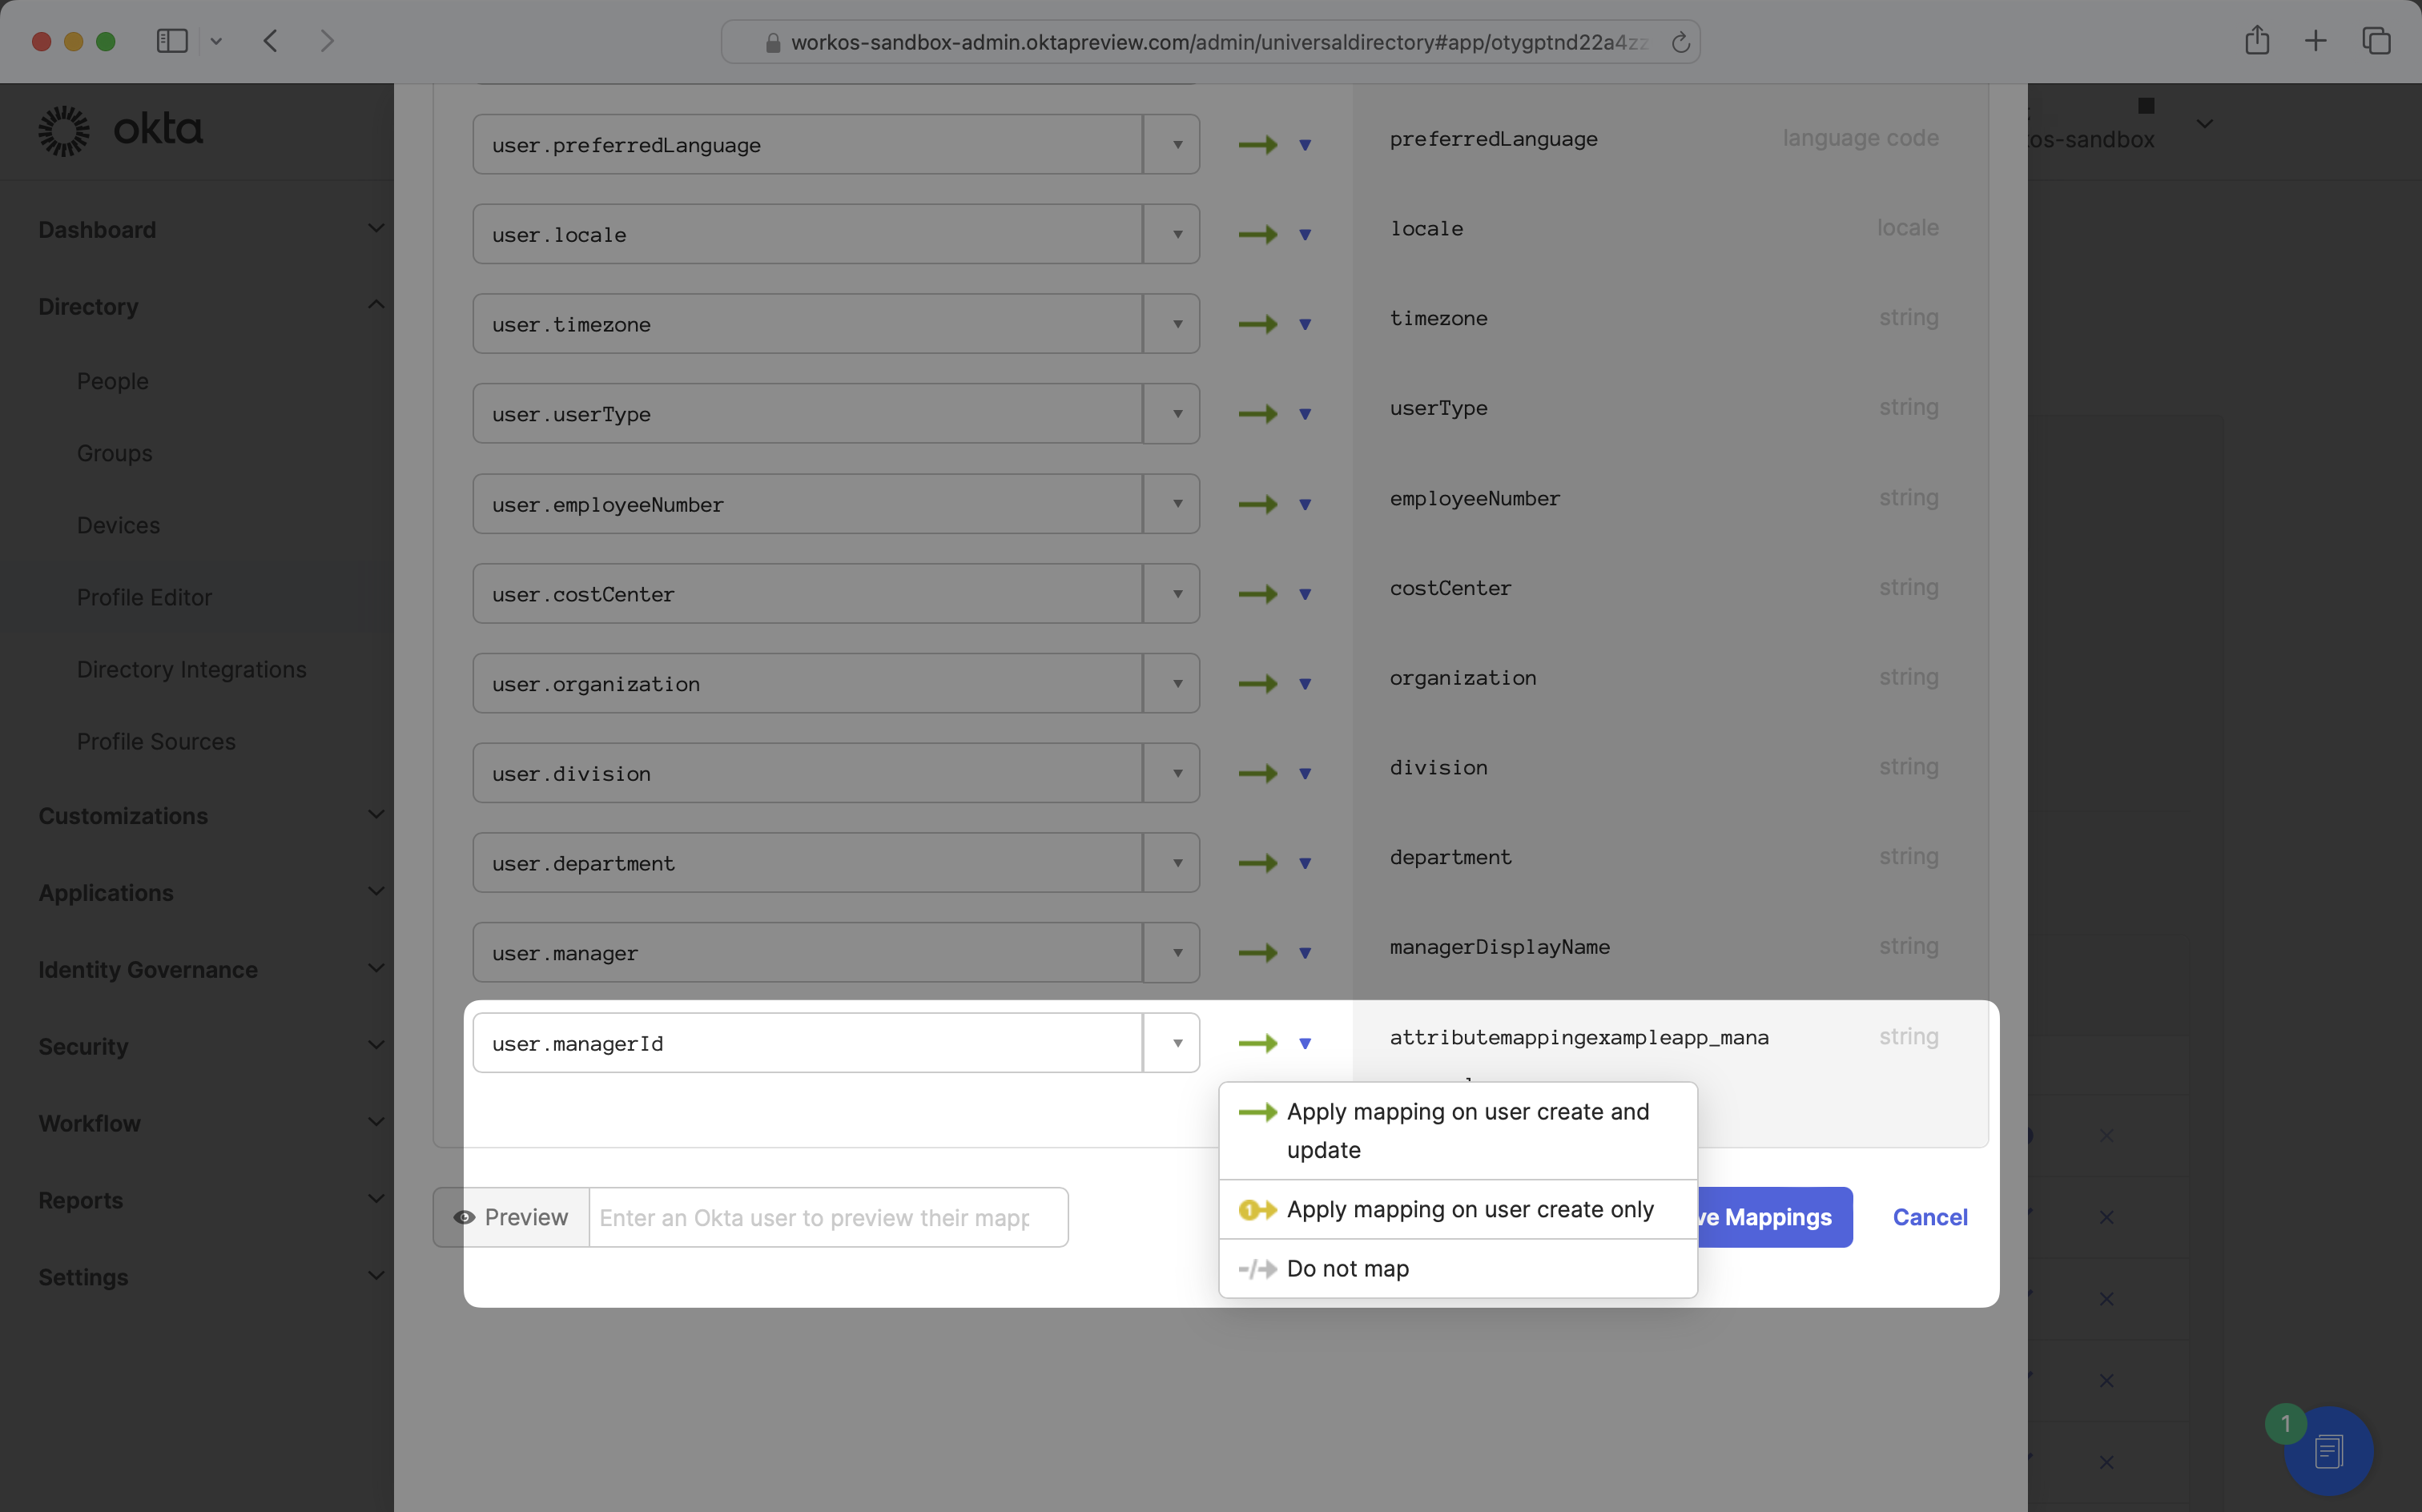
Once your mappings are configured, click “Save Mappings” and “Apply updates now”. These new attribute mappings will now propagate to the application.
A user appears in a group they are no longer a member of in Okta, why? How can I fix this situation?
There is a known issue in Okta where push group membership removals are not sent via SCIM when the affected user is deactivated or unassigned from the app. This commonly happens when a single group is used for both assignment and push, since removing a user triggers deactivation causing the membership removal event to never be sent. The IT admin can fix it by clicking “Push now” on the affected group in the Push Groups tab.
How often do the Okta SCIM 2.0 directories perform a sync?
The Okta SCIM 2.0 directory syncs events in real time.
Why is a user suspended in Okta still active in WorkOS?
Suspending a User in Okta will only affect their login and will not alter their status in any connected applications.
Deactivating or Deleting a User in Okta will result in a inactive status in connected applications (i.e., WorkOS).
For more details, please refer to Okta’s official documentation User Suspension User Deactivation and Deletion.
What is the idp_id for directory groups from Okta?
Okta only provides a group display name as a group identifier, so this display name is persisted as the idp_id and name for directory groups in WorkOS.
