This article provides a thorough how-to for combining Vite, an innovative frontend build tool known for its quick development environment and effective build process, with Bootstrap, a popular CSS framework. To accomplish this integration, we'll look into two methods: installing Bootstrap using npm for greater control, or using the Bootstrap CDN for faster setups. Developers of all experience levels will find it simple to follow along and select the approach that best suits their needs, as both approaches will be thoroughly explained.
These are the following approaches:
Table of Content
Steps to Set up Vite Application
Step 1: Install Vite and set up your project
npm create vite@latest my-vite-project
Step 2: Select these options
√ Select a framework: » React
√ Select a variant: » JavaScript + SWC
Step 3: Navigate to the project
cd my-vite-project
Step 4: Install all the dependencies
npm installProject structure:
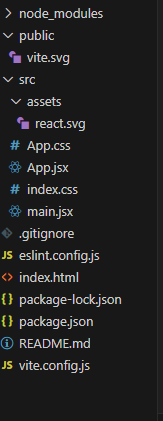
Updated dependencies:
 "dependencies": {
        "react": "^18.3.1",
        "react-dom": "^18.3.1"
      },
Using Bootstrap CDN
Using the Bootstrap CDN is the quickest way to integrate Bootstrap with Vite. Smaller projects or rapid prototyping are best served by this approach since it eliminates the need for extensive Bootstrap style customization. Without installing extra dependencies, you can quickly get started with Vite and Bootstrap by including it via a Content Delivery Network (CDN).
Example: This example shows the use of bootstrap in Vite by using Bootstrap CDN link.
<!-- index.html -->
<!DOCTYPE html>
<html lang="en">

<head>
    <meta charset="UTF-8" />
    <meta name="viewport" content="width=device-width,
                   initial-scale=1.0" />
    <title>Vite + Bootstrap</title>
    <!-- Bootstrap CSS via CDN -->
    <link href=
"https://cdn.jsdelivr.net/npm/bootstrap@5.3.3/dist/css/bootstrap.min.css"
          rel="stylesheet"
        integrity=
"sha384-QWTKZyjpPEjISv5WaRU9OFeRpok6YctnYmDr5pNlyT2bRjXh0JMhjY6hW+ALEwIH"
          crossorigin="anonymous">
</head>

<body>
    <div id="root"></div>

    <!-- Bootstrap JavaScript Bundle with Popper -->
    <script src=
"https://cdn.jsdelivr.net/npm/bootstrap@5.3.3/dist/js/bootstrap.bundle.min.js"
        integrity=
"sha384-YvpcrYf0tY3lHB60NNkmXc5s9fDVZLESaAA55NDzOxhy9GkcIdslK1eN7N6jIeHz"
        crossorigin="anonymous"></script>
    <script type="module" src="/src/main.jsx"></script>
</body>

</html>
// src/main.jsx
import React from 'react';
import ReactDOM from 'react-dom/client';
import App from './App';

ReactDOM.createRoot(document.getElementById('root')).render(
  <React.StrictMode>
    <App />
  </React.StrictMode>
);
// src/App.jsx
import React from 'react';

function App() {
  return (
    <div className="container mt-5">
      <h1 className="text-primary">Hello, Bootstrap with Vite!</h1>
      <button className="btn btn-success">Click Me</button>
    </div>
  );
}

export default App;
Run the Development Server:
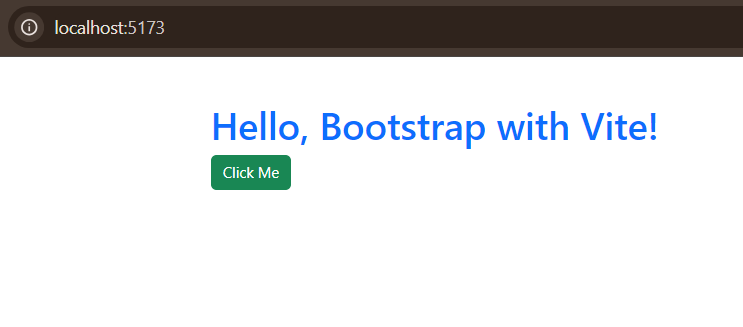
npm run devOutput: Visit the local development URL provided (e.g., http://localhost:5173). You should see a basic Bootstrap-styled page with a button.
Installing Bootstrap via npm
It is recommended to install Bootstrap via npm for larger applications or when you require more control over Bootstrap's styles and dependencies. By using features like tree-shaking to remove unnecessary CSS, you can better manage dependencies and customize Bootstrap.
Install Bootstrap and Its Dependencies
Navigate to your Vite project directory and install Bootstrap via npm:
npm install bootstrapUpdated dependencies:
"dependencies": {
        "bootstrap": "^5.3.3",
        "react": "^18.3.1",
        "react-dom": "^18.3.1"
      },
Example: This example shows the using bootstrap with Vite by installing it through npm.
<!-- index.html -->
<!DOCTYPE html>
<html lang="en">

<head>
    <meta charset="UTF-8" />
    <meta name="viewport"
          content="width=device-width,
                   initial-scale=1.0" />
    <title>Vite + Bootstrap (npm)</title>
</head>

<body>
    <div id="root"></div>
    <script type="module" src="/src/main.jsx"></script>
</body>

</html>
// src/main.jsx
import React from 'react';
import ReactDOM from 'react-dom/client';
// Import Bootstrap styles
import 'bootstrap/dist/css/bootstrap.min.css';
import App from './App';

ReactDOM.createRoot(document.getElementById('root')).render(
  <React.StrictMode>
    <App />
  </React.StrictMode>
);
Run the Development Server:
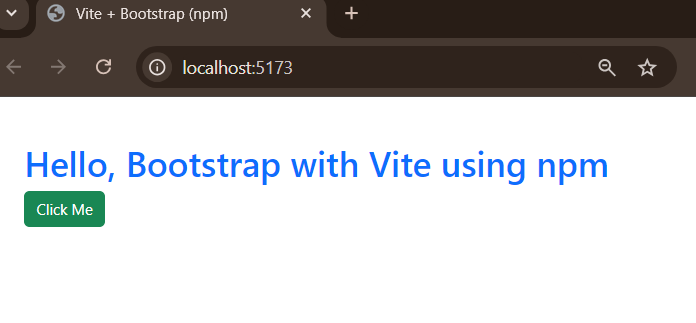
npm run devOutput: Visit the local development URL provided (e.g., http://localhost:5173). The output should be a Bootstrap-styled page, similar to the CDN approach but with more flexibility.