Neith"s Crafty Creations - image created with Club Scrap DigiDeluxe Refresh and Serengeti Kits
Showing posts with label Tutorial. Show all posts

Saturday, January 17, 2009

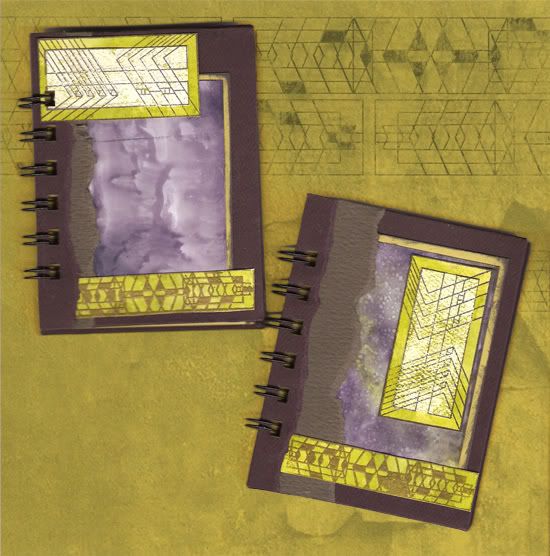
Milestones Books with Rainbow Inks

Milestones Rainbow Inked Books


To create these papers, we're going to use Ranger's Posh Impressions Rainbow Sponge Inks, but ditch the sponges! Instead we'll be monoprinting with a combination of the Rainbow Inks and the Perfect Ink Refresher and then using a brayer with the Rainbow Inks and water from a Mini Mister, we'll imitate the technique from Tag 11 of Tim Holtz's 12 Tags of Christmas 2008 but use the Rainbow Inks instead of Distress Ink Pads!

All of the juicy details, plus some step-by-step photos, can be found as a tutorial in the Ranger Ink Link Yahoo Group's files as a Guest Inkling for today! If you haven't joined yet, it's a great little group with tons of great designers, store owners, and crafters of all levels... plus tons of Ranger "experts" (including their signature artists) to help inspire you and answer any questions! Each month, I host a new challenge, sponsored by Ranger, with three random winners who get sent some awesome loot direct from Ranger! Every group member is welcome to play along and the challenges vary from product or technique to theme based challenges! And, every week, there is a new Inkling chock full of directions to create a new project or technique!

Supplies Used
  • Ranger: Posh Impressions Rainbow Sponge Ink Earthones in Eggplant & Butterscotch plus French Country in Kiwi; Perfect Ink Refresher; Non Stick Craft Mat; Brayer; Mini Mister; Adirondack Alcohol Inks in Denim, Eggplant, Lettuce, and Pearl; Ink Applicator Tool; Perfect Medium; Gold Embossing Powder; Heat Tool; Adirondack Dye Ink Pad in Eggplant;
  • Club Scrap: Milestones 12/08 Create Milsetones CSt UM Stamps, B&B UM Stamps, Digi Green Tea Print, and Boysenberry, Earl Grey, Green Tea, & Soft White Plain Cardstock;
  • Bind It All: 1/2" Black;
  • Glossy Paper;
  • Manila Tag;
  • Craft Iron;

  • Gloves (These are optional, but if you don't use them you will have TONS of ink all over your hands and deeply embedded in your fingernails.)

Thursday, May 8, 2008

Stenciling Revisited, Tutorial

This is another installment of past tutorials of mine which have lost their original host site. Enjoy!

In the past, I had a bin full of stencils gathering dust. I used to look at them mostly as a tool to use as templates or with pencils, markers, and dry embossing stylus tools. But there are so many more ways to use them and create stunning results . . . If you have stencils that coordinate with your prints or your stamps, then there are so many more ways to tie them into your finished pieces! Why not use the inks that you are already using with your stamps on the same project, but incorporate your stencils into the work, or the same embossing powders, etc?
Stenciling Tools

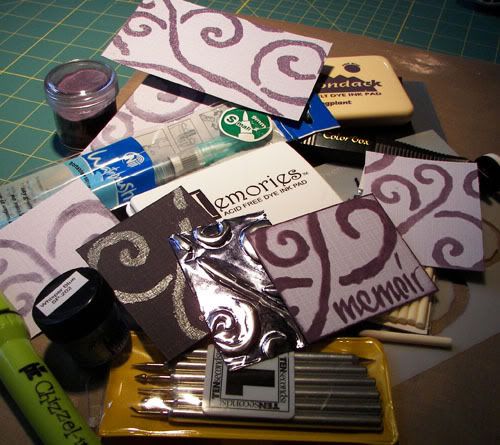
To use your ink pads, pair them up with some wonderful tools. There's the ColorBox Stylus, Ranger's Cut 'n' Dry Foam, Ranger's Ink Applicator Tool, cosmetic sponges, Ranger's Cut 'n' Dry Nibs, Provocraft's Chizzel-It, Niji's Waterbrush, regular paintbrushes, and more! Alternately you can use liquid or dimensional paints, dry embossing tools, Ranger's Perfect Medium Marker or VersaMark's Marker and embossing powders, pigment powders, or chalks, etc.

Remember to always clean your stencil before moving it or changing colors. Using only water-based dye inks, clear embossing ink, or paints will facilitate easy cleaning of both your stencil and your tools without damaging them.
ColorBox Stylus Tool

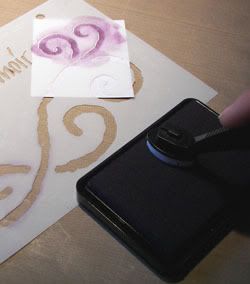
Using the ColorBox Stylus with sponge tips gives a soft but very complete image! Simply press your sponge tip gently onto a waterbased dye ink pad to pick up the color then gently press or swirl the ink through the stencil. I recommend water based dye inks because they will easily rinse off the sponges without damaging them, although darker colors may stain the sponges. Another great and similar tool is the Ranger Ink Applicator Tool. If you do not have access to these tools then you can use small pieces of Ranger's Cut 'n' Dry Foam or a cosmetic sponge for a somewhat similar look.
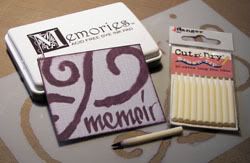
Ranger Cut n Dry Nib

Ranger's Cut 'n' Dry Nibs give a very clear image and full strength color with your stencils. Simply swipe the Nib's tip across your ink pad before coloring through your stencil. You may use any ink that you desire to create a custom marker with the nib for using with your stencil or on its own! To change colors, clean your nib in the same way that you would clean your rubber stamps. If you have a hard time holding the small nibs, then simply empty a multipoint pencil and slide the Nib into the tip, a little glue will hold it in place better!
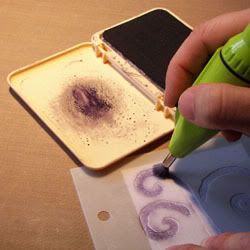
Provo Craft Chizzel-It Tool

The Chizzel-It with a spinning brush tip is a great tool for creating air-brushed looks with your stencils. Delta also makes the Rubber Stampede Spin Color which works in much the same manner. To use these tools with inks (as opposed to paints) they require a little more ink than it will pick up directly from the ink pads, but a lot less than you would get from dipping it into a reinker. An easy way to work around this is to use Ranger's Adirondack, Big 'n' Juicy, Sea Brights, Sea Shells, or Stamp It Ink Pads which come in a special case, allowing you to press on the center of the closed lid to pool a small amount of ink onto the inside of the lid. Alternately, you can press your ink pads onto a slick surface like Ranger's Non-Stick Craft Sheet. In either case, simply wipe your brush, or spin it against the pooled ink or a paint of your choice and then make sure to spin the brush while working it through your stencil.
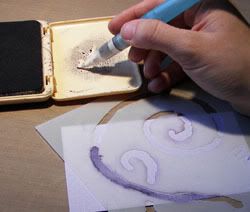
Niji Waterbrush Tool

Niji's Waterbrush is a great tool whenever you wish to watercolor and it works so well with water based dye inks! It is faster than regular paint brushes with water and cleans up so quickly without requiring the dreaded open dish of water at your table! To use it with ink pads, pool your ink just like you would with the Chizzel-It, or use reinkers and simply swipe a moist brush tip through the ink and paint your stenciled image! If the brush is too moist, use a paper towel to lightly soak away excess water or add more water by gently squeezing the handle or by pressing the brush against a paper towel. You can also dilute your ink with extra water, run your inked brush across a towel before painting, or blot your painted image to lighten the result. To change colors, simply squeeze a little water through the brush and wipe it on a towel to remove the old ink from the brush. You can also use the Waterbrush with pigment ink powders like Perfect Pearls, or with traditional watercolor paints, etc. And, if you can't get the Waterbrush, go ahead and use a regular paint brush.
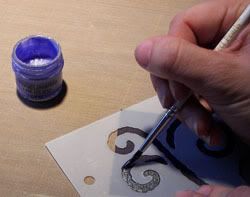
Painting with Radiant Pearls

Paints are a wonderful medium to use with your stencils. I happened to use Radiant Pearls for this sample, but regular liquid paints (like acrylic paint) will work wonderfully. You can also take it a step further and use dimensional paints, like Delta's Texture Magic, with a palette knife to create a rich textured image.
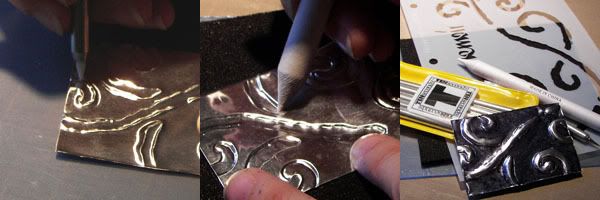
Ten Seconds Studio Metal Tools

Dry embossing is always an option with your stencils and embossing metal can be quite stunning! Ten Seconds has a great line of metal tools which can be used with any stencil or printed design in order to create great pieces of art. Using their Thick Foam Mat and the Teflon Embossing Tool, simply trace your stenciled image onto the back of your scrap metal. Flip the metal over and place on their Acrylic mat to outline your lines on the right side as a stronger border. Flip the metal back over to the wrong side and use a blending tool or Paper Thumb to "puff" the image into your Thick Foam Mat, to stabilize your embossing you may want to fill the puffed areas with light weight spackle from the hardware store. You can also choose to create 3-d designs into your stenciled area or background with any of their many freehand tools and embossing molds.
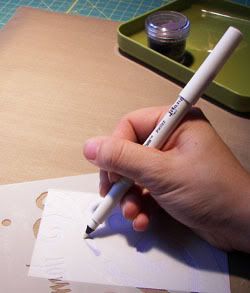
Ranger Perfect Medium Embossing Pen

Heat embossing your image is also possible! Use Ranger's Perfect Medium Embossing Pens or Tsukineko's VersaMaker Pen to color in your stenciled image, then apply embossing powder and heat! Alternatively you may cover your inked area with Perfect Pearls, colored chalk, etc. This also is a great way to use handmade paper templates to add your own designs to your projects!
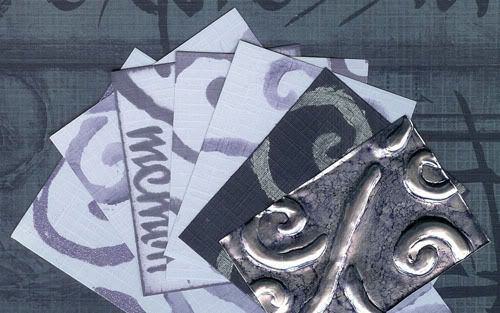
Stenciled Projects

These pieces were all created with Club Scrap's The Written Word November 2005 Stencil and papers in addition to the following:

Angelwings - Radiant Pearls in Whisper Blue;
ColorBox - Stylus with Sponge Tips;
Niji - Waterbrush;
ProvoCraft - Chizzel It;
Ranger - Adirondack Alcohol Blending Solution; Adirondack Alcohol Inks in Eggplant & Stonewashed; Adirondack Dye Ink Pad in Eggplant; Antiquities Embossing Powder in Tanzanite; Cut 'n' Dry Nibs; Heat-It Craft Tool; Non-Stick Craft Sheet; Perfect Medium Embossing Pen;
Stewart Superior - Memories Dye Ink Pad in Dark Blackberry;
Ten Seconds - Acrylic Mat; Teflon Embossing Tool from Basic Kit #1; Thick Foam Mat;

These additional samples show a few finished projects that used stenciling techniques from above!
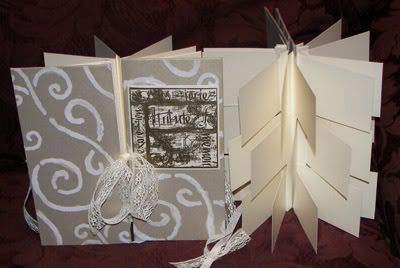
Dimensional Paint on Flag Book

The Flag Books incorporate dimensional paint and use: Club Scrap The Written Word November 2005 Stencil & Collage Stamp, Asian Artisan January 2004 Cream Frost Paper, Time & Space December 2004 Gold Paper, Matte Board, and Bookbinding Glue; Delta Texture Magic Dimensional Paint in White (applied through stencil using a palette knife); Ranger Black Soot Distress Ink Pad; Gold Embossing Powder; Rafael Model Lace from Walmart;
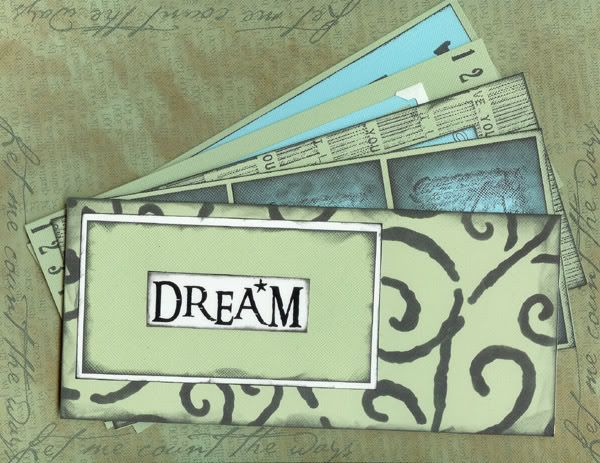
Stenciled Card Collection

The Dream Card includes distressed edges made with the ColorBox stylus and uses: Club Scrap The Written Word November 2005 Stencil, Let Me Count The Ways February 2006 GTG and Papers, Greetings For a Year Stickers, and White Notecards; ColorBox Stylus with Sponge Tip; Stewart Superior Palette Noir Ink Pad;
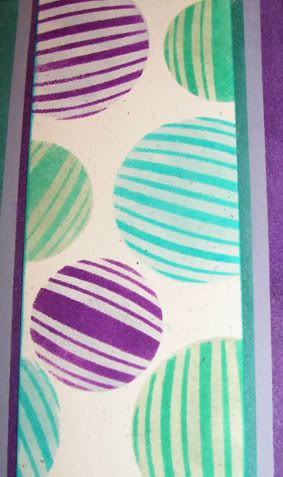
Holiday Ornaments Card

The Holiday Ornaments feature layered ink and masking tape together with the ColorBox Stylus and use: Club Scrap Holidays Stencil and assorted POPs Papers; ColorBox Stylus with sponge tips; Ranger Awning Green, Pool, & Purple Surf Sea Brights Dye Ink Pads and Cool Peri, Ocean Aqua, & Starfish Green Sea Shells Dye Ink Pads; Masking Tape;

Here are some links to other great stenciling guides online!
Sunday, May 4, 2008

Ink Your Clay Tutorial

The site where I used to have this tutorial recently went down... So I hunted to find my copy of the original to post here for you! I hope you enjoy!

Ink is for more than just paper and altered arts. Did you know that you can also use your inks to create custom colored polymer clay?
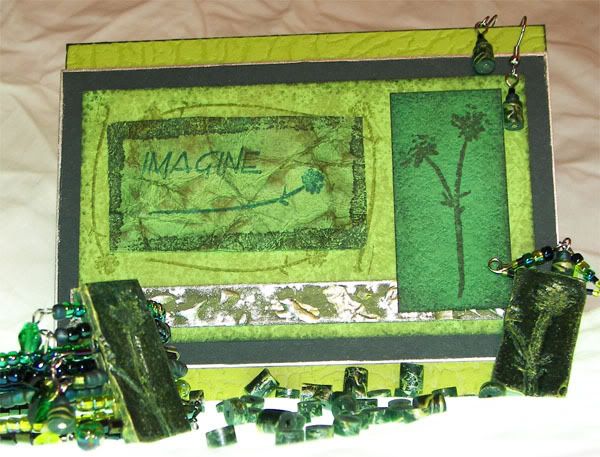
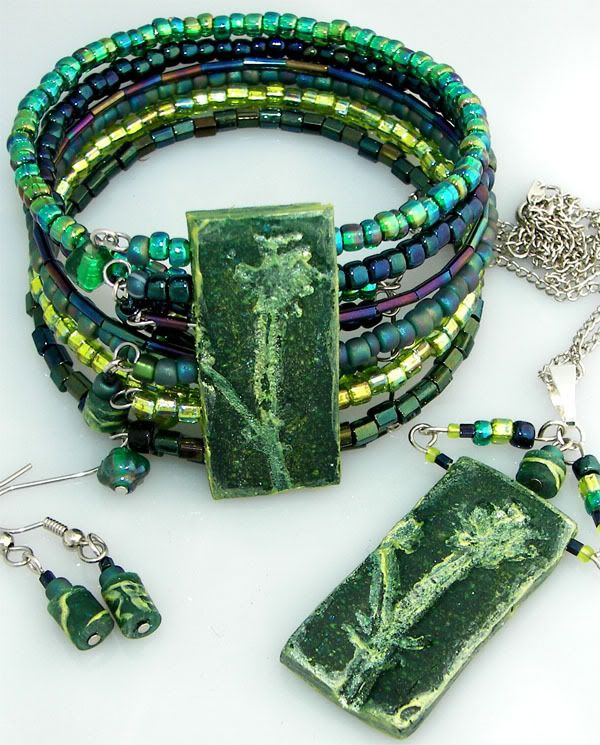
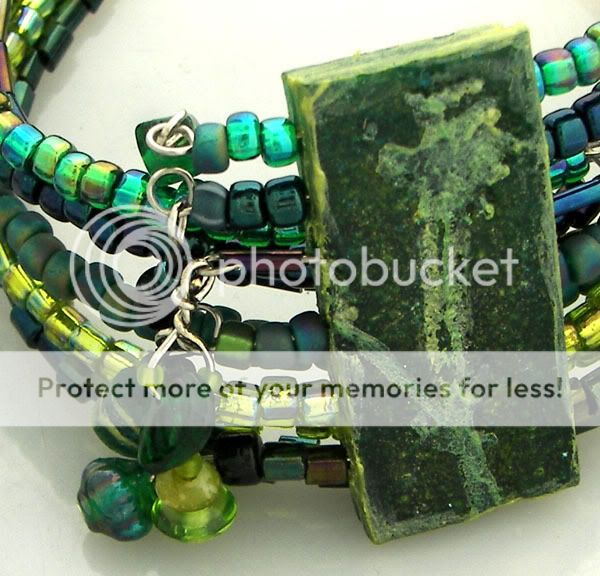
Design Originals has a great book, Clay Techniques to "DYE" for, which teaches you all kinds of ways to use Ranger inks and embossing powders to color your clay, along with over 20 projects. I took inspiration from their coloring techniques to create my own clay blend… which I then used to create a series of tube beads, a pendant, and a six-holed focal spacing bead for a bracelet modeled after Heather Powers Cuff Bracelet from Bead & Button: Beading Basics Essential Techniques and https://www.humblebeads.com/blog/throw-back-thursday-bead-edition
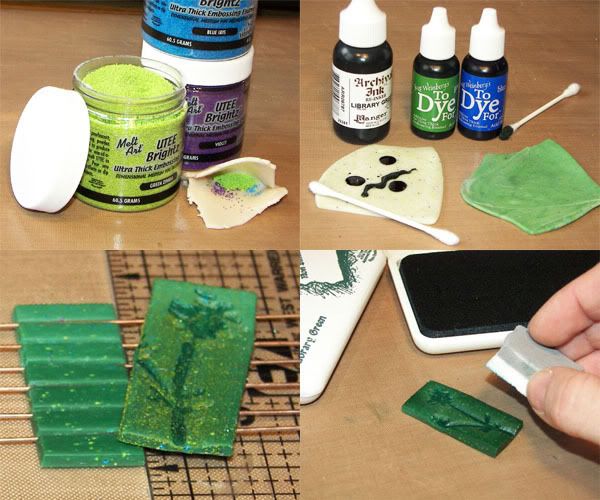
UTEE is wonderful for tinting your clay to a small degree while embedding grit and variability into the piece. Translucent clay will allow the differing levels of color shine through. To tint clay with UTEE, first condition your clay by running it through your clay machine at the thickest setting until it is pliable. Pinch your clay into a pocket and add no more than 2 teaspoons per full bar of clay. Seal the pocket and run it through your clay machine, folding between each run, until the UTEE is evenly dispersed.
Even with UTEE Brightz, the clay will still be light in color when you cure it. So, at this point, you may wish to add dyes to the clay to give it a deeper color. Be sure to put on some gloves for this part because the liquid ink can get messy! Take your conditioned clay and add some drops of Archival Reinkers or To Dye For to the surface of your sheet. Spread it out with a Q-Tip and fold the clay over, keeping the inked surface covered. Run it through the clay machine, at the thickest setting, folding between runs until the color is even.
You may opt to create a faded sheet of clay by merging two colors, or go with just one. Mold your clay as you wish and then you can also color the surface of your piece by stamping on it, pressing additional embossing powders into it, using Adirondack Pigment Pens and Adirondack Dimensional Pearls paints, using Cut n' Dry Foam to apply more Archival Ink, etc. If you have too much clay left over, you may save it or use it to make a series of small beads. Cure according to the instructions on your clay package and marvel over your finished work!
One wonderful thing about using your inks, powders, and stamps to create clay pieces is that you can create gift cards or scrapbook pages with the same materials for a wonderfully coordinating set!
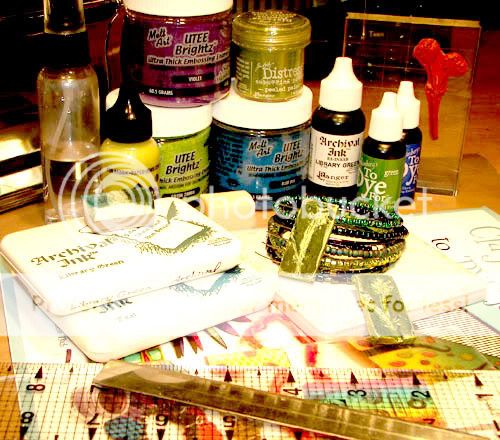
Supplies used on jewelry pieces:
  • Amaco: Bead Baking Rack; Bead Making Tool Set; Polymer Clay & Craft Oven;
  • Bead & Button: Beading Basics Essential Techniques;
  • Beadalon: 10mm Silver Plated Medium Bale;
  • Blue Moon: Memory Wire Bracelets;
  • Club Scrap: 2/07 Refresh Beads; 8/06 Wheel & Sprocket Beads; 1/06 Framed Beads; 5/03 Aromatherapy Borders & Backgrounds Unmounted Stamps;
  • Darice: 2" Nickel Plated Head Pins;
  • Design Originals: Clay Techniques to DYE for;
  • Fire Mountain Gems: 4.5mm Silver Plated Jump Ring; Surgical Steel Fish Hook Ball/Coil Earwire;
  • Ranger: Adirondack Dimensional Pearls in Lettuce; Archival Ink Pads in Library Green & Teal; Archival Reinker in Library Green; Cut n' Dry Foam; Distress Embossing Powder in Peeled Paint; To DYE For in Blue & Green; UTEE Brightz in Blue Iris, Green Zinnia, & Violet;
  • Sculpey: Translucent Polymer Clay;

Supplies used on card:
  • Club Scrap: 2/07 Refresh Dark Green & Light Green plus Water Mister; 10/06 Farmer's Market Green; 5/06 Painted Desert Stem; 3/04 Culinary Green; 5/03 Aromatherapy Borders & Backgrounds Unmounted Stamps;
  • Krylon: Silver Leafing Pen;
  • Ranger: Adirondack Alcohol Ink Metallic Mixatives in Silver; Adirondack Dimensional Pearls in Lettuce; Archival Ink Pads in Library Green & Teal; Cut n' Dry Foam; Distress Ink Pads in Peeled Paint & Shabby Shutters;

Monday, April 30, 2007

Asi Es La Vida! - New Cards and Waterbrush Technique!

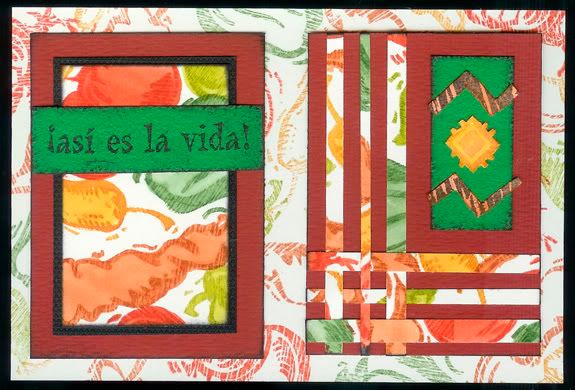
On these cards and ATCs, I used a technique that is based on last month's Technique Junkies Ink Wash Technique! (Definitely check out the newsletters they offer that are chock full of great techniques and ideas!) I changed things a little bit to suit the colors and intensity that I wanted and to work best with my stamps!

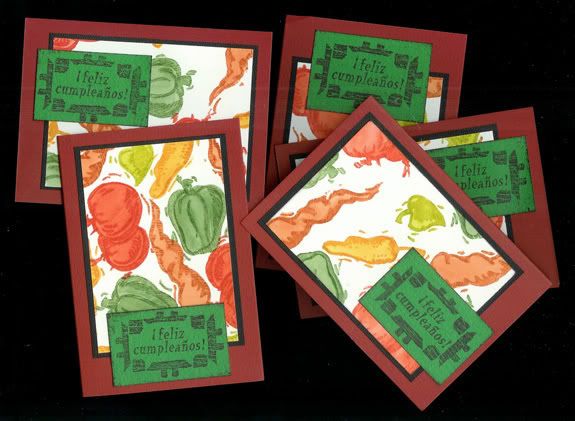
Club Scrap Salsa 11/03 Cards by Neith


Club Scrap Salsa 11/03 Stamps and Papers from Refresh 2/07. Wheel & Sprocket 8/06, Collections 6/06, and Culinary 3/04; Ranger Jet Black Archival Ink Pad and Adirondack Ink Pads in Butterscotch, Lettuce, Meadow, Red Pepper, & Terra Cotta; Niji Waterbrush; Xyron Sticker Maker; Adapted Technique Junkies Ink Wash Technique;

Club Scrap Salsa 11/03 Cards by Neith


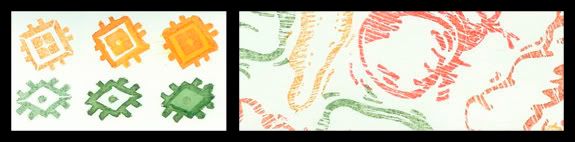
In order to color the chilis and tomatoes, I wanted to use the Technique Junkies Ink Wash Technique, but wanted my colors a little but more vivid and wanted to still use my Adirondack Inks! So I revamped it to make it my own! First, I stamped the images (as seen on the left and on the right) and then used my Niji Waterbrush with the matching ink to go over the stamped lines (first images from the left). I allowed this time to dry and then did a lighter wash of ink, water, and ink from the stamped image to color in the area. This really made the images pop while making them look as if they may have been handpainted!

Club Scrap Salsa 11/03 Cards by Neith

Friday, February 23, 2007

Monoprinting: a great way to have bursts of color on your work!

Monoprinting with the Ranger Non Stick Craft SheetClub Scrap Painted Desert and Road Trip Kits

When I first was reading about this technique, with its proper name, it involved using specialized monoprinting sleeves... I improvised by using a pair of write on transparencies. But, I have since learned that it is soooo much easier to use the Ranger Non Stick Craft Sheet (which I already use every time I ink and glue)!

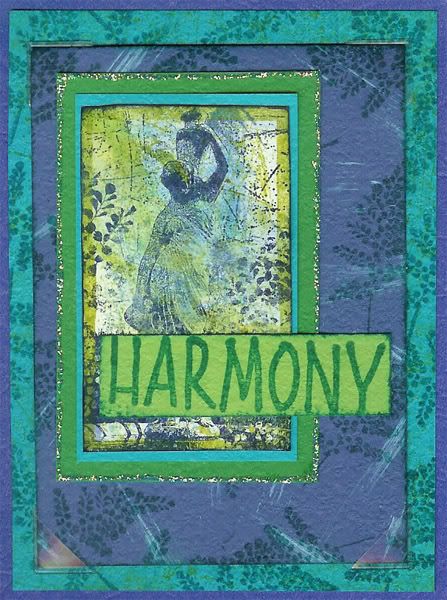
The ATC, in the right hand image above, was created with the transparencies, Club Scrap 3/05 Road Trip White Paper, Club Stamp 5/05 Painted Desert Unmounted Stamps, Ranger Black Pigment Ink & Black Embossing Powder (the edges of the ATC are inked and embossed also), and ColorBox Ancient Page Harbor, Lime, & Neptune Inks. I applied inks to the paper by dripping reinkers, one color onto the papers at a time, onto a transparency and used the ColorBox Stylus to spread it out, then sandwiched a blank transparency on it and pressed unevenly. I then spritzed the side of the transparency that I was using with the Ranger Perfect Ink Refresher and laid the cardstock onto the damp transparency. I sandwiched the transparencies again and used a brayer to press the ink into the paper. I then repeated the process with the darker ink.

Club Scrap 2/07 Refresh Club Stamp KitBasically you can press Ink Pads onto the craft sheet, drip and drizzle Reinkers on it, pounce ink on, smear glitter glue onto it, add Paints, drip or draw onto it with Alcohol Inks, dilute with Alcohol Blending Solution or even spritzes of water (for water based inks) and then take your intended project surface and press it onto the inks, swirl or swipe as you lift and marvel over the finished piece! You can also press portions of the Non Stick Craft Sheet onto itself before adding the inks to your project to get more of an ink blot effect! Glossy Paper is wonderful for this technique, but anything will do! The glossy surface just helps the ink travel and fills the paper better.
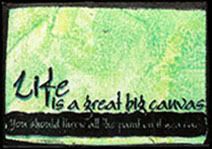
In the ATC to the right and in the title image for this Blog entry, I used a combination of Ranger Alcohol Inks in Lettuce & Stonewashed, Ranger Alcohol Blending Solution, and Ranger Stickles in Waterfall to create a backdrop for the stamped scratch marks, frame, and focal image. On the ATC, I used also Ranger's Aqua Adirondack Paint Dabber, Adirondack Bottle, Lettuce, & Stonewashed Ink Pads, and Archival Cobalt & Teal Ink Pads as well as Club Scrap's Glossy Paper plus the 2/07 Refresh Kit's CSt UM Stamps, CSt WM Statue & Fern Collage Stamp, Dark Blue, Light Blue, Dark Green, and Light Green Papers.

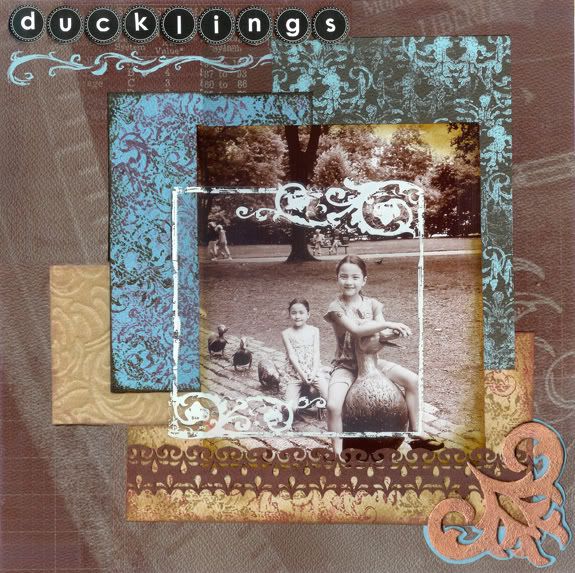
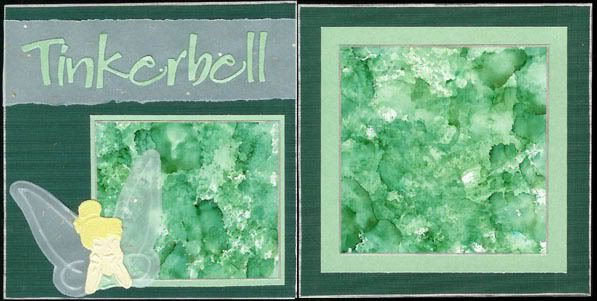
The mattes in the layout below were created with Glossy Paper and Alcohol Inks using a combination of monoprinting and direct pouncing with Alcohol Inks. I dry embossed Tinkerbell with a Plaid Embossing Stencil. The papers are all Club Scrap, using the Mint Frost and Cream Frost from the 1/04 Asian Artisan Kit, and unfortunately unlabelled other CS papers. (I didn't post details in the past!)

Club Scrap

Below is another sample made with alcohol ink monoprinting, as you can see in the upper right, eventually the colors will blend all the way, simply soak it up and add new inks! I misted rubbing alcohol onto the Glossy Paper and onto the craft mat, dripping Alcohol Inks at random. Then I laid the Glossy Paper face-down on the inked mat and swirled, swiped, and lifted. I used Club Scrap's 9/05 Science Unmounted Stamps, 7/05 Wings Apricot Paper, and Glossy Paper along with Ranger's Non Stick Craft Sheet, Adirondack Alcohol Inks in Butterscotch, Caramel, & Terra Cotta, and Adirondack Ink Pads in Butterscotch, Caramel, Rust, & Terra Cotta.

Club Scrap 9/05 Science Kit and 7/05 Wings Kit

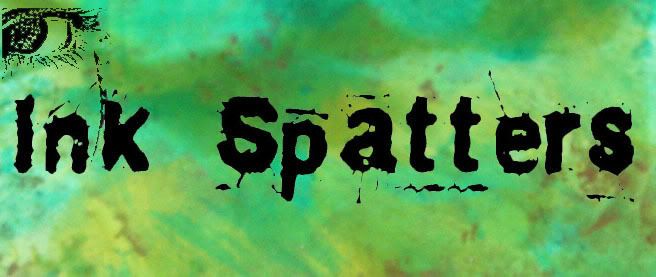
Below is the new logo for my tutorials at Diversity Designs! I applied small "spatters" of Ranger's Alcohol Inks in Bottle, Lettuce, and Stream to the Ranger Non-Stick Craft Mat, added the Alcohol Ink Blending Solution, then took Glossy Paper and pressed it onto the sheet, swirling and lifting until the paper was well covered. I added more ink and targeted the white areas. After the paper was filled with ink, I added a little Adirondack Metallic Mixatives in Copper to a felt applicator and pounced away! The black art work is a self portrait of me that was then altered by Roselyn!

Ink Splatters Banner, Created With Alcohol Inks

Tim Holtz also teaches a version of this with his Distress Inks and calls it Wrinkle Free Distressing. With it, you will often spritz the craft sheet or your project material with water and then iron your finished piece to keep the wet work from warping. Ranger has posted one project with instructions for a Monoprint Card plus Distress Ink Tips. Pennywise Arts has a great online class on Monoprinting with Alcohol Inks.