Showing posts with label tutorial. Show all posts

Wednesday, June 22, 2011

Tutuorial - How To Use Acrylic Stamps

By Michelle of Evie's Tool Emporium

This wonderful tutorial on how to use acrylic stamps is from DribsNDrabs! Sit back and enjoy!

Wednesday, June 15, 2011

Tutuorial - Spoon Plant Markers Utilizing a Metal Stamping Set

By Michelle of Evie's Tool Emporium

Here is a tutorial that I hope you enjoy! Lindsay, who is the creator of this tutorial, has a great vintage shop which is called ShrimpSaladCircus, and one of the most creative, clever blogs around with the same name, Shrimp Salad Circus.
From Evie's Tool Emporium she uses the Metal Stamping Set - 3mm (1/8") 36 Piece Letters And Numbers or you can use the Metal Stamping Set With Case - 3mm (1/8") 36 Piece Letters And Numbers to create these wonderful spoon plant markers.
If you have a couple of minutes please be sure to stop by Shrimp Salad Circus and check out her tutorial for these spoon plant markers!

Wednesday, June 8, 2011

How To Make A Leather Key Chain Using A Leather Punch Set

By Michelle of Evie's Tool Emporium

Last week I shared with you that every once in awhile you stumble upon a great opportunity to partner with someone that leads to the unexpected. Almost two years ago via the internet I met Dotty from Totally Tutorials. She has a wonderful blog site that features tutorials made by many talented, creative artists.
I discovered that she was looking for supply sellers to offer supplies in exchange for a tutorial. I jumped at the opportunity. One of the exchanges Evie's Tool Emporium participated in was with ArtMind. The supply that we gave in exchange was a Leather Punch Set - 6 Size. Mitsy created a second tutorial for us that is equally as fun as the first one. This one is how to make leather key chain that is not only a quick easy read, but also shows how a new tool can change the creative process!
If you are a supply seller or an artist please feel free to contact Dotty. She is wonderful to work with and I know your experience will be as positive as mine! A huge thank you to Mitsy for her tutorial!

Wednesday, June 1, 2011

How To Make Spring Felt Birds Using A Leather Punch Set

By Michelle of Evie's Tool Emporium

Every once in awhile you stumble upon a great opportunity to partner with someone that leads to the unexpected. Almost two years ago via the internet I met Dotty from Totally Tutorials. She has a wonderful blog site that features tutorials made by many talented, creative artists.
I discovered that she was looking for supply sellers to offer supplies in exchange for a tutorial. I jumped at the opportunity. One of the exchanges Evie's Tool Emporium participated in was with ArtMind. The supply that we gave in exchange was a Leather Punch Set - 6 Size. Mitsy created a how to make spring felt birds tutorial that is not only a quick easy read, but also shows how a new tool can change the creative process! It was published on the PoppyTalk blog!
If you are a supply seller or an artist please feel free to contact Dotty. She is wonderful to work with and I know your experience will be as positive as mine! A huge thank you to Mitsy for her tutorial!

Wednesday, May 11, 2011

Tutorial - How To Forward Your Domain Name To Your Etsy Store

By Michelle of Evie's Tool Emporium

The Etsy Supply Street Team - ESST - is very lucky to have a very diversified group of sellers. Each seller brings a level of expertise to our team with their unique business backgrounds. I'm excited to share with you today the expertise of Nil, of NAKPUNAR. Her shop features handmade emery pincushions, loose emery sand to fill your own pincushions, and dmc threads.
Here is an informative tutorial from Nil. It is a clear, concise tutorial on How To Forward Your Domain Name To Your Etsy Store. In the tutorial Nil explains why you should do this and how to do it! Simple and easy!
Thank you Nil for your wonderful tutorial!

Wednesday, March 30, 2011

Tutorial - Monogram Pendant Utilizing a Metal Stamping Set

By Michelle of Evie's Tool Emporium

Here is a tutorial that I hope you enjoy! Lindsay, who is the creator of this tutorial, has a great vintage shop which is called ShrimpSaladCircus, and one of the most creative, clever blogs around with the same name, Shrimp Salad Circus.
From Evie's Tool Emporium she uses the 3mm metal stamping set and the 6mm metal stamping set to create this fun monogram pendant.
If you have a couple of minutes please be sure to stop by Shrimp Salad Circus and check out her tutorial for this monogram pendant!

Wednesday, February 23, 2011

Tutorial - How To Make A Sailor's Valentine With Shells And Dresden Trims

By Michelle of Evie's Tool Emporium

The Etsy Supply Street Team - ESST - is very lucky to have a very diversified group of sellers. Each seller brings a level of expertise to our team with their unique business backgrounds. I'm excited to share with you today the expertise of Amanda, of 32NorthSupplies. Her shop is filled with amazing Dresden trims from Germany, fancy fabric trims and other delightful finds. Today Amanda is sharing with us a wonderful tutorial on how to make a Sailor's Valentine with shells and Dresden trims.

Making sailor's valentines was a common craft in the early 19th century, practiced mainly by men on sailing ships at sea for months on end, as gifts for their sweethearts or mothers and sisters back home. You can continue the tradition with just a few readily available supplies and the design can be as simple or detailed as you choose to make it.
You'll need: a sturdy box (cigar, wooden, papier mache), scissors, seashells and glue. Foil paper trims and lace are optional. We're using a papier mache heart shaped box from Germany. We don't use glue guns, but prefer a quick drying glue like Alene's.
Keep your design simple and don't worry about perfection - no two shells are exactly alike and that makes them even more beautiful. When placing the shells, we work out from the center.
We've glued vintage lace to the base and trimmed it close to the box edge
A band of paper Dresden foil trim finishes that edge. We've also added a band of paper foil inside the box, to continue the design from outside.
A vintage brass stamping of an angel finishes the top.
This box works well for small jewelry and other treasured pieces.
Keep in mind that you can paint your box or work directly on the original surface; Dresden trims come in a large variety of widths and colors; you can find a huge selection of seashells, both natural and colored, in our etsy shop: 32NorthSupplies
For the papier mache heart boxes, please visit our website: 32DegreesN.com

Wednesday, February 9, 2011

Tutorial - Polymer Clay Brooch Or Ring Utilizing A Diamond Burr Set

By Michelle of Evie's Tool Emporium

Here is a creative polymer clay brooch or ring tutorial from the very talented Mitsy, of ArtMind. She utilizes the 30 Piece Diamond Burr Set With 1/8 Inch Shanks from Evie's Tool Emporium to engrave the design for tutorial. Please check out her tutorial on her fun filled ArtMind Blog.
Thank you Mitsy for your always inspiring tutorials!

Wednesday, February 2, 2011

Tutuorial - How To Make A Covered Button And A Ponytail Holder

By Michelle of Evie's Tool Emporium

This wonderful tutorial on how to make a covered button and a ponytail holder is from Cutie Stuffs! Sit back and enjoy!

Check out her selection of cover buttons size 36.

Wednesday, January 26, 2011

Tutorial - Valentine Polymer Clay Heart Utilizing A Letter And Number Stamp Set

By Michelle of Evie's Tool Emporium

Every once in awhile you stumble upon a great opportunity to partner with someone that leads to the unexpected. Over year ago via the internet I met Dotty from Totally Tutorials. She has a wonderful blog site that features tutorials made by many talented, creative artists.
I discovered that she was looking for supply sellers to offer supplies in exchange for a tutorial. I jumped at the opportunity. One of the exchanges Evie's Tool Emporium participated in was with ArtMind. The supply that we gave in exchange was a Metal Stamping Set - 1.5 mm 36 Piece Letters And Numbers. Mitsy created a how to use metal letter stamp set with clay tutorial that is not only a quick easy read, but also shows how a new tool can change the creative process!
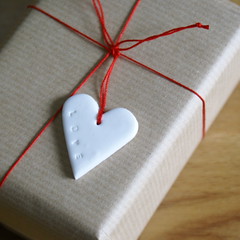
Polymer Clay Gift Tag
If you are a supply seller or an artist please feel free to contact Dotty. She is wonderful to work with and I know your experience will be as positive as mine! A huge thank you to Mitsy for her tutorial!

Wednesday, August 4, 2010

Tutorial - Copper Domed Pendant Necklace Utilizing A Wooden Dapping Block

By Michelle of Evie's Tool Emporium

Every once in awhile you stumble upon a great opportunity to partner with someone that leads to the unexpected. About a year ago via the internet I met Dotty from Totally Tutorials. She has a wonderful blog site that features tutorials made by many talented, creative artists.

I discovered that she was looking for supply sellers to offer supplies in exchange for a tutorial. I jumped at the opportunity. One of the exchanges Evie's Tool Emporium participated in was with alteredbeauty. The supply that we gave in exchange was a wooden dapping block with punches. Ashley created a copper domed pendant tutorial that is not only a quick easy read, but also shows how a new tool can change the creative process!

If you are a supply seller or an artist please feel free to contact Dotty. She is wonderful to work with and I know your experience will be as positive as mine! A huge thank you to Ashley for her tutorial!

Wednesday, June 16, 2010

Covered Button Rings by Cutie Stuff On You Tube


*

For a great video tutorial by CutieStuff.

How to Make a Fabric Covered Button Ring.


Find Great Supplies from Team ESST.


And more Fabulous Craft Supplies!

Thursday, December 18, 2008

Snowflake Ornaments -- How To

I adore snowflakes. Whether they're stylized or realistic, elegant shades of white or bright and garish colors, I love them all! Now you can make your own~


Materials needed --


Large round beads
Large metal beadcaps
Metallic Silver ribbon - Available at supplycandy


Round nose pliers

Take one wire form. Working on one branch at a time, thread one spacer bead (I used vintage white lucite), a silver round bead, a beadcap, a large round bead, another beadcap, another silver bead, a large faceted oval, and a last silver round.

Using your roundnose pliers, make a loop on the end of the branch.

Repeat this pattern on each of the following 5 branches.


Your snowflake is finished, but you still need a way to display it. Decide how long you'd like the snowflake to hang, and cut a length of ribbon twice that long, plus a couple inches. Thread the ribbon through one of the loops you made and even up the ends. Tie an overhand knot, leaving a bit of a tail.


Now, you can display your ornament however you see fit. I like to make several in varying lengths and sizes to display in my front windows.

Tuesday, December 9, 2008

Altered Ribbon - How To


Materials Needed --


Decide what length of ribbon you need for your project. Cut it off, plus a couple inches.

Place some scrap paper over your work space. I like to use copy paper. Put the ribbon on that and run the inkpad over it until you reach your desired color intensity. I chose the weathered look for the sample.

Run your paper towel over the newly inked ribbon to remove the excess ink.
Using your small alphabet stamps, choose a message to stamp out. I like to spell out the message and space it out before committing. This also helps to avoid spelling errors.

Once done, set it aside to dry completely. I like to leave mine at least overnight.

You now have customized ribbon, with a handmade touch. I wouldn't recommend laundering this ribbon, but it's great for most projects.

Tuesday, October 28, 2008

Tutorial: Guaridan Angel


IMG_1663
Originally uploaded by dsgndbyrj

Want to make your own guardian angels? RJ of RJ Beads shows you how...

Tools:
1 pair flat nose jewelry pliers
1 pair round nose jewelry pliers
1 pair wire cutters

Materials:
1 4mm frosted white glass bead (for head)
1 pewter angel wing bead
1 12mm glass flower bead (for skirt)
1 head pin
1 jump ring

Directions:
Step 1
- assemble components on your head pin from bottom to top, ie. skirt, wings, head (see fig.1). Fit tightly together at bottom of head pin.

Step 2 - Using flat nose pliers, bend head just above the angel-head bead.

Step 3 - Using round nose pliers, loop headpin around pliers creating a small loop, then wrap the head pin around itself, between the loop and the angel-head bead to secure (see fig.2).


fig.2

Step 4 - Using wire cutter, trim head pin. Using flat nose pliers flatten any excess wire to prevent snagging.

Step 5 - Using both pliers, gently open jump ring - pulling one side towards you and one side away from you. Slide headpin loop onto jump ring. Close jump ring.

Voila! Your own guardian angel! You can now strong your angel onto a chain, ribbon or cord! Make it into a bookmark, or even a cell phone or purse charm!

Visit RJ Beads to buy individual components and ready-to-assemble Guardian Angel Kits!


fig.4 Finished Angel

Sunday, October 26, 2008

How to Find the ESST Promo Thread on ETSY's Forum

Tutorial: Finding the Team Esst Weekly Promotion Thread

I. For People Who Need To Find The New Thread / Find the Thread For The First Time.

1) Navigate to the forum main page, the one with the five most recent posts under each category. http://www.etsy.com/forums_main.php or Etsy--->community ----> forums.

2) In the main ETSY header there is a search bar. It has two sections--a drop down box to the left telling you what category of item you are searching, and a blank bar to the right for you to enter your search terms. The default option on the drop down box will be "Forum titles" (if you are on the main forum page), so you don't have to make any changes there.

3) Type "ESST" into the search window and press the "Search" button, which is directly to the right of the search bar.

4) You will see a new screen that has all the forum posts that have "ESST" in the titles. Generally the most recent promo thread will be at the top (or near to the top), and will read something like, "@--}--Team ESST-Etsy Supply Street Team Weekly PROMO *Oct 19 to 26".

5) Click on that thread title to go to the thread. When the thread is closed the last post will give the link to the new thread.

II. For People Who Have Posted In the ESST Thread.

1) Navigate to the forum main page, the one with the five most recent posts under each category. http://www.etsy.com/forums_main.php or Etsy--->community ----> forums.

2) BENEATH the main ETSY / search bar there is, on the right, a bright blue link: "View Topics You've Posted In."

3) Click that link. The page will refresh to show you all the threads in which you've posted; the most recent will be at the top. You should be able to find the ESST thread in the first few entries.

4) If not, see above :)

Wednesday, April 30, 2008

A Super-Quick Super Simple Tutorial


I originally posted this tutorial on my blog, but have agreed to share it here. I've been wearing my bracelet all over town and get tons of compliments on it.


I've been looking at
these sequins for 6 months, thinking that they'd make cool jewelry. Today, I finally sat down and did something with them!


Here's what you need to make your own -

  • 1 pkg of the above sequins, available in my Etsy shop. One package should make 2 bracelets. You could also get two packages and make a necklace.
  • 1 clasp - I used a silver snap clasp for ease of use.
  • Jump Rings - I used 7 (seven) 6mm jump rings.
  • Pliers for opening jump rings


How to make it -

  1. Using your pliers, open a jump ring. Link two donut sequins, through the small holes along the edge, using a jump ring. Close the jump ring.
  2. Open another jump ring. Connect another sequin to the chain of two you've started. Close jump ring. Repeat until bracelet reaches your desired length. I used 6 sequins.
  3. Once your bracelet reaches your desired length, open another jump ring. Use this to connect your clasp to one end of the sequin chain. Repeat with the opposite side of the clasp and other end of the sequin chain.
  4. Voila! You have a very cool, very bold, very lightweight bracelet!

    Make sure that you don't have a twist in the sequin chain. If this happens, simply open one jumpring and untwist the chain. This may happen when you add the clasp.