

You have just finished a fresh CachyOS install (or you are still on the way and following the step-by-step install guide) and you are looking at a clean KDE Plasma desktop. The install guide walked you through the Calamares wizard, but the actual work of turning that fresh disk image into a daily-driver workstation happens in the first hour after first boot. This is the tested walkthrough of things to do after installing CachyOS: check your mirrors, take the first update, get to know Shelly and the AUR, add Flatpak, set up the fish shell or swap it for zsh, install the apps you will actually use, theme KDE Plasma, confirm the firewall, and pick up the small set of CLI tools that make Linux less painful.
One theme runs through the whole list: CachyOS does more for you during install than most distros, so several jobs that other post-install guides hand you are already finished. Where that is true this guide says so and shows you how to verify it, instead of having you set the same thing up twice. Every command below was run on a fresh CachyOS install on a UEFI machine, on the 260628 desktop ISO with KDE Plasma 6 on Wayland, fish as the login shell and a Btrfs root, in July 2026.
Step 1: Check your mirrors and run the first system update
Worth knowing before you type anything: the installer already did part of this. Calamares runs a mirror-ranking pass partway through the install, which you see on the progress line as initialize pacman … ranking mirrors … copy pacman mirrorlist and keyring to target, and it copies the ranked list onto the new system. The install itself is an online one, so packages come from the live repos at install time rather than out of a months-old squashfs.
Two things follow from that. Your mirrors are already sorted on day one, and the first upgrade is normally a short list rather than the several-hundred-package haul an offline installer leaves behind. Check the mirrorlist rather than assuming:
head -n 6 /etc/pacman.d/cachyos-mirrorlistThe header is written by the ranking run, and the timestamp on it is your install date:
# STARTED AT: 2026-07-31 12:45:03.637769345 +03:00
# VERSION: 0.30.0
# ARGS: rate-mirrors --save /tmp/tmp.vn854pRotE cachyos
# FETCHED MIRRORS: 28
# MIRRORS LEFT AFTER FILTERING: 28
# JUMP #1
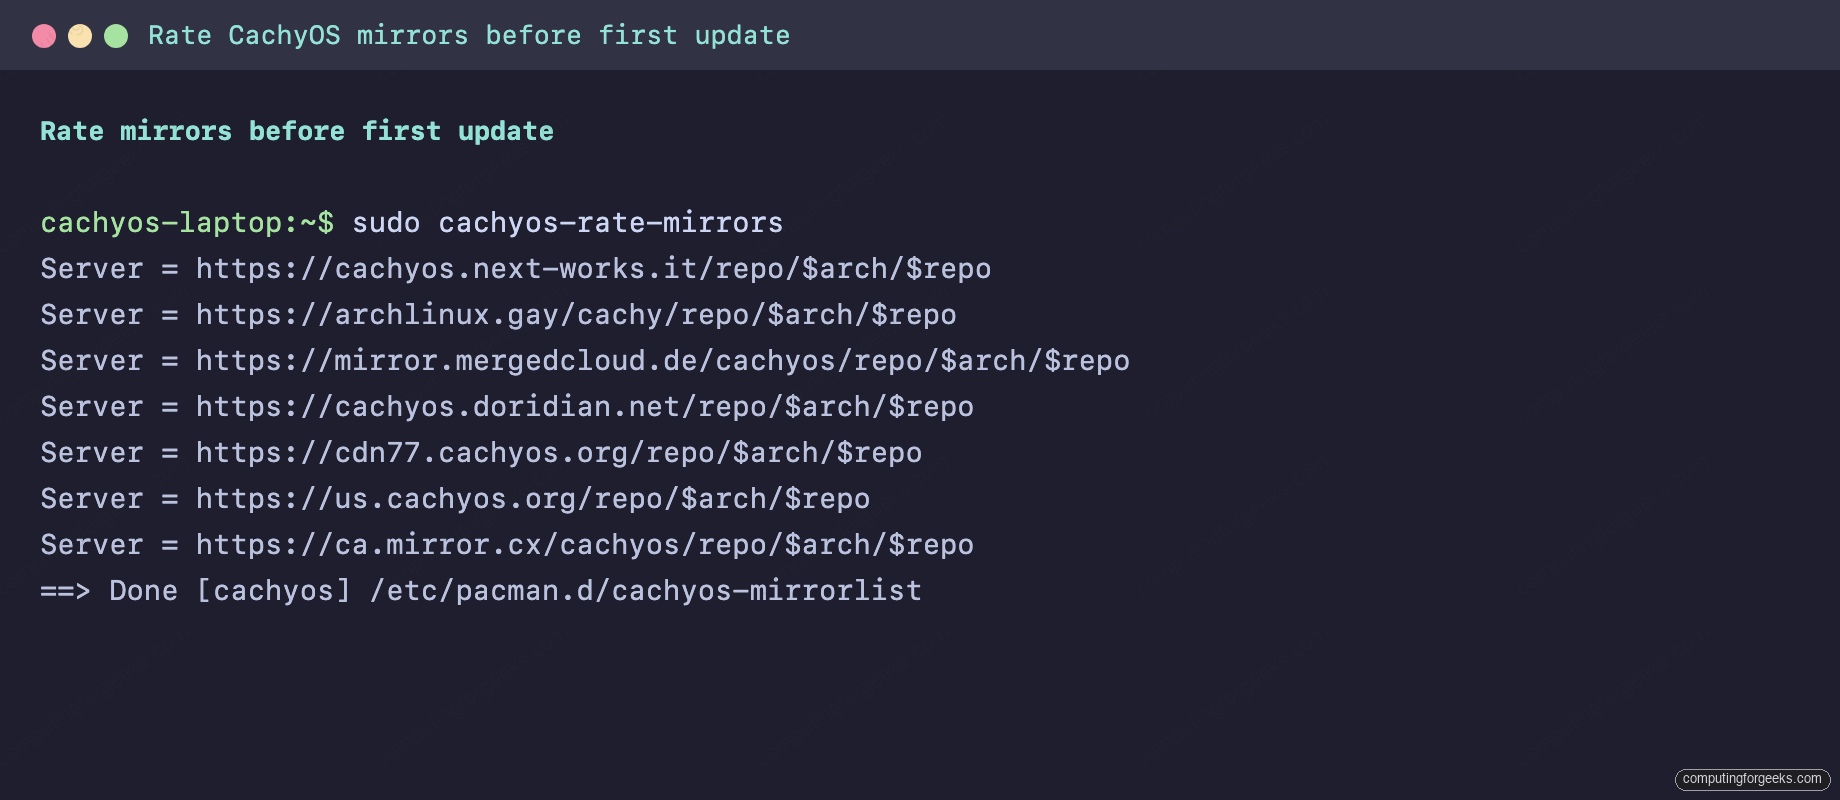
Re-rank when something has actually changed rather than as a daily ritual: you moved country, you swapped home fibre for a mobile hotspot, or downloads have gone slow. That is what cachyos-rate-mirrors is for:
sudo cachyos-rate-mirrorsIt benchmarks the mirror list against your connection and rewrites the file, which takes 30 to 60 seconds:
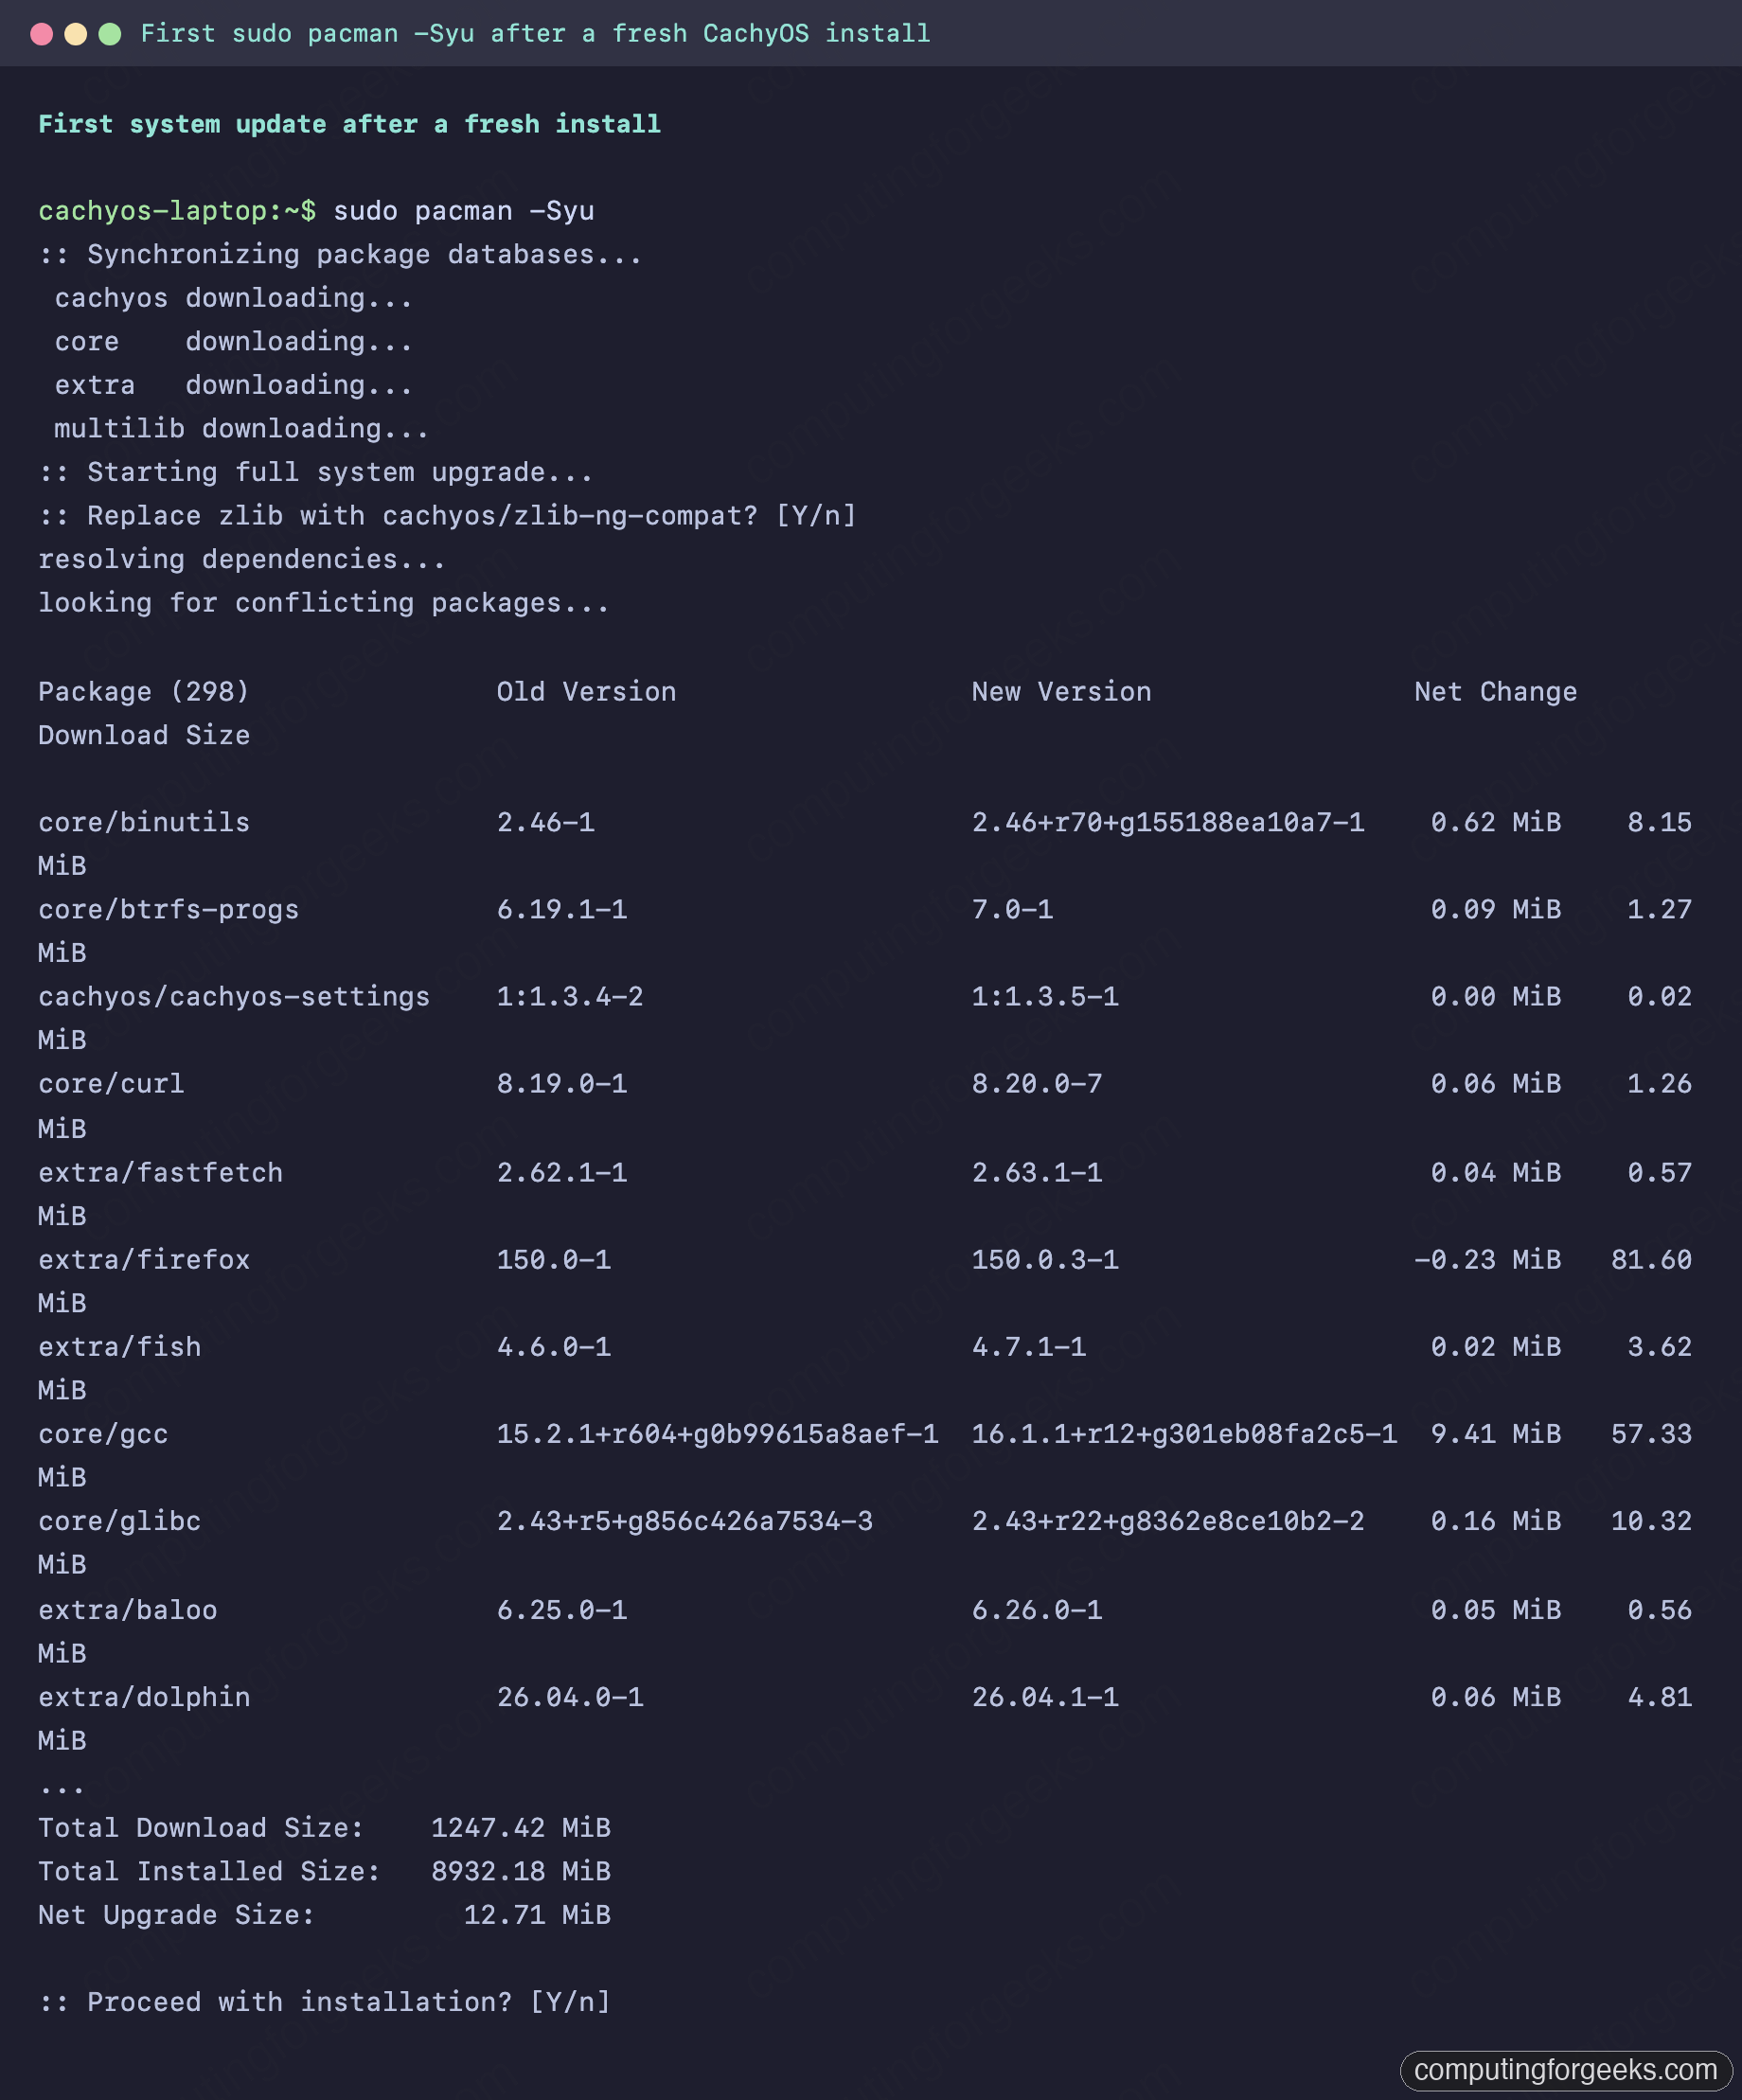
Now take the update. CachyOS is a rolling release, so however fresh the install is, upstream has moved since the ISO was cut:
sudo pacman -SyuOn the test machine, installed and updated the same afternoon, that came to three packages. An install left sitting for a few weeks will pull considerably more, but the online installer means you are never starting from the ISO build date.
If a new kernel came down with that update, reboot before carrying on. Kernel modules load at boot, so a running kernel and a freshly installed module tree drift apart until you do, and the breakage that causes tends to surface later looking like something unrelated.
Step 2: Meet Shelly, the package manager CachyOS now ships
If you have followed older CachyOS guides you will expect paru here. It is not on a current install. On the 260628 ISO the installer lays down Shelly instead, a native package manager that handles the pacman repos, the Arch User Repository, Flatpaks and AppImages behind one command, with a GUI on top of the same engine. Confirm what you actually have:
shelly --version
paru --version
Shelly answers with its version and paru is simply absent, which is the correct state and not something you broke:
3.0.1
fish: Unknown command: paru
The commands that cover most daily use:
| Command | What it does |
|---|---|
shelly upgrade | Upgrade everything Shelly manages: repo packages, AUR builds, Flatpaks and AppImages. |
shelly install package | Install from the repos, the AUR, Flathub or a local file. Shelly picks the backend. |
shelly search aur query | Search a specific backend. Swap aur for standard or flatpak. |
shelly remove package | Remove a package, an AppImage or a Flatpak app. |
shelly list-updates standard | Show pending updates without applying anything. |
Running shelly with a bare search term is the shortcut worth learning. It searches the repos and the AUR together, then prompts you to pick one to install. Add -n when you want it to take the safe default answer instead of asking.
Here is Shelly on a fresh install, next to the paru that is no longer there:

You can still have paru if the muscle memory matters more than the default. It remains in the CachyOS repos and installs in one command, but upstream has been quiet for a while (the last tagged release was mid-2025), and CachyOS has already dropped it from the installer, so Shelly is the direction of travel:
sudo pacman -S paruWhichever you use, the AUR is unaudited build scripts from strangers. Both tools show you the PKGBUILD before building, and reading it on first install is the habit worth keeping.
Step 3: Turn on Flatpak and Flathub for sandboxed apps
Flatpak is the third package source on a CachyOS box, alongside the pacman repos and the AUR. It ships sandboxed builds from Flathub, the cross-distro registry, and it is the sane way to run browsers, chat clients, and media players that you would rather keep at arm’s length from the rest of the system. Flatpak is genuinely not part of the default install, so it needs pulling in.
The quickest route is Shelly, which has a Flatpak backend behind a single toggle in its settings. Flip it on and Flathub is wired up for you, with Flatpak builds appearing next to the native package whenever you search. If you would rather do it from a terminal, three commands cover the same ground:
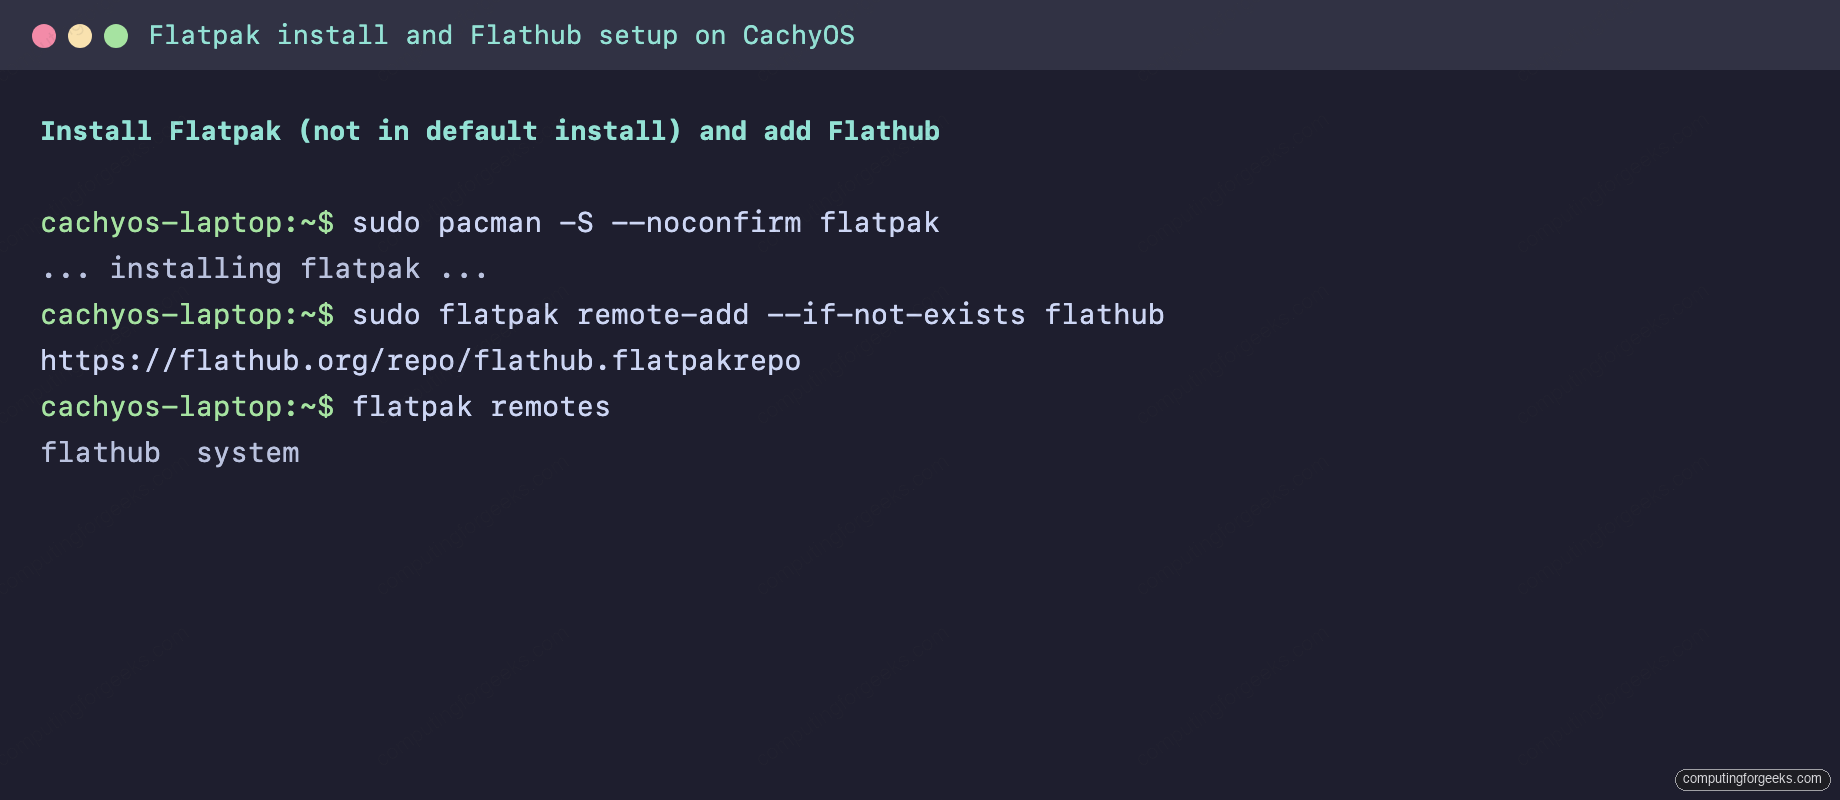
sudo pacman -S --noconfirm flatpak
sudo flatpak remote-add --if-not-exists flathub https://flathub.org/repo/flathub.flatpakrepo
flatpak remotes
Discover and the flatpak CLI both read from Flathub once the remote is registered. Pull something down to prove it works:
flatpak install flathub org.signal.Signal
flatpak run org.signal.Signal
The captured output of the Flathub setup looks like this:
Which source to reach for, in order:
- pacman repos for anything packaged natively. Always first choice: lowest overhead, and it participates in the pacman snapshot hooks.
- AUR for software nobody has packaged officially. Proprietary apps, pre-release dev tools, niche utilities that build against a specific upstream.
- Flatpak for sandboxed graphical apps, especially ones you want isolated. When Discover offers both a native and a Flatpak build of the same app, take the native one.
Step 4: Install the apps you will actually use
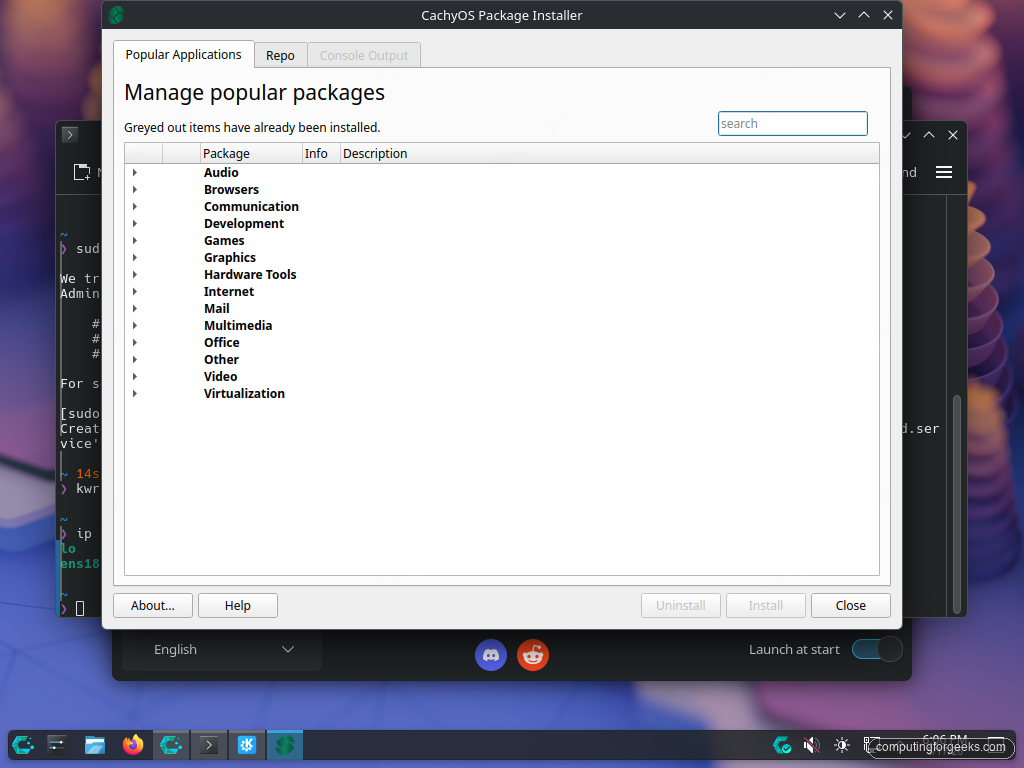
CachyOS Hello has an Apps/Tweaks button at the bottom that launches cachyos-pi, a Qt GUI that bundles categorised app picks (browsers, dev tools, multimedia, office, gaming, fonts). It is a reasonable shortcut if you do not want to learn pacman flags first. Click into it once to see what is on offer:
For everyone past their first day on Linux, the terminal is faster. Here is a curated set of native pacman packages that covers most of what a developer or power user needs on day one. Split into logical chunks so you can pick what fits your laptop:
# Browsers and chat (pick one of each)
sudo pacman -S firefox chromium thunderbird

# Office and PDF
sudo pacman -S libreoffice-fresh okular gwenview

# Dev essentials
sudo pacman -S base-devel git github-cli docker docker-compose neovim

# Languages and runtimes
sudo pacman -S python python-pip nodejs npm go rust

# Multimedia
sudo pacman -S vlc mpv obs-studio audacity gimp inkscape

# CLI quality-of-life
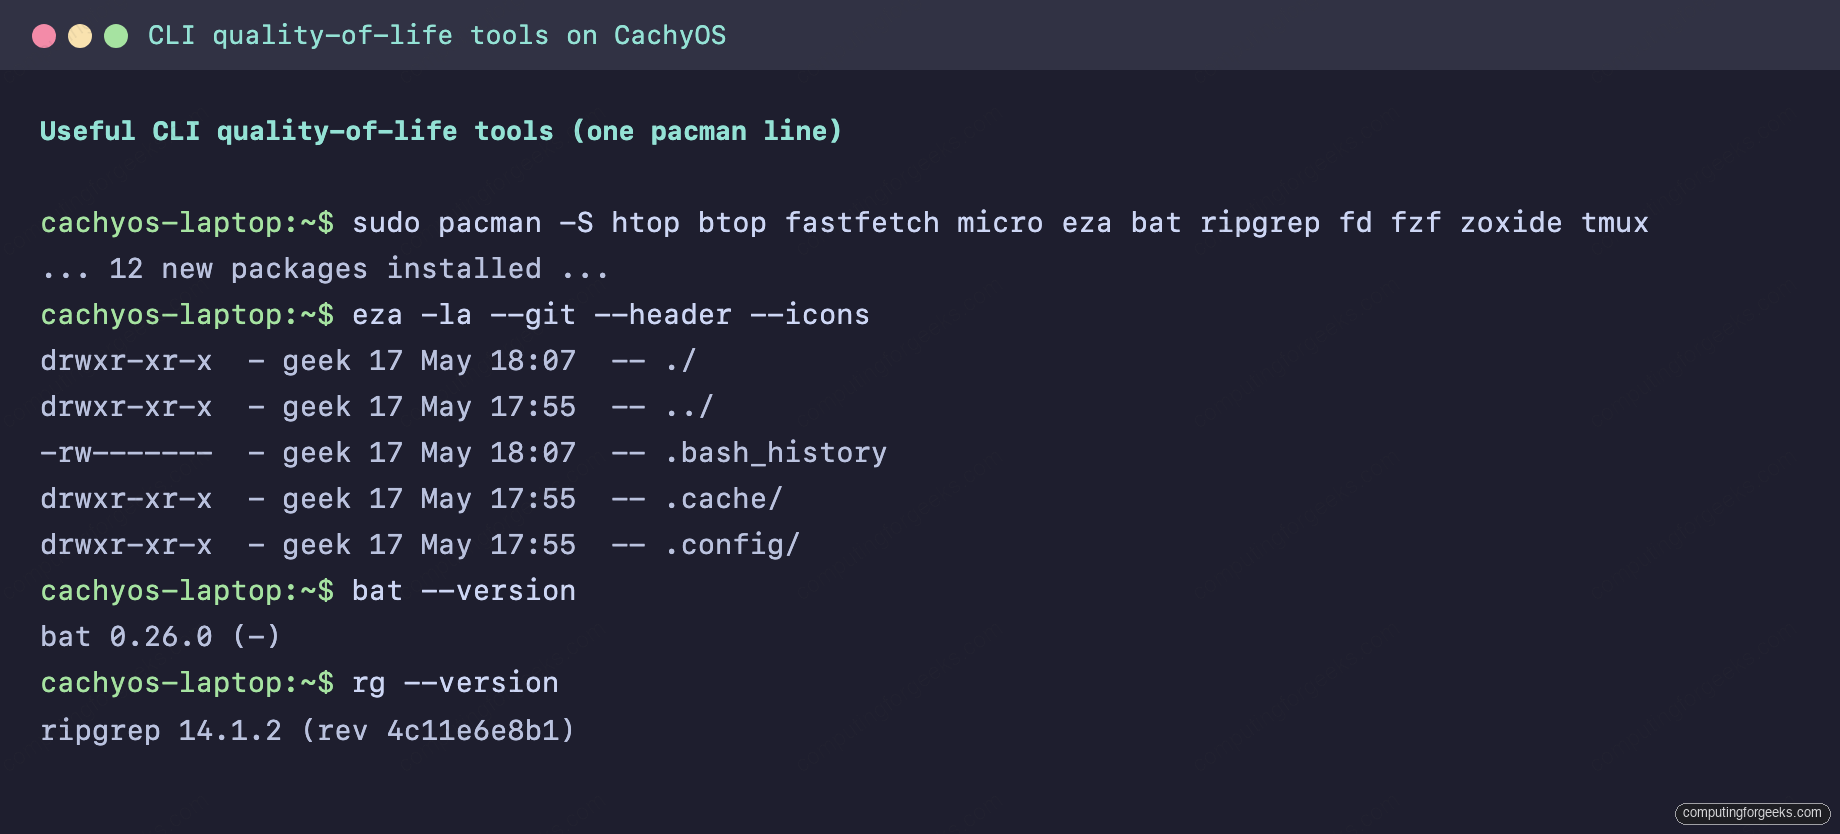
sudo pacman -S htop btop fastfetch micro eza bat ripgrep fd fzf zoxide tmux
The “CLI quality-of-life” line at the bottom is the one most users skip and then regret. eza replaces ls with a faster, prettier alternative; bat replaces cat with syntax highlighting; ripgrep replaces grep with one tool that handles every file type; fzf adds fuzzy finding everywhere; zoxide replaces cd with a directory-jumper that learns your habits. Install them now, build the muscle memory later.
Captured output of installing the CLI tools and a quick version check on a few of them:
For proprietary or AUR-only apps, let Shelly build them. The common ones for a fresh laptop:
shelly install visual-studio-code-bin slack-desktop zoom google-chrome 1passwordShelly shows each PKGBUILD before building. Read them on the first run, accept on later updates. None of those packages take more than a minute or two to build.
Step 5: Get to know fish, the default shell
CachyOS sets fish as the default user shell, which is a meaningful departure from bash and zsh that you will hit immediately. fish gives you three things that “just work” with no config:
- Autosuggestions. As you type, the rest of a command from your history fades in greyed-out. Hit Right Arrow or Ctrl+E to accept.
- Syntax highlighting. Real-time colour: valid commands are blue, invalid ones red, files purple, options yellow. Catches typos before you press Enter.
- Smart tab completion. fish knows the man-page flags for hundreds of commands and offers them inline.
The trade-off: fish is not POSIX. Bash scripts and one-liners that work in sh may not work as-is in fish. The pragmatic split is to use fish interactively and bash for scripts (shebang #!/usr/bin/env bash at the top).
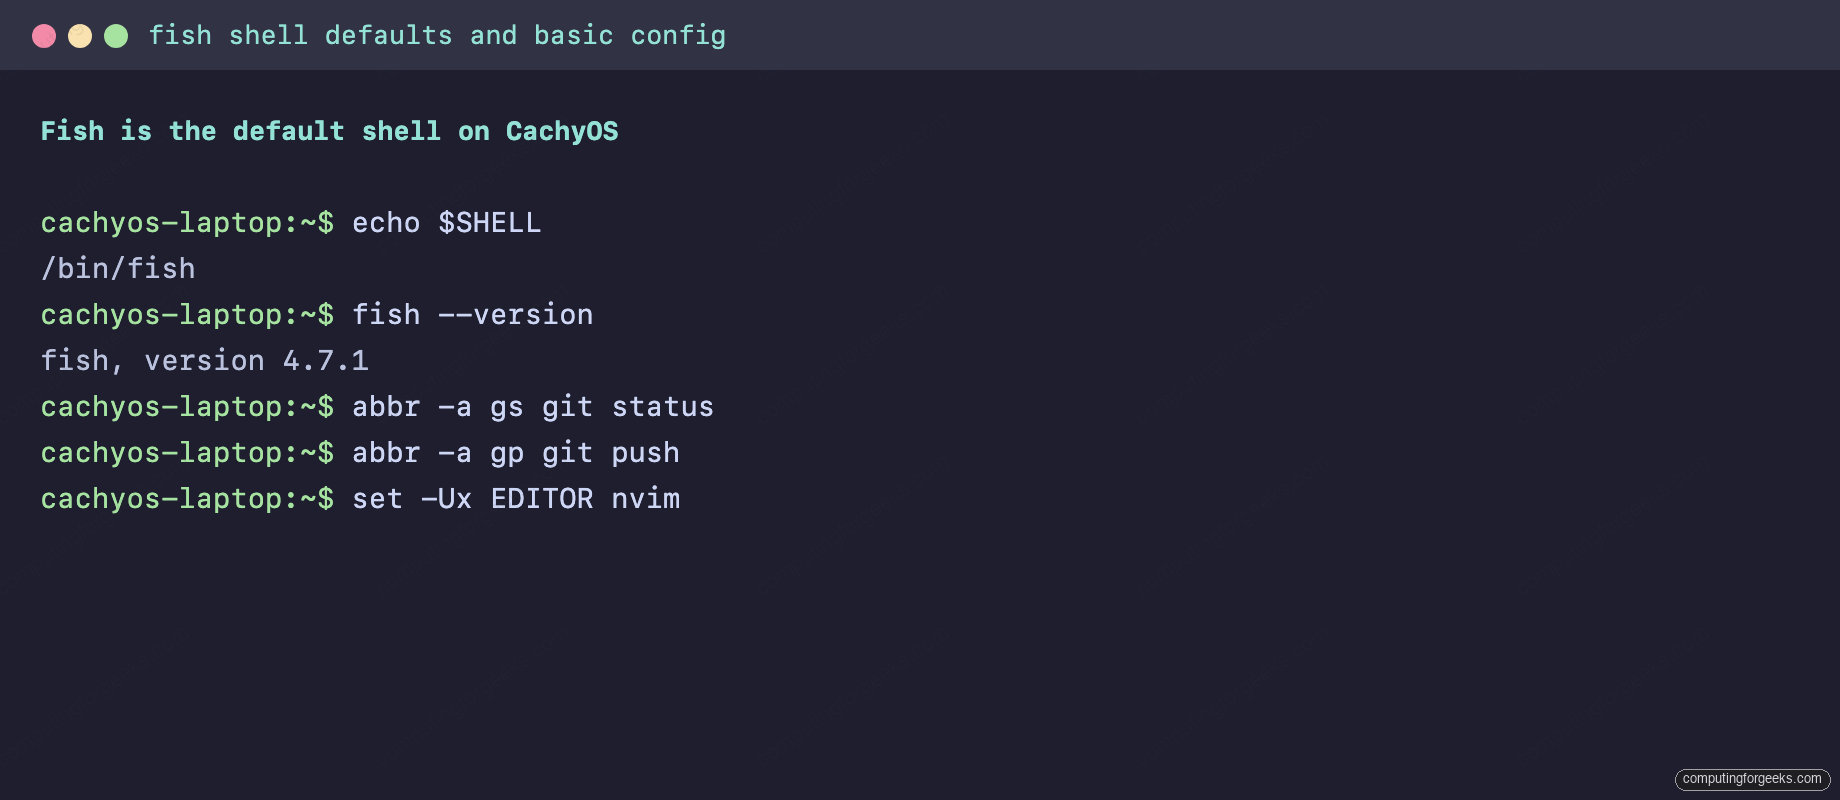
The fish commands worth learning on day one:
# Web-based config: themes, prompt, key bindings, history viewer
fish_config

# Create an abbreviation (expands when you press Space)
abbr -a gs git status
abbr -a gp git push

# Set an environment variable in a way that persists across sessions and is exported
set -Ux EDITOR nvim
set -Ux MANPAGER 'nvim +Man!'

# Define a function (saved to ~/.config/fish/functions/NAME.fish on save)
function mkcd
  mkdir -p $argv[1]; and cd $argv[1]
end
funcsave mkcd
fish_config opens a local web page where you can pick a colour theme, configure the prompt, browse your command history, and see every function and variable in scope. It is genuinely the easiest way to make fish look the way you want.
If fish ends up not fitting your brain, switch to zsh. Both are first-class on CachyOS:
sudo pacman -S zsh zsh-completions
chsh -s /usr/bin/zsh
# Log out and back in for the change to take effect
Step 6: Add Starship for a consistent prompt across shells
Starship is a Rust-built prompt that works the same in fish, zsh, and bash. It auto-detects what is in the current directory (git repo, language version, kubectl context, AWS profile, etc.) and renders a contextual prompt with no per-shell config. It is the easiest way to get a “powerline-looking” prompt without per-shell theme files.
sudo pacman -S starship
# Wire it into fish (only line you need)
echo 'starship init fish | source' >> ~/.config/fish/config.fish
# Open a new terminal to see the new prompt
The default Starship config is sensible. Configuration lives at ~/.config/starship.toml when you want to tweak it. The Starship docs catalogue every module and how to disable or restyle it.
Step 7: Make fastfetch the system info you actually run
CachyOS preinstalls fastfetch, the actively-maintained successor to neofetch (which is unmaintained). fastfetch is the screenshot-worthy “OS / kernel / DE / theme / RAM” tool you see in every Linux configuration post. Run it bare:
fastfetchCaptured output looks like this:
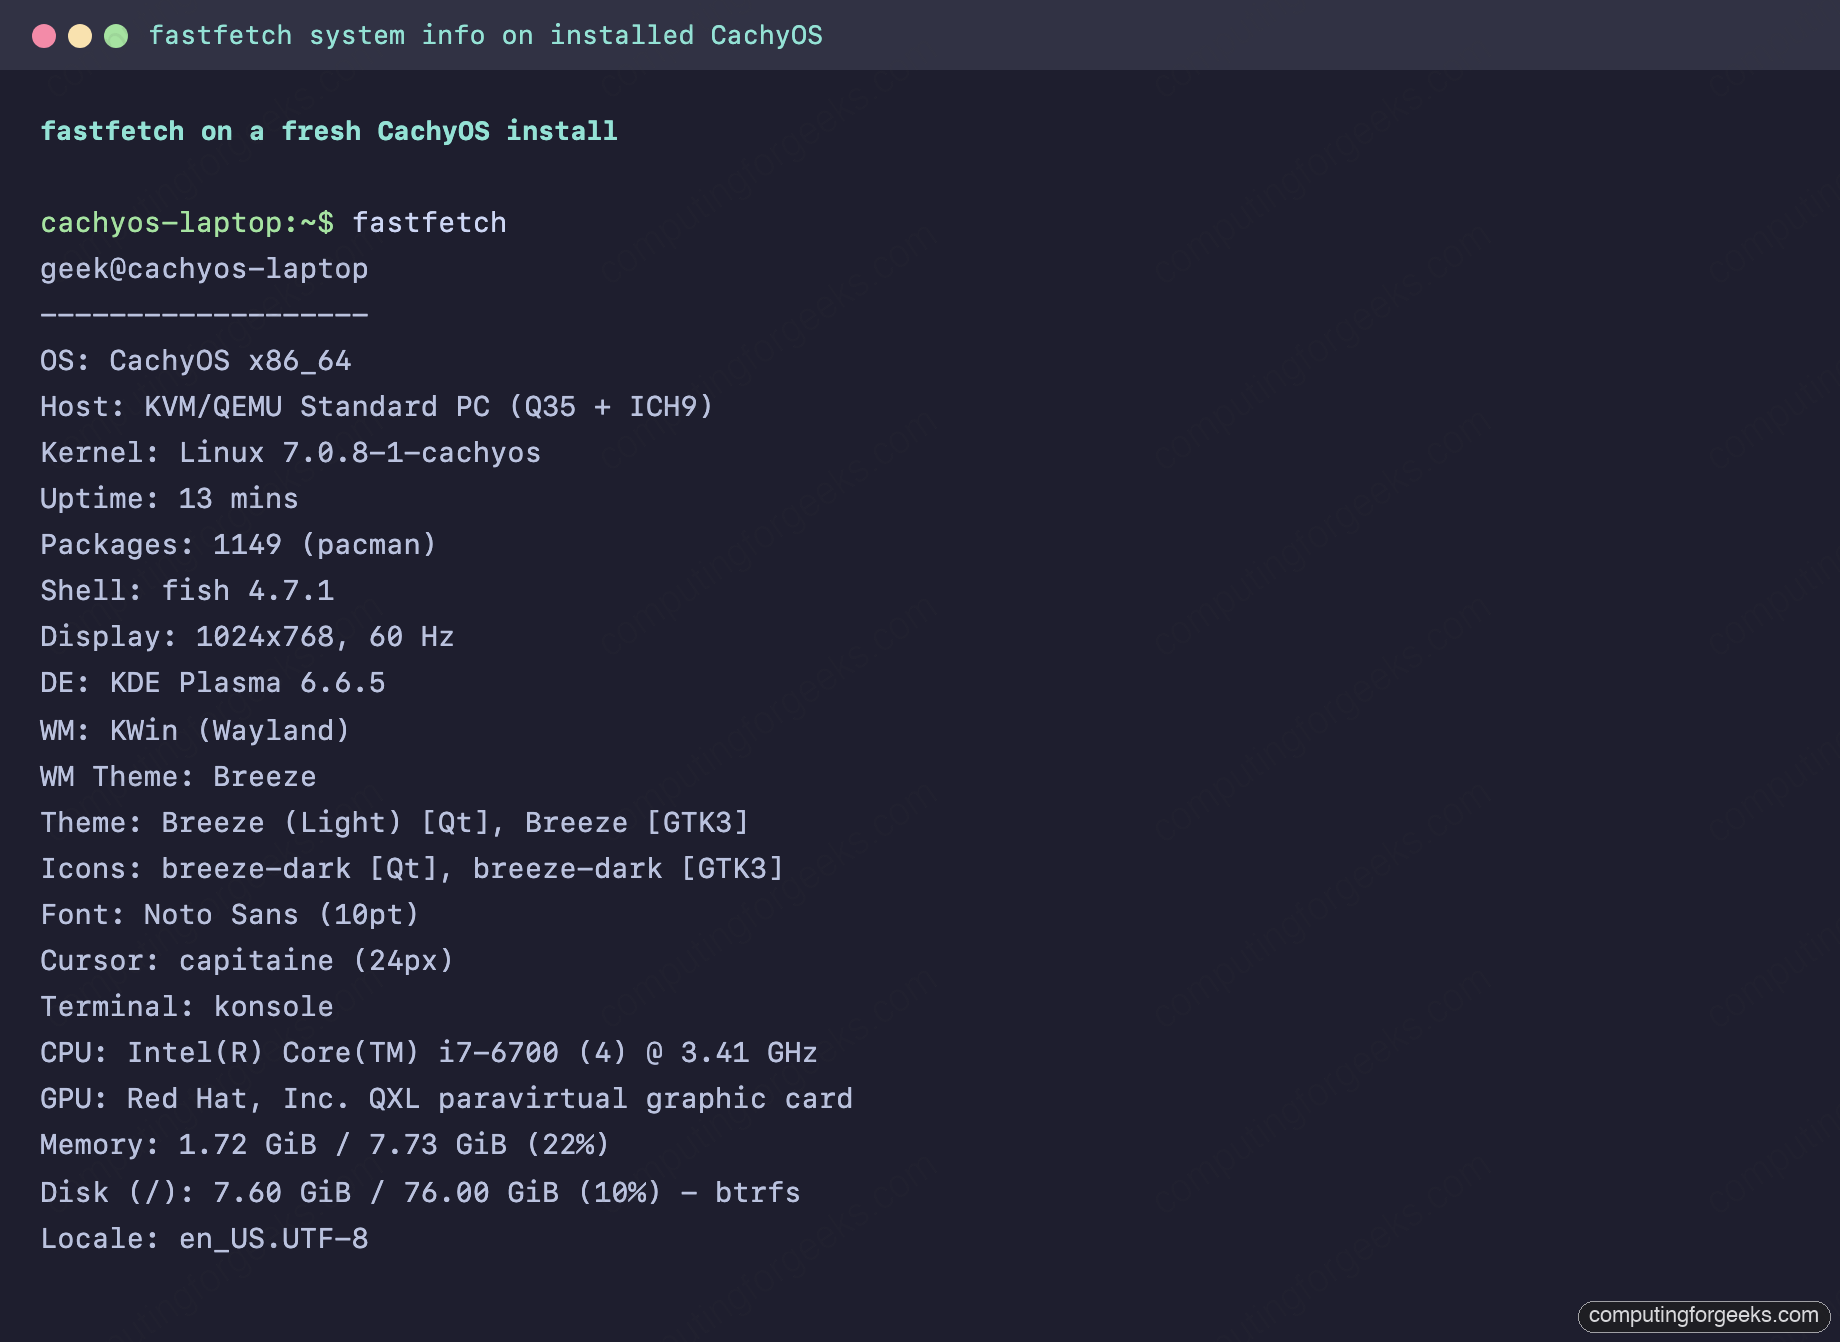
The default output is the CachyOS logo plus a sensible info column. To make it your own, generate a config and edit the JSONC file:
fastfetch --gen-config
$EDITOR ~/.config/fastfetch/config.jsonc
The config is plain JSON with comments; modules can be added, removed, or restyled. A useful trick is to set fastfetch as a Konsole start-up command so every new shell shows a small system summary.
Step 8: Theme KDE Plasma
The CachyOS default theme is fine, but the entire point of KDE Plasma is that everything is themeable. The settings live in System Settings → Appearance. The five panels that actually matter:
- Global Theme: one-click bundles that change everything at once (window decoration, plasma style, colours, fonts, icons). Browse “Get New Global Themes” for community options; the official Plasma 6 themes (Breeze Dark / Light) are solid defaults.
- Colors: independent colour schemes overlay any Global Theme. Useful when you like a theme but want a different accent or background tone.
- Icons: Papirus, Tela, Reversal, Numix are the popular alternatives to Breeze. Install via Discover or pacman:
sudo pacman -S papirus-icon-theme. - Cursors: Bibata is the de facto Linux cursor theme of the last few years.
paru -S bibata-cursor-theme. - Fonts: install a programmer font with ligatures (
sudo pacman -S ttf-jetbrains-mono ttf-jetbrains-mono-nerd ttf-fira-code) and set it for the system + monospace font.
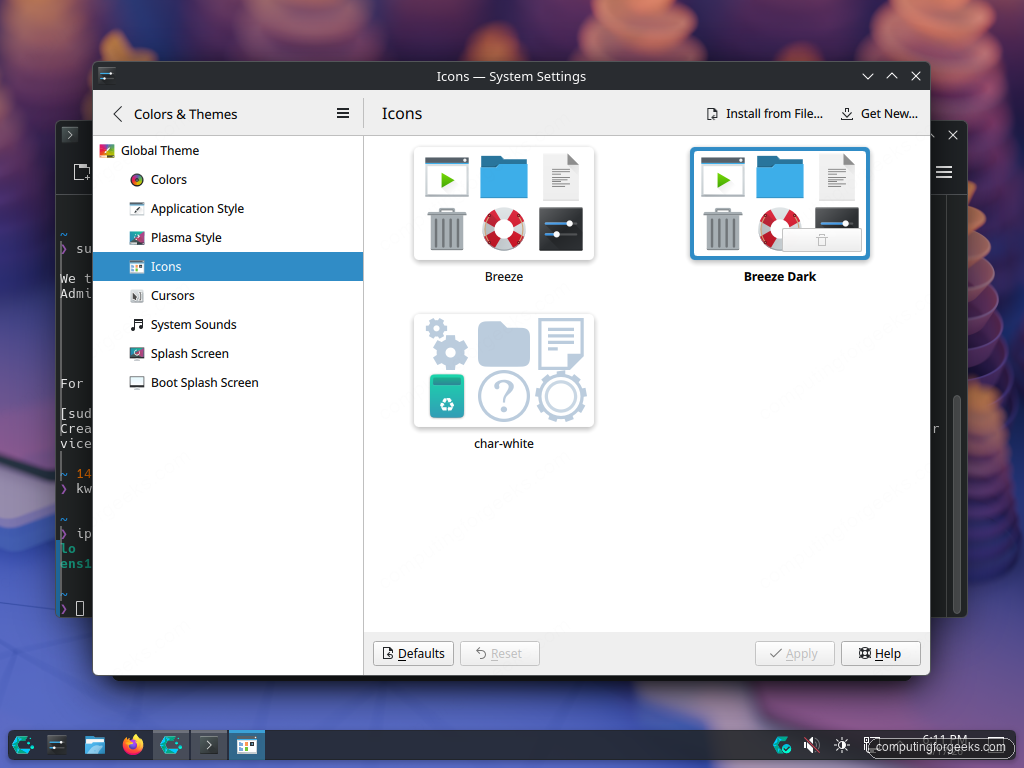
The two GUI dialogs you will spend the most time in. First, Global Theme picker (above). Second, the Application Style and Window Decorations sub-panels:
Once you have a Global Theme picked, scroll past the appearance panels to Workspace Behavior → Desktop Effects. The two effects worth knowing about are Wobbly Windows (cosmetic, optional) and Magic Lamp (minimise animation). Disable both if you want maximum performance on integrated graphics; keep them if you like the eye candy.
Step 9: Tune the panel, widgets, and shortcuts
Right-click on the taskbar panel and pick Enter Edit Mode to redesign the panel. You can move it to the top, change its height, add widgets, or rearrange existing ones. The widgets most people add on day one:
- Application Title Bar shows the current window title in the panel, great on a laptop where the panel is your main reference point.
- System Load Viewer tiny CPU / RAM / network graphs you can park next to the clock.
- Pager if you use virtual desktops, lets you click between them instead of remembering Ctrl+Alt+Arrow.
Keyboard shortcuts live under System Settings → Shortcuts. The few worth confirming or changing right away:
| Action | Default | Why |
|---|---|---|
| Launch terminal | Ctrl+Alt+T | Set this if it is not already; opening a terminal in one shortcut is the single best return on muscle memory. |
| KRunner | Alt+Space | Spotlight-like search and command runner. |
| Screenshot | PrintScreen | Plasma 6’s Spectacle is the default. Region select with Shift+PrintScreen. |
| Switch window | Alt+Tab | Alt+Tab cycles through windows; Meta+Tab is the activity switcher. |
Step 10: Tune power, display, and fonts
Three System Settings panels matter on day one for any laptop or desktop:
- Display Configuration for resolution and HiDPI scaling. On a HiDPI laptop, set Global Scale to 150% or 200% under System Settings → Display & Monitor. Plasma 6 handles per-output scaling cleanly, so an external monitor at 100% can sit alongside an internal panel at 200%.
- Energy Saving for screen and suspend timeouts on AC and battery separately. The default 5-minute screen off on battery is too aggressive for most use; 10-15 minutes is saner.
- Fonts for system and monospace fonts. After installing the JetBrains Mono package above, set monospace font to “JetBrains Mono” 11pt and watch every terminal and code editor become more readable.
Deeper laptop power tuning (TLP vs auto-cpufreq vs power-profiles-daemon, suspend-then-hibernate, thermal monitoring) is the topic of a separate Day-2 guide in this series.
Step 11: Check the firewall (CachyOS already turned it on)
This is the step most post-install guides get wrong, including an earlier version of this one. CachyOS does not leave you unprotected and waiting to pick a firewall. The Calamares installer puts ufw in the default package set, then runs its own enable-ufw script at the end of the install, which enables the service, denies all inbound traffic, and allows outbound. Your laptop was already firewalled the first time it booted.
So the job here is to confirm it, not to install anything. Check the state:
systemctl is-enabled ufw
sudo ufw status verbose
A stock install answers like this, with the default-deny policy already in place:
Status: active
Logging: on (low)
Default: deny (incoming), allow (outgoing), disabled (routed)
New profiles: skip

To                         Action      From
--                         ------      ----
1714:1764/udp (KDE Connect) ALLOW IN    Anywhere
1714:1764/tcp (KDE Connect) ALLOW IN    Anywhere
1714:1764/udp (KDE Connect (v6)) ALLOW IN    Anywhere (v6)
1714:1764/tcp (KDE Connect (v6)) ALLOW IN    Anywhere (v6)
deny (incoming) and allow (outgoing) is the right posture for a laptop, and it is what you already have. If you run KDE Connect, the installer script also added its rule for you.

Opening a port is a single command. To reach a local dev server from another machine on the same network:
sudo ufw allow 3000/tcp
sudo ufw status numbered
Rules are numbered so you can remove one later with sudo ufw delete 2 instead of guessing at the syntax you used months ago.
Do not install firewalld on top of ufw
Both ufw and firewalld are front ends that write nftables rules, and they have no idea the other exists. Installing firewalld on a stock CachyOS box gives you two managers fighting over one rule set, which produces exactly the class of bug that is miserable to debug: ports that are open until a reload, rules that vanish after a reboot, a firewall-cmd --list-all that does not match reality.
If you genuinely prefer firewalld (zones and rich rules are nicer on a server), switch rather than stack. Take ufw down first:
sudo ufw disable
sudo systemctl disable --now ufw
sudo pacman -Rns ufw ufw-extras
Only then bring the replacement in:
sudo pacman -S firewalld
sudo systemctl enable --now firewalld
sudo firewall-cmd --state
For a desktop or laptop there is no real reason to make that swap. The default ufw setup already blocks everything inbound, and it is the configuration CachyOS actually tests against.
Step 12: Snapper snapshots + Limine integration
The Calamares BTRFS layout you installed onto is already set up for snapper. Every pacman transaction takes pre and post snapshots automatically (the snapper post-transaction hook), and the Limine bootloader exposes those snapshots as bootable entries under the [+] Snapshots menu. When a kernel update breaks the system, you reboot, pick a pre-update snapshot from the boot menu, and you are back in a working state in under thirty seconds.
This is the single most useful Day-2 feature on a rolling release. List the current snapshots to confirm the integration is working:
sudo snapper -c root list
sudo btrfs subvolume list /
The snapshot setup, automation policy, retention, and the recovery flow itself are covered in a dedicated Day-2 guide on BTRFS snapshots and rollback.
Step 13: A handful of small quality-of-life tweaks
- Set git identity now.
git config --global user.name "Your Name"andgit config --global user.email "[email protected]". Otherwise the first commit you try in a new repo prompts you for it. - Add yourself to common groups. CachyOS picks the right defaults during install, but if you plan to use Docker, KVM, or wheel-specific tools, confirm:
sudo usermod -aG docker,libvirt,wheel $USERthen log out and back in. - Generate an SSH key.
ssh-keygen -t ed25519 -C "[email protected]"creates an Ed25519 keypair at~/.ssh/id_ed25519. Upload the.pubto GitHub, GitLab, or whatever you push to. - Pin a fallback kernel. Install
linux-cachyos-ltsso the Limine menu has a second kernel to fall back on. Coverage of this lives in the dedicated kernel manager and performance tuning guide. - Backup somewhere off the laptop. Snapshots are not backups. Pick one:
resticto a remote object store,borgover SSH, or a simplersynccron to a NAS. The choice matters less than the existence of one.
That is the realistic post-install setup on CachyOS. The list looks long the first time you read it, but the actual time spent is roughly one hour: thirty minutes for updates and apps, twenty for theming, ten for shells and prompt. After that, the laptop is a daily-driver. The Day-2 articles in this series go deeper on each of the things this post only pointed at: kernel manager and performance tuning, laptop power and battery, snapper-based rollback, gaming, and the rolling-release update survival kit.





This is a poorly written article. Did you check or do anything yourself or just pass it off to a LLM?
1. Mirrors are rated upon installation, what the user has on first install is the most current one for them. So pointless to tell people to do it again.
2. Cachy uses an online installer, so no packages will need updating after reboot.
3. Shelly has been installed by default since April, there’s no need to install paru unless the user wants it. To add, paru has been unmaintained for at least 6 months, which is why it was removed from default installs.
4. Shelly also covers flatpak and does the initial setup for you if you enable it on first shelly launch.
5. UFW is installed by default, telling people to install firewalld without removing ufw will only cause headaches and confusion.
You were right on the substance, so the guide has been rewritten against a fresh 260628 install rather than patched. That install shows shelly 3.0.1 present and paru not installed at all, ufw installed and already enabled with deny incoming by the enable-ufw script Calamares runs at the end, and the mirrors ranked during the install itself. Steps 1, 2, 3 and 11 now reflect that, and the firewalld instructions are gone. Good catch on the ufw conflict in particular, stacking a second nftables front end would have cost people real debugging time.